
The basic process of Liferay 6.2 Theme development involves creating a new theme, make changes to it, and deploy. It’s really a simple process; however. the only drawback to this process is that every time you make any changes to a theme, you will need to deploy it to see the changes. Deploying every time to see every little update can really slow down your overall work efficiency and can be really frustrating.
Here are the steps I follow to ease my work with Liferay Theme Development. It not only helps to speed up the work but also keeps me efficient.
Once you have setup your Liferay Development Environment, follow the steps given below. I recommend using ‘Liferay Developer Studio’. It comes with all things necessary for Liferay theme development and is optimized for the same.
The first thing to do is change your server mode to Developer Mode. This prevents caching, so you can deploy and see your updates immediately. Otherwise, even if you deploy, your recent CSS and JavaScript changes will not show up.
- Double click on your Liferay Tomcat server

- Change Server Mode to Development
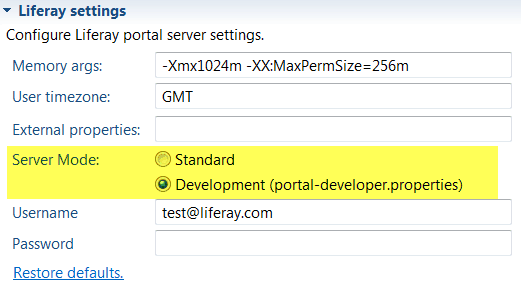
- Then restart server
Secondly, use the webapps folder inside your Tomcat folder to test your updates. When you change to developer mode, it stops caching. But you will still need to deploy each update. To prevent this, simply update on webapps folder of Tomcat Server and the changes will be immediately reflected.
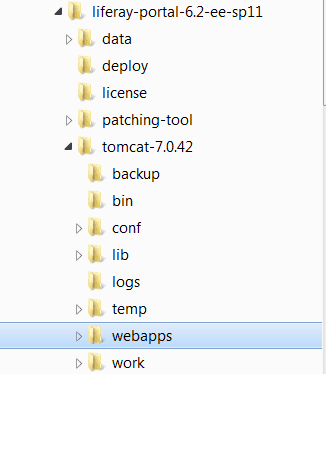
- So, go to the webapps folder and locate your theme folder.
- Directly update your css, js, vm files in the webapp folder to see immediate changes.
- Once you are satisfied with your changes, just update your source code in your workspace.
Its important that you copy your changes to your main source before deploying the theme again, otherwise all your changes will be lost.
Thats it! Good Luck!