Before diving into the Boomi platform setup, let’s answer this question: what is Boomi?
Boomi is a configuration-based integration tool, founded in 2000 and later acquired by Dell in 2010. Boomi works with a wide range of customers and continuously seeks customer feedback to improve its product suite’s functionalities. Starting with its core integration tool, which has matured into a unified platform with the following capabilities:
- Boomi Integration
- Master Data Hub
- API Management
- Boomi Flow (a modern, cloud-native, low-code application development platform)
In this article, we will only cover the capabilities of Boomi Integration.
What Is Boomi Integration?
Boomi Integration is an iPaaS (Integration Platform as a Service) that supports application integrations between the cloud platforms, software-as-a-service applications, and on-premise systems. Boomi Integration supports the B2B interactions with trading partners using industry-leading messaging standards like EDI X12, EDIFACT, and RosettaNet. Boomi Integration (Integrate and Exchange) are two parts of Dell Boomi’s Unified Platform. The other components include Hub (Master Data Hub), Mediate (API design and Management), and Flow (Workflow Automation and App Development).

How to Set Up the Boomi Platform?
As mentioned above, this cloud platform doesn’t require you to install anything on your local devices; instead, you just need to set up an account, and then you’re good to explore the product.
(Note: To set up the account, click this link and create your free account.)
How to Orchestrate the Boomi Integration Process?
To do the orchestration of SaaS applications, we need to use various shapes available in the process palette. These shapes are the building blocks of any process in Boomi.
There are three types of shapes:
- Execute – These shapes manipulate the document data. Some examples of Execute shapes include:
- Map: Transforms data from one profile(format/schema) to another.
- Set Properties: Sets the Connector-specific properties for documents.
- Process Call: Executes another process from within a function or passes document data to another function for further execution.
- Logic – Logic shapes direct the flow of documents through the process. Logic shapes have three subsets:
- Branch: Creates a copy of a document and passes it down each branch in sequential order.
- Route: Routes documents conditionally down different paths based on the condition.
- Decision: Routes documents based on comparison results of true/false.
- Connect – Connector shapes get data into the process, or they send data out of the process. There are further classifications for these connector shapes, which include:
- Technology: Provides connectivity to and from web applications and on-premise applications using protocols like HTTP, JMS, FTP, etc. Examples of Technology shapes are AS2 Client, Database, FTP, LDAP, Mail, MQTT connector.
- Application: Provides connectivity to various SaaS applications. Examples of these connectors are Amazon S3 REST, Google, Hadoop, Kafka, Salesforce, and Google PubSub.
How do we call the SaaS connector?
Step One: After you log in to the platform, select the Integration component.
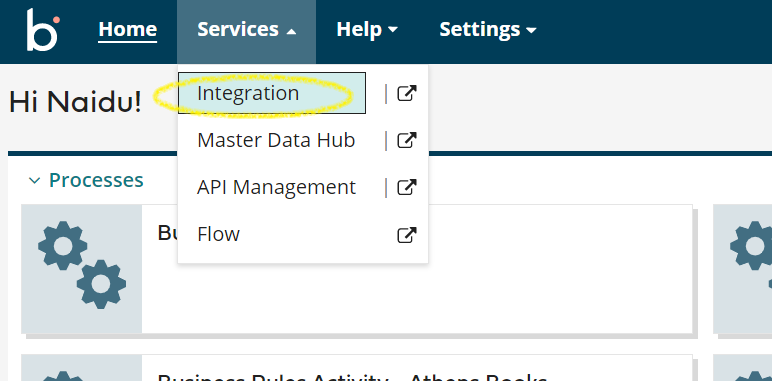
Step Two: After selecting the “Integration,” you’ll see a screen similar to below.
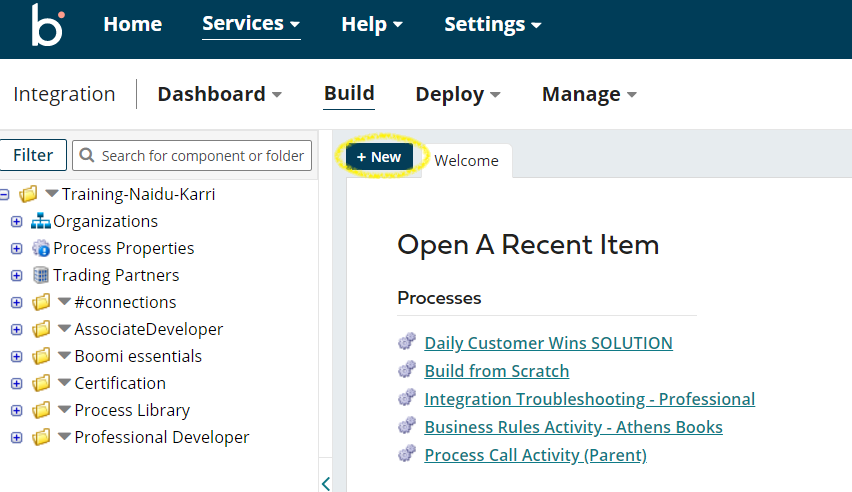
Step Three: Create a new component of type. i.e., “process.”
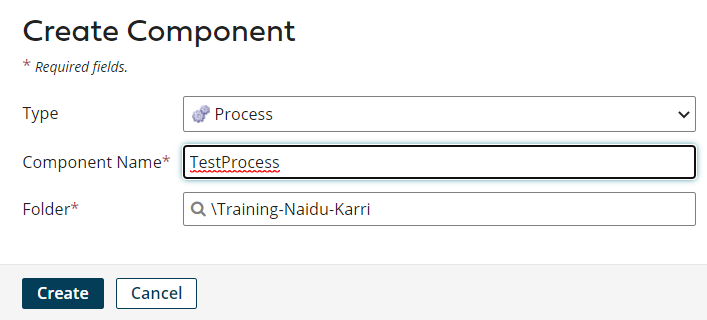
Let’s have a process that tracks prospects by pulling the new accounts from Salesforce and saves them to the database.
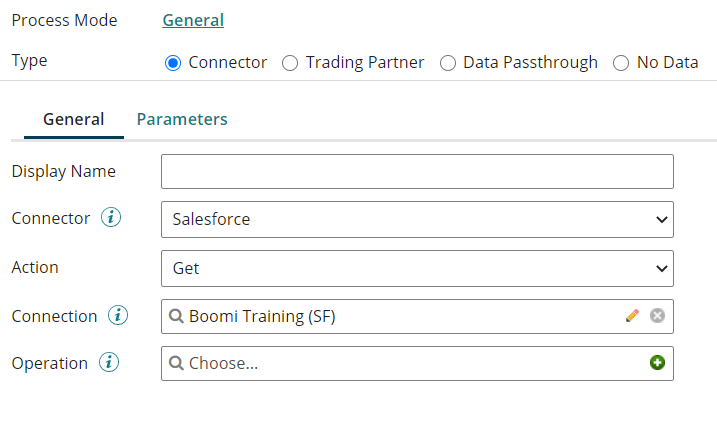
Step Four: Create a “start step” with the Salesforce connector.
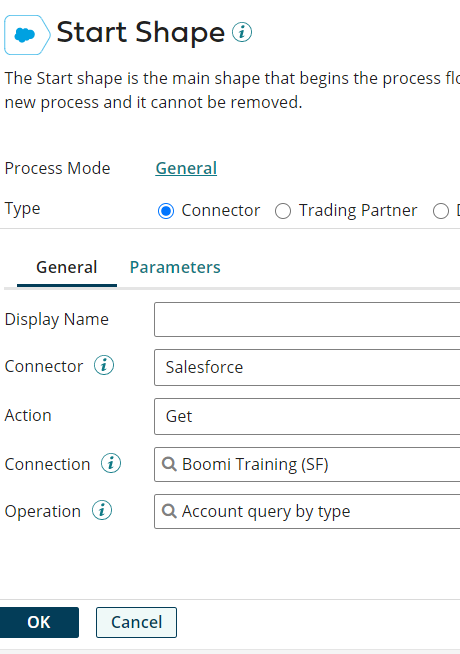
The Start shape is the initial shape that begins every process. It’s automatically included in every new process and cannot be removed.

The two key attributes for a connector are connection and operation. We create a Salesforce Connection by clicking on the green plus sign and configure it with the connection details.
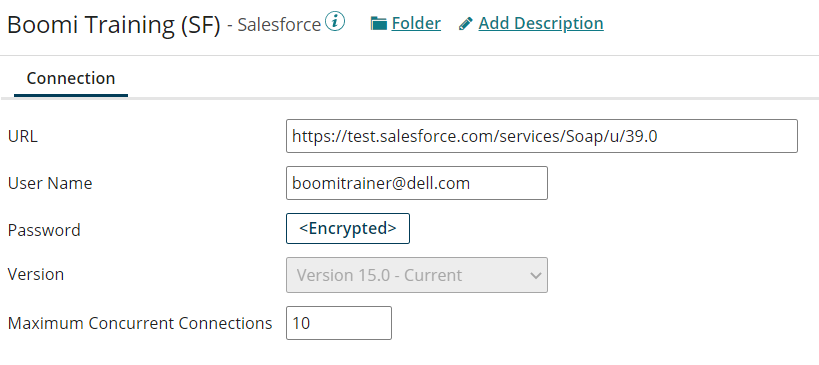
Click on Save and Close.
Once the connection is created, we can see it listed in our connector.
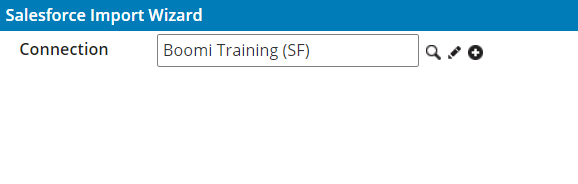
Now, we’ll set the operation for this connector by clicking on the green plus sign next to the operation.
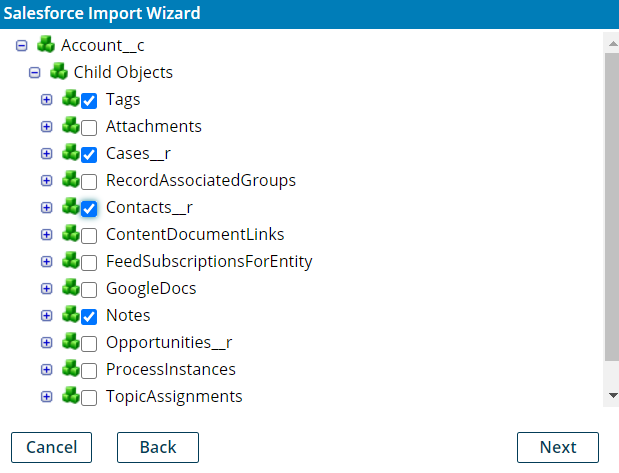
Click on the import button, which allows us to connect to Salesforce to import the object.

Select the object type.
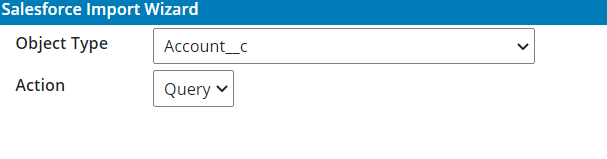
You can choose the fields of the object needed in the profile creation below.
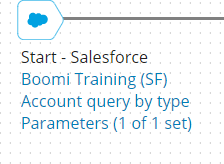
After this, our start step is fully configured.
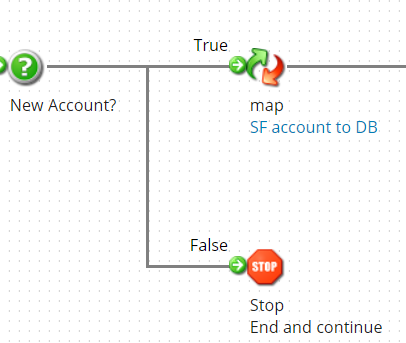
Step Five: After retrieving the accounts from Salesforce, we have to decide whether that account is new or not. For this, we’ll be using the Decision shape with a SQL query.
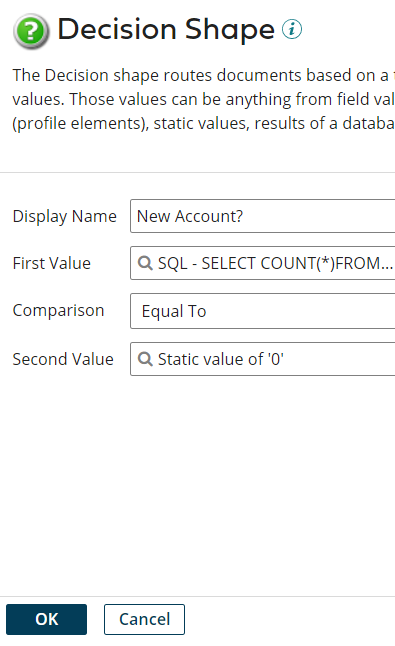
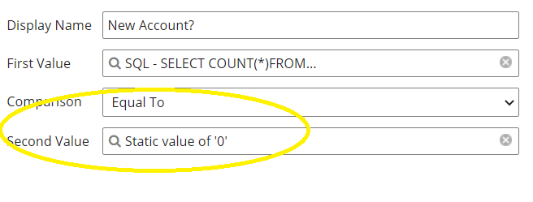
The first value of the Decision shape should be configured as below.
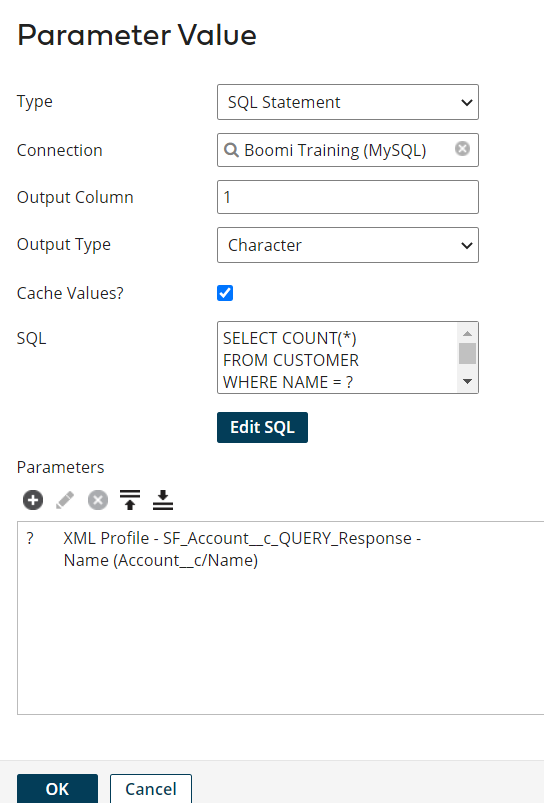
This gives the count of the records in the Database (Customer Table) with a Customer Name the same as Account_c/Name (Salesforce Account name). For the account to be a new account, the count from the above query should be 0. So, our second value of the Decision shape would be a static value of “0.”
Step Six: After identifying the new account, we have to map the Salesforce object to the Database table schema. In Boomi terminology, we have to map the Salesforce Account profile to the Database Customer profile (schemas are known as profiles in Boomi).
Mapping in Boomi is done by holding the source field and dragging it onto the destination field. Boomi leverages a very common coding platform.

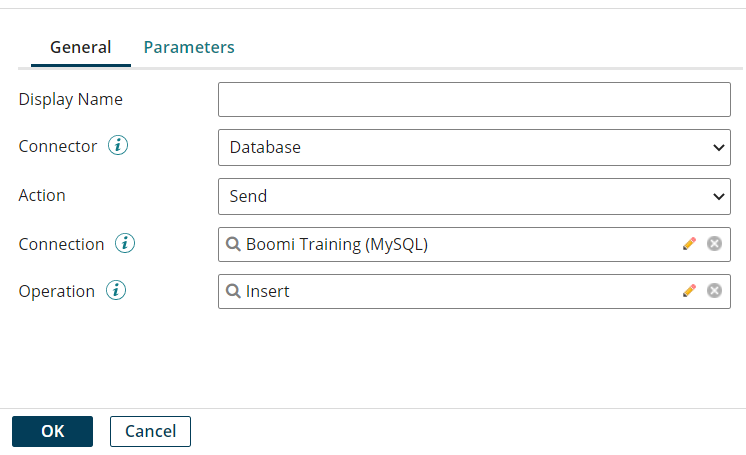
Step Seven: Once the mapping is done, we would be calling the Database connector to insert the customer object.


How to Deploy the Process?
After building and testing the Build tab’s processes and components, the next step is to deploy packaged components to one or more environments. Deployed operations can accommodate full production-scale data volumes, batch processes can be scheduled for automated execution at set intervals, listener processes such as API services, and event-driven connectors are activated to receive requests.
The deploy tab provides access to these options:
- Packaged Components – This option lets us package the components of the process components we build.
- Deployments – This option lets us monitor existing deployments and create new deployments.
All the environments are configured with atoms, which can be on-premise or cloud atoms. This keeps the deployment process the same, whether we are deploying to on-premise or cloud.
Below is an example of a typical deployment workflow:
- Create the process in the build tab with the connectors/components.
- Test the process in “Test Mode” to verify the process is working.
- Package the process using the “Packaged Component,” and version “v1” is created.
- Deploy the packaged component v1 into the Test Environment.
- The processes are tested in this Test environment, and any development issues will be fixed in the build tab.
- After building/fixing the process, the process is again packaged with the version “v2.”
- Packaged version v2 is deployed to the test environment and tested successfully.
- Now, the same packaged version v2 is deployed to the Production environment.
Component Source control
All the versions are implicitly maintained by the AtomSphere platform and are available for a rollback in the build tab. At any point, there is only a version of the process that can be developed/enhanced because coding in Boomi is serialized. In other words, there is no parallel development of the same process.
Below are the attributes of source control in Boomi Atomsphere:
- AtomSphere is the source control engine.
- There is a single copy of the last revision of the processes and components.
- All users work with the latest revision.
- There are no individual copies of the process.
- There is no trunk vs. branch concept.
- There is no automated way to merge revision differences.
Conclusion
Boomi AtomSphere, with the unified platform, offers solutions for all enterprise integration needs. Utilization ranges from Application-to-application, B2B, EDI, and API enablement across the enterprise. The essential nature of the AtomSphere is graphical, which reduces the time for developer onboarding without complex coding techniques. The source control is built-in, so there is no need to maintain the version externally. Additionally, the Dell Boomi licensing model is noteworthy: one license per unique connection per runtime (atom/molecule), so components/connections reuse are free.
If you have an integration project I would certainly recommend looking at Boomi. It makes debugging integrations much simpler.