
Mule 4 LDAP Operations:
- Search
- Create OU(organizationalUnit)
- Create a user
- Modify
- Delete
Pre-requisites:
- MuleSoft Anypoint Studio 7
- Java 8
- OpenLDAP, OUD, OID, Microsoft AD.
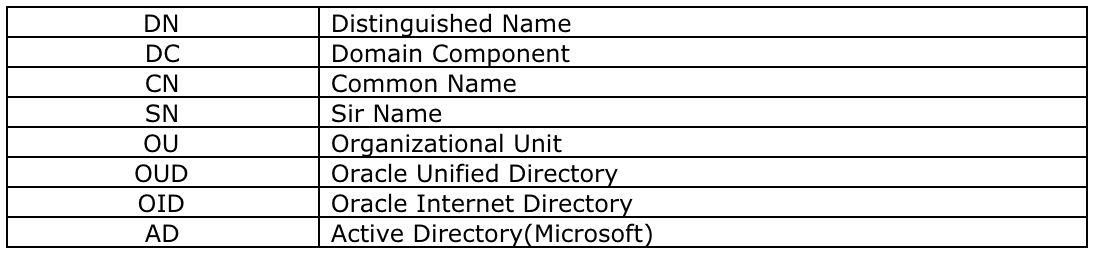
Acronyms:
1. Search operation
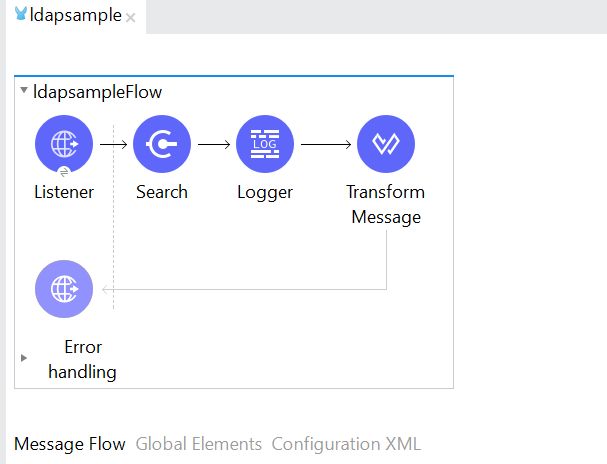
Step 1: Create a project in MuleSoft Anypoint Studio and drag and drop all the required components from the Mule component palette as shown in the below flow.
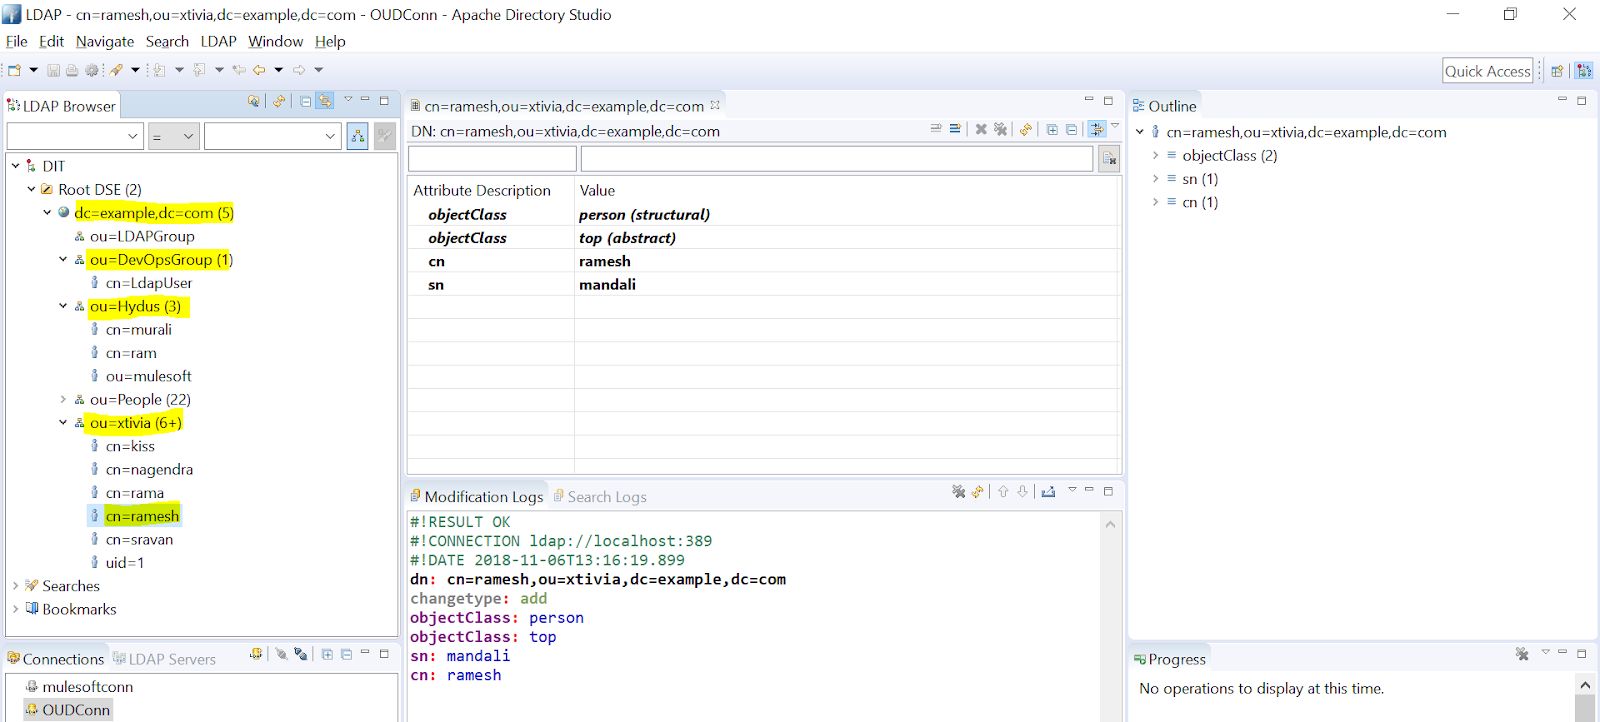
Step 2: Installed Oracle unified directory LDAP server, as mentioned in the below screenshot. Next, traverse the tree structure of the LDAP server.
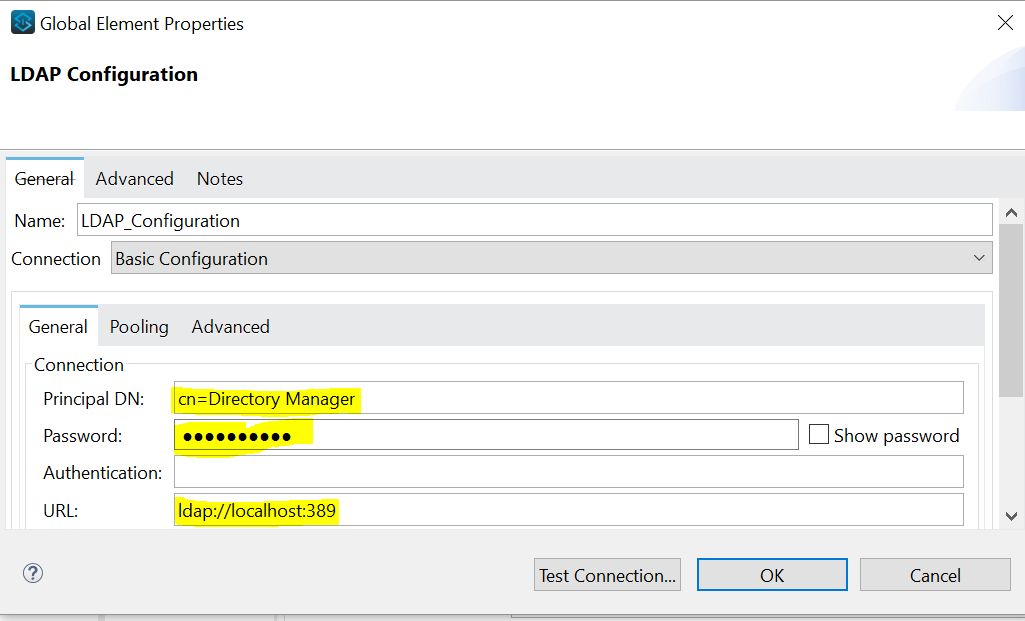
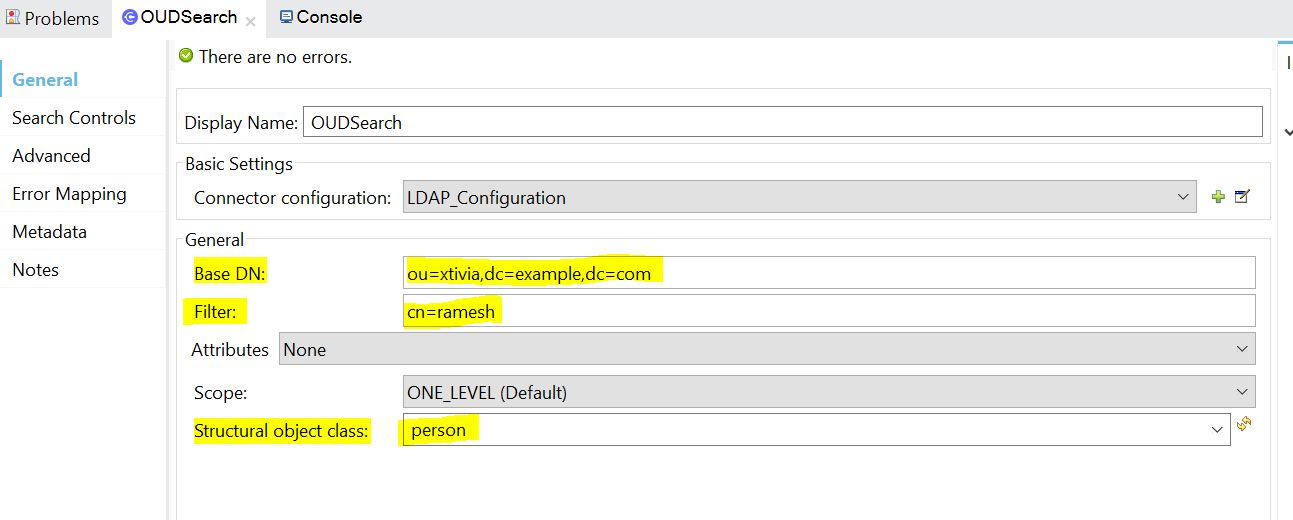
Step 3: In the search component we must configure LDAP server details.
Step 4: After configuring LDAP server details we must provide the Distinguished Name (DN) and filter (should be Common Name(CN)) these are the main fields to search in the LDAP server.
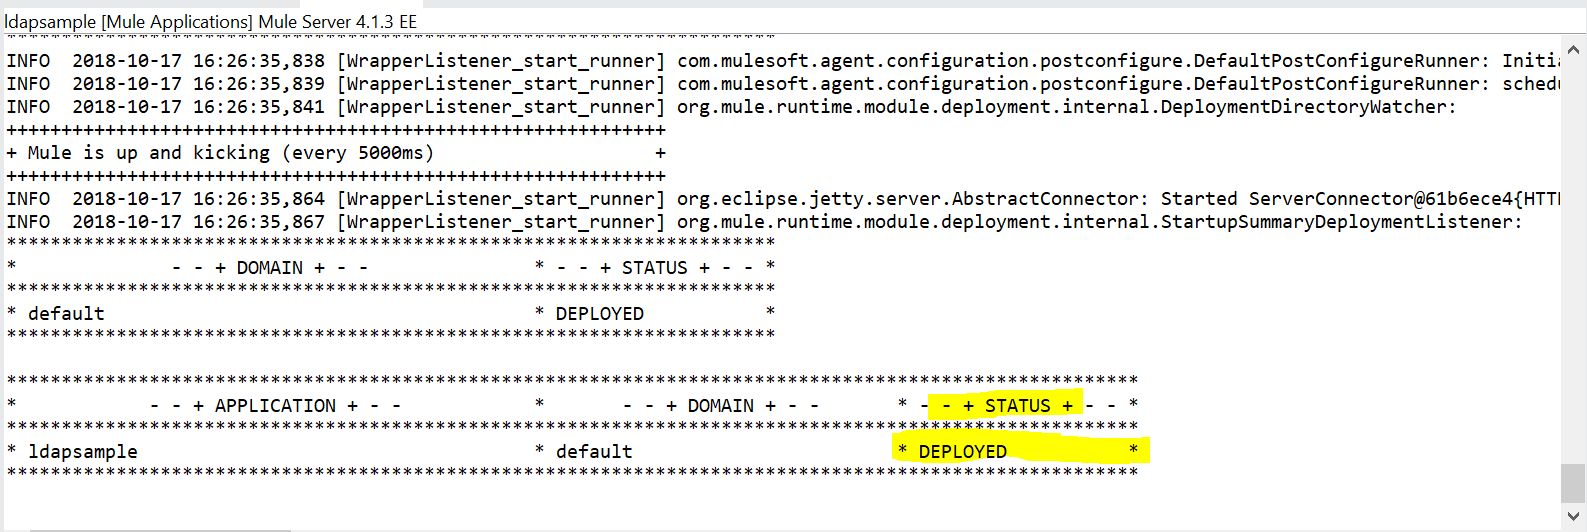
Step 5: Once the application has run, it must be deployed status.
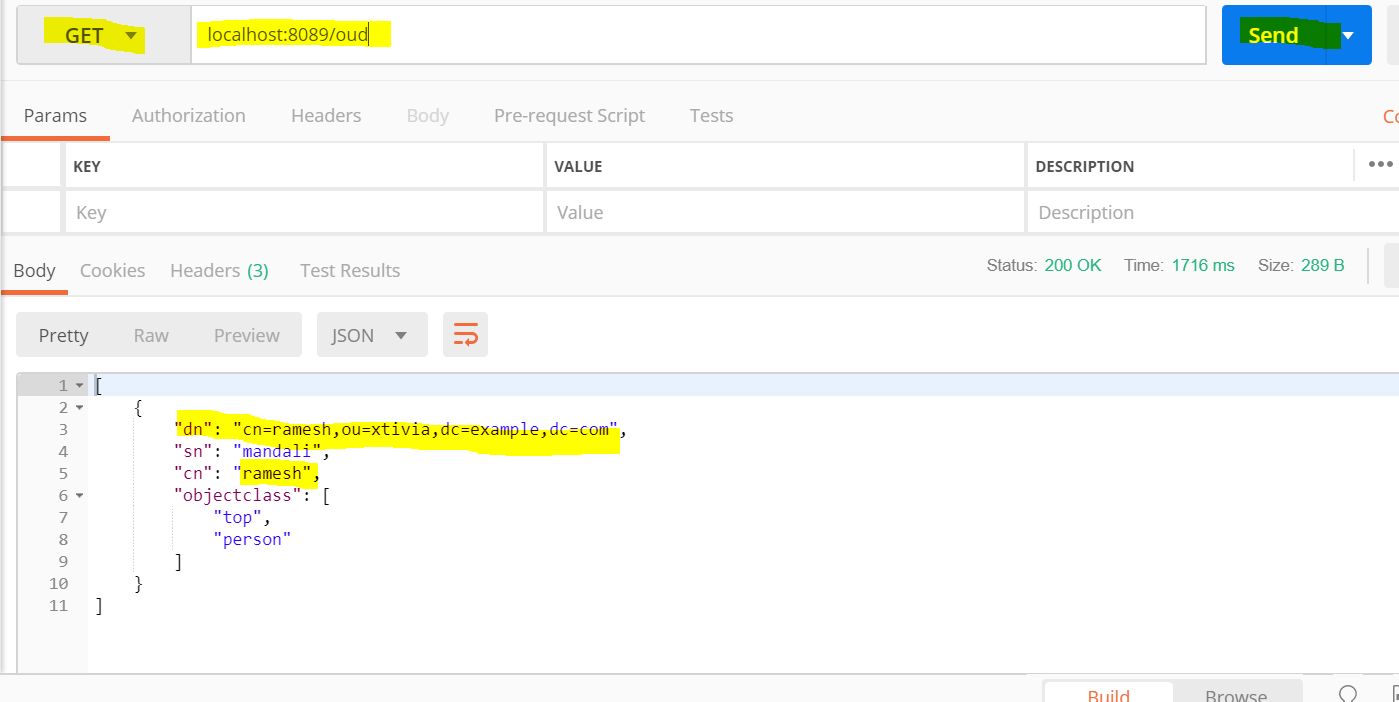
Step 6: To test the result open postman hit the send button, and see the result below. The common name ramesh was used as a filter for the results given below. localhost:8089/oud
2. Create OU(organizationalUnit)
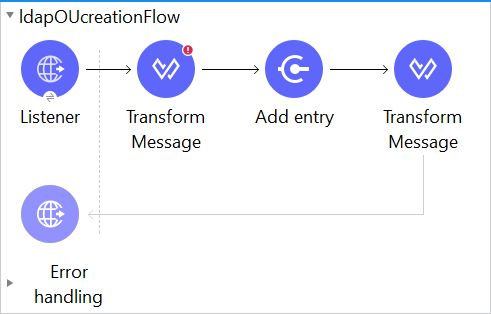
Step 1: Create a project in MuleSoft Anypoint Studio. Drag and drop all the required components from the Mule component palette as mentioned in the below flow.
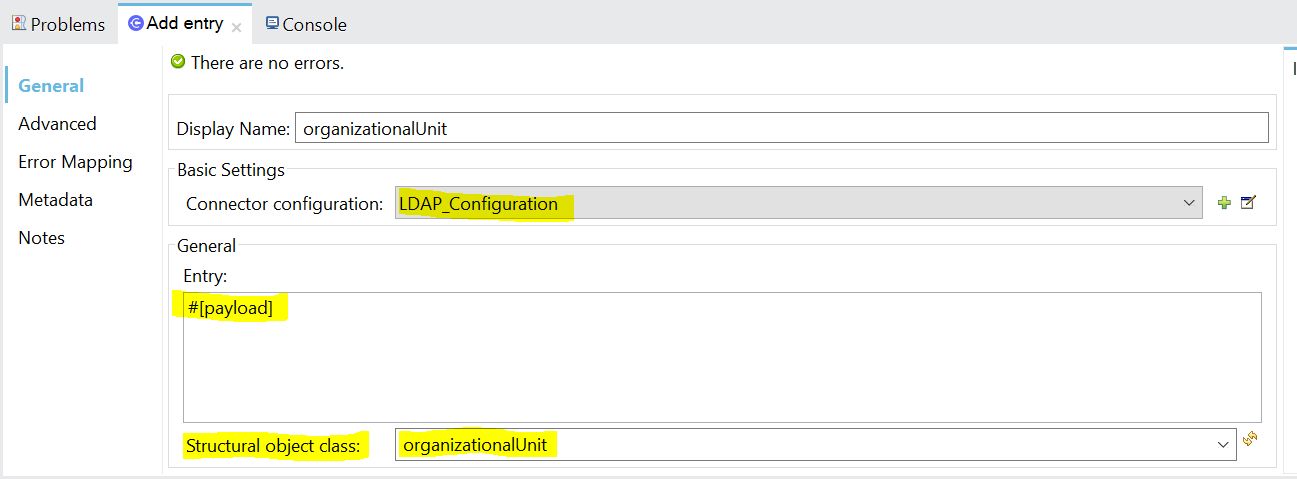
Step 2: In the add entry component tab, we need to select the structural class as organizationalUnit because I am creating a group on to the LDAP server to create multiple users on this unit.
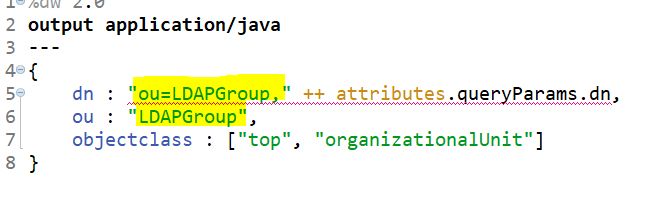
Step 3: In DataWeave I am creating a group as DevOpsGroup like organizational Unit(OU). Here I am getting Distinguished Name(dn) from queryparams.
Top Class: is the superclass of all the classes in every LDAP server’s language. if you want to create any user or OU etc…. we must import top class.
Step 4: Once we hit the API from postman we can see the logs for add entry operation in the console like below for the organizational Unit.

Logs:

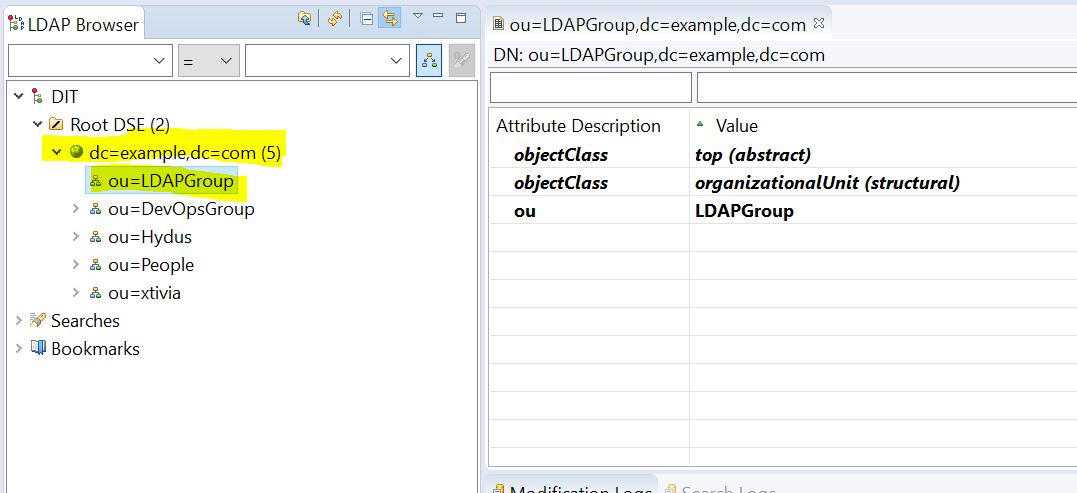
Step 5: I have logged into OUD LDAP server and refreshed it to get the updated entry onto the server. Now I can able to see the LDAPGroup OU creation.
3. Create a user under OU:
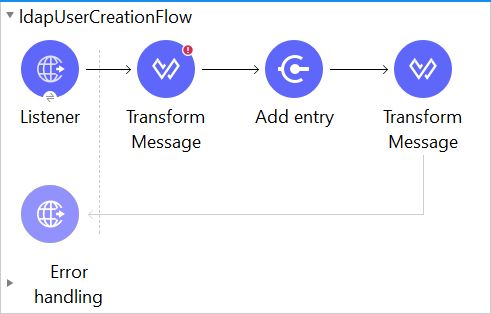
Step 1: Create a project in MuleSoft Anypoint Studio. Drag and drop all the required components from the Mule component palette as mentioned in the below flow.
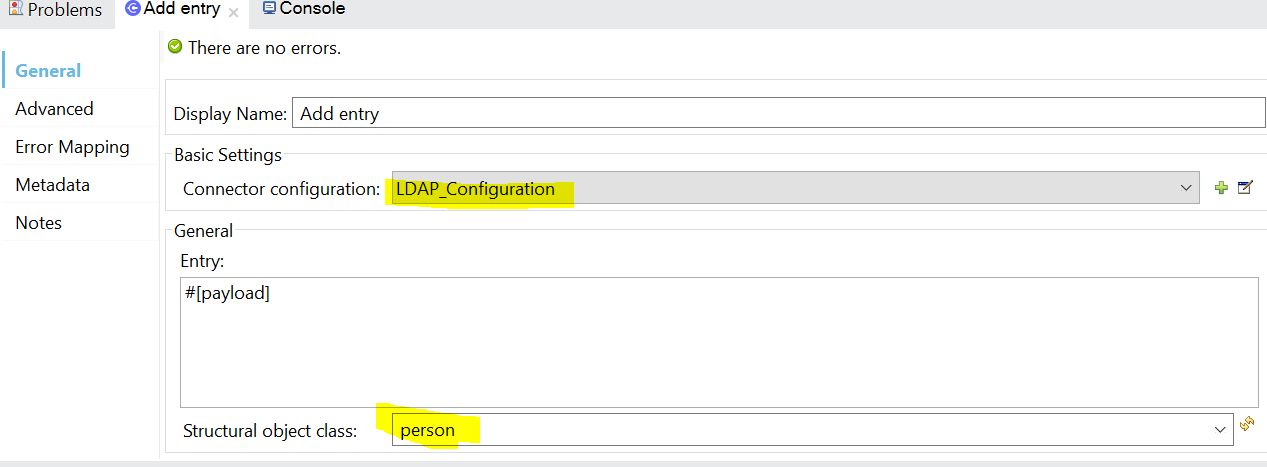
Step 2: In add entry component we need to select the structural class as Person because I am creating a user on to the LDAP server.
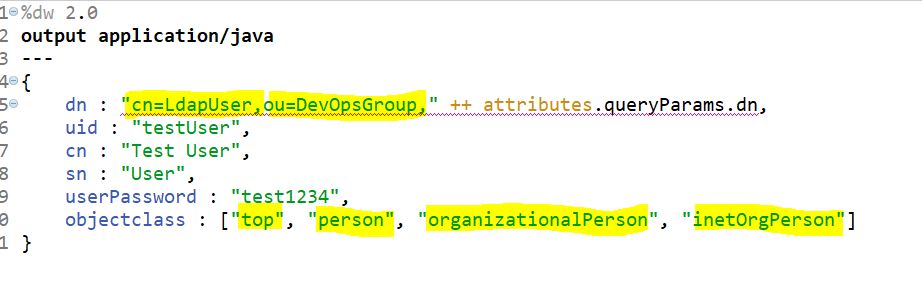
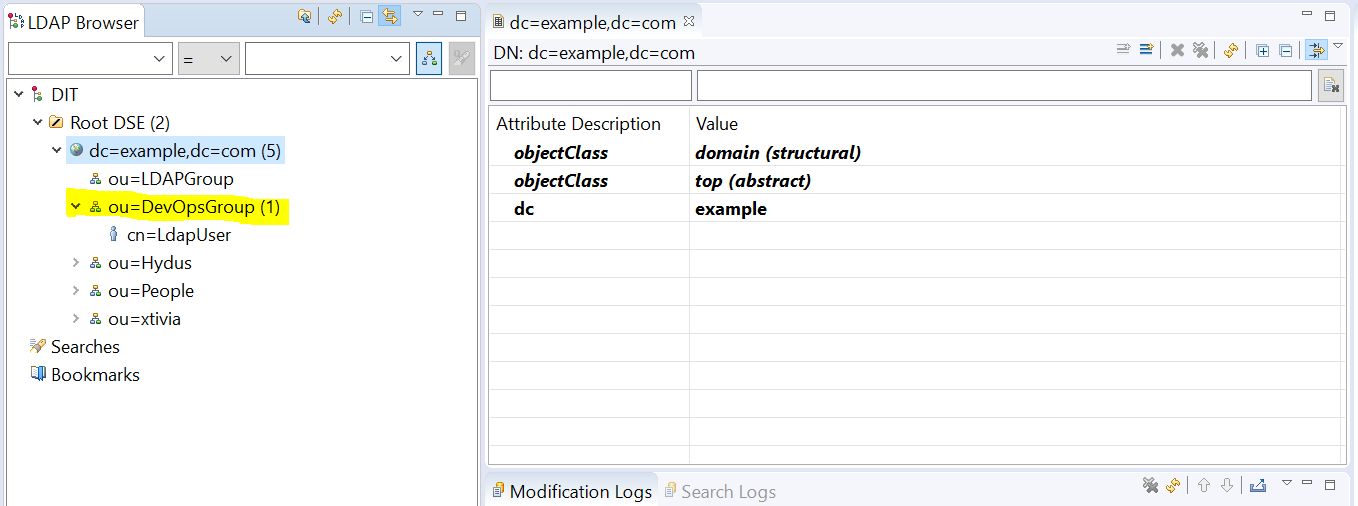
Step 3: In DataWeave I am creating a user LdapUser as common name (cn) into DevOpsGroup organizationalUnit(OU). Here I am getting Distinguished Name(dn) from queryparams.
Step 4: Once we hit the API from postman we can see the logs for add entry operation in the console like below.

Logs:

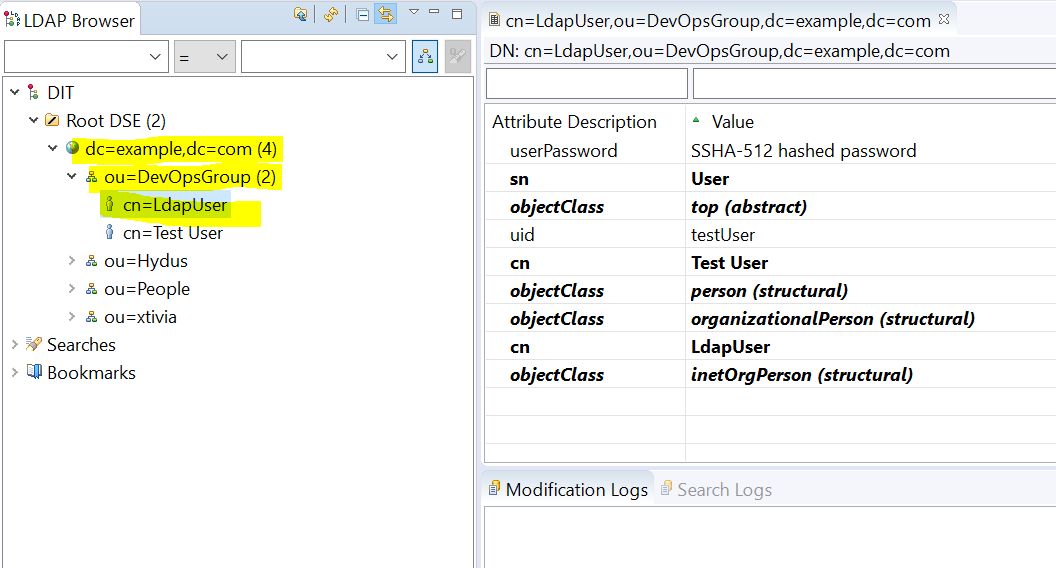
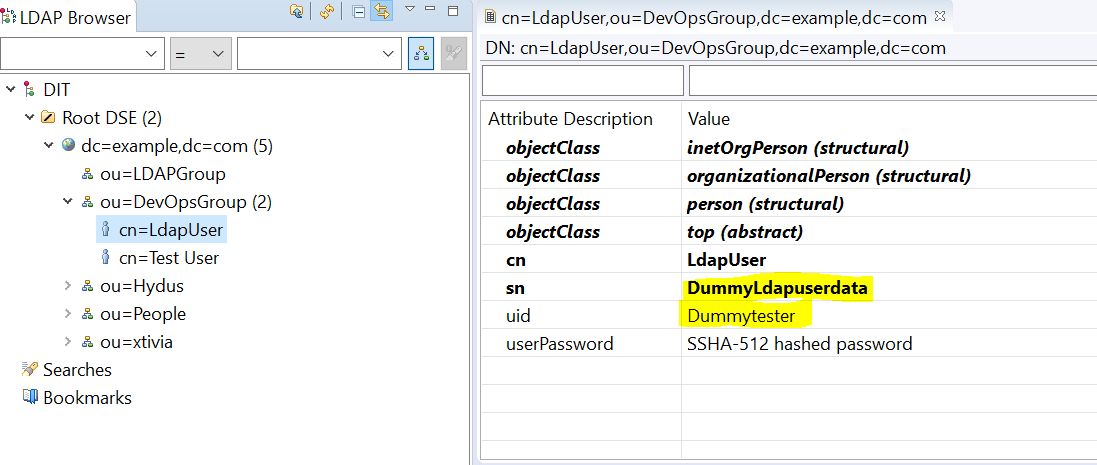
Step 5: I have logged into OUD LDAP server and refreshed it to get the updated entry on to the server. Now, I am able to see the LdapUser creation.
4. Modify a User:
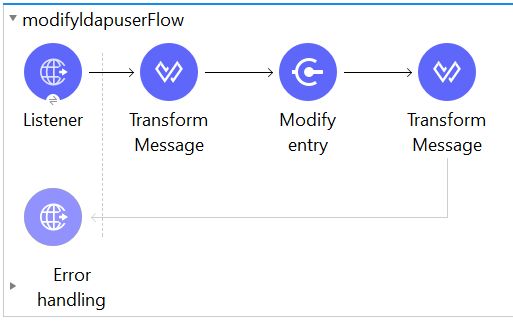
Step 1: Create a project in MuleSoft Anypoint Studio. Drag and drop all the required components from the Mule component palette as below flow.
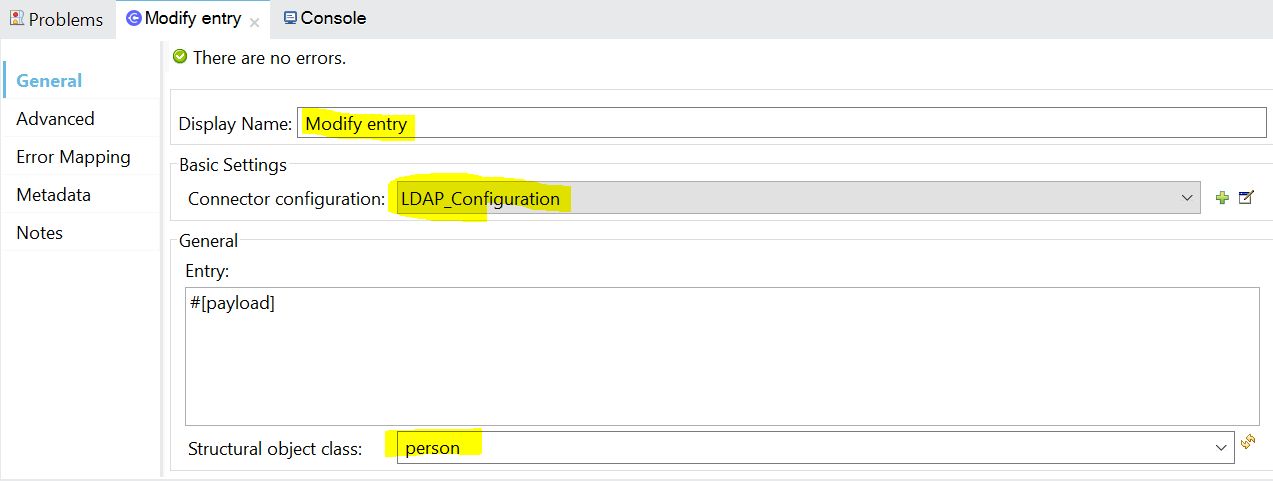
Step 2: In modify entry component, we need to select the structural class as Person because I am modifying a user’s data onto the LDAP server.
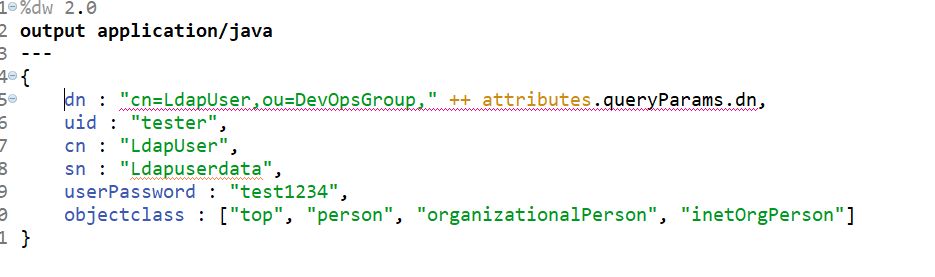
Step 3: Before modifying the user’s data, DataWeave code needs to be written as mentioned below.
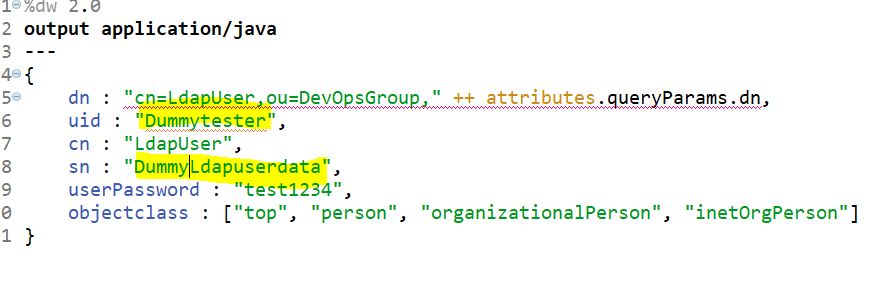
Step 4: After modifying the user’s data DataWeave could be like below. Here I am trying to modify LdapUser’s data.
Step 5: Once we hit the API from the postman, can see the logs for modified entry data in the console like below.

Logs:

Step 6: Before modifying the user’s data in OUD LDAP server
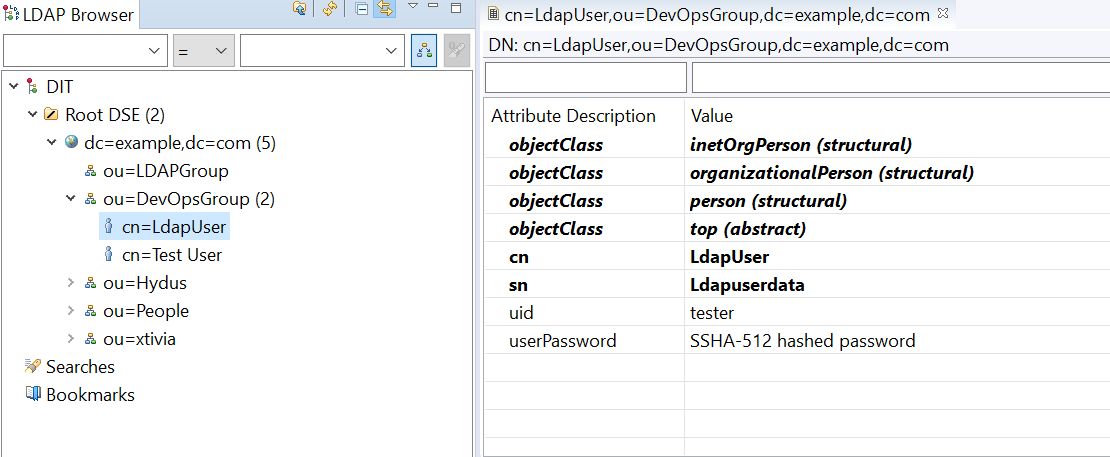
After the modified operation, the user’s data changed as shown below.
5. Delete operation:
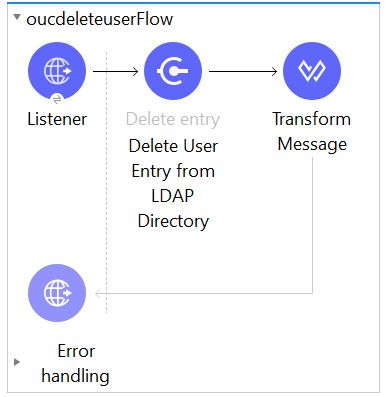
Step 1: Create a project in MuleSoft Anypoint Studio. Drag and drop all the required components from the Mule component palette as mentioned in the below flow.
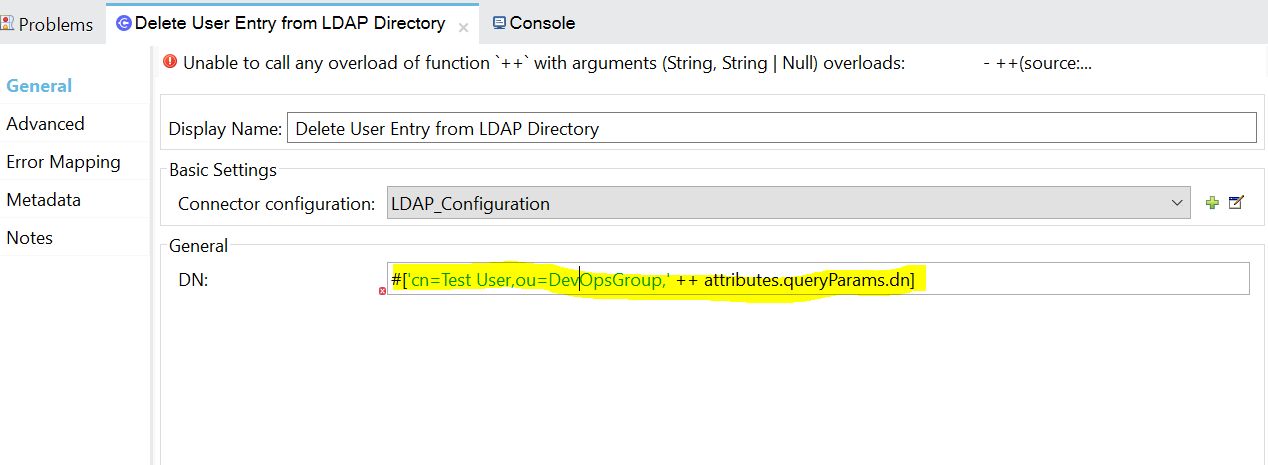
Step 2: In the delete component, we must provide the DN. The user will delete based on the DN condition like below.
Step 3: Once we hit the API from postman we can see the logs for add entry operation in the console like below.


Step 4: Before deleting a user on the LDAP server we can see Test User as mentioned in the below screen.
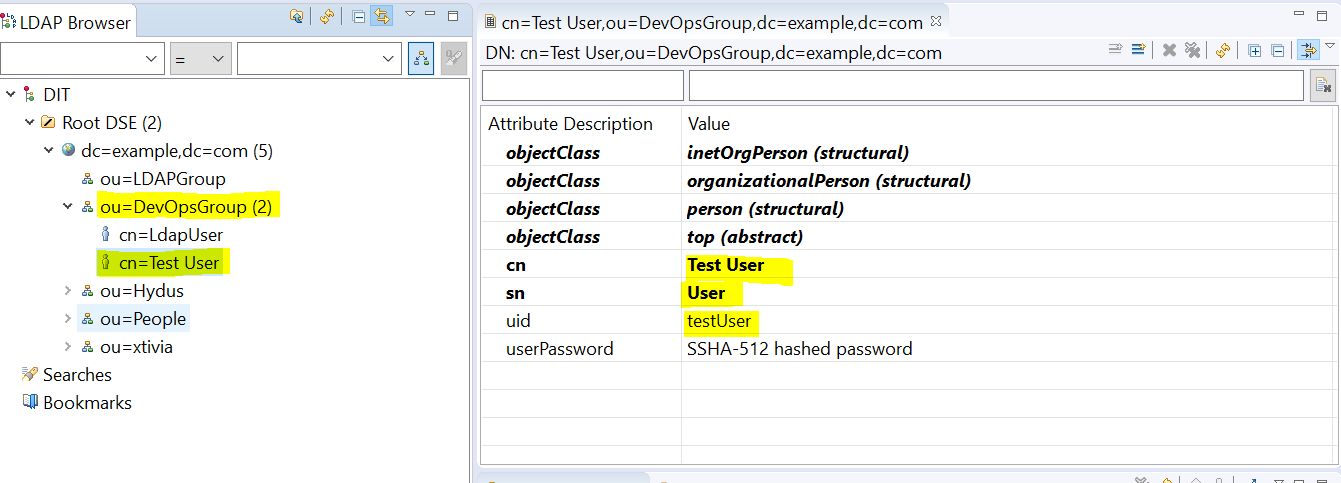
After deleting a user on the LDAP server.
Ran into trouble trying to complete the Mule 4 LDAP connectivity or any associated operations? XTIVIA is here to help whether you need assistance with just a specific problem or even completing the task for you. If you would like to learn more about how we can help you with your MuleSoft integration, don’t hesitate to contact us today. We also have a great MuleSoft blog, check it out here!