
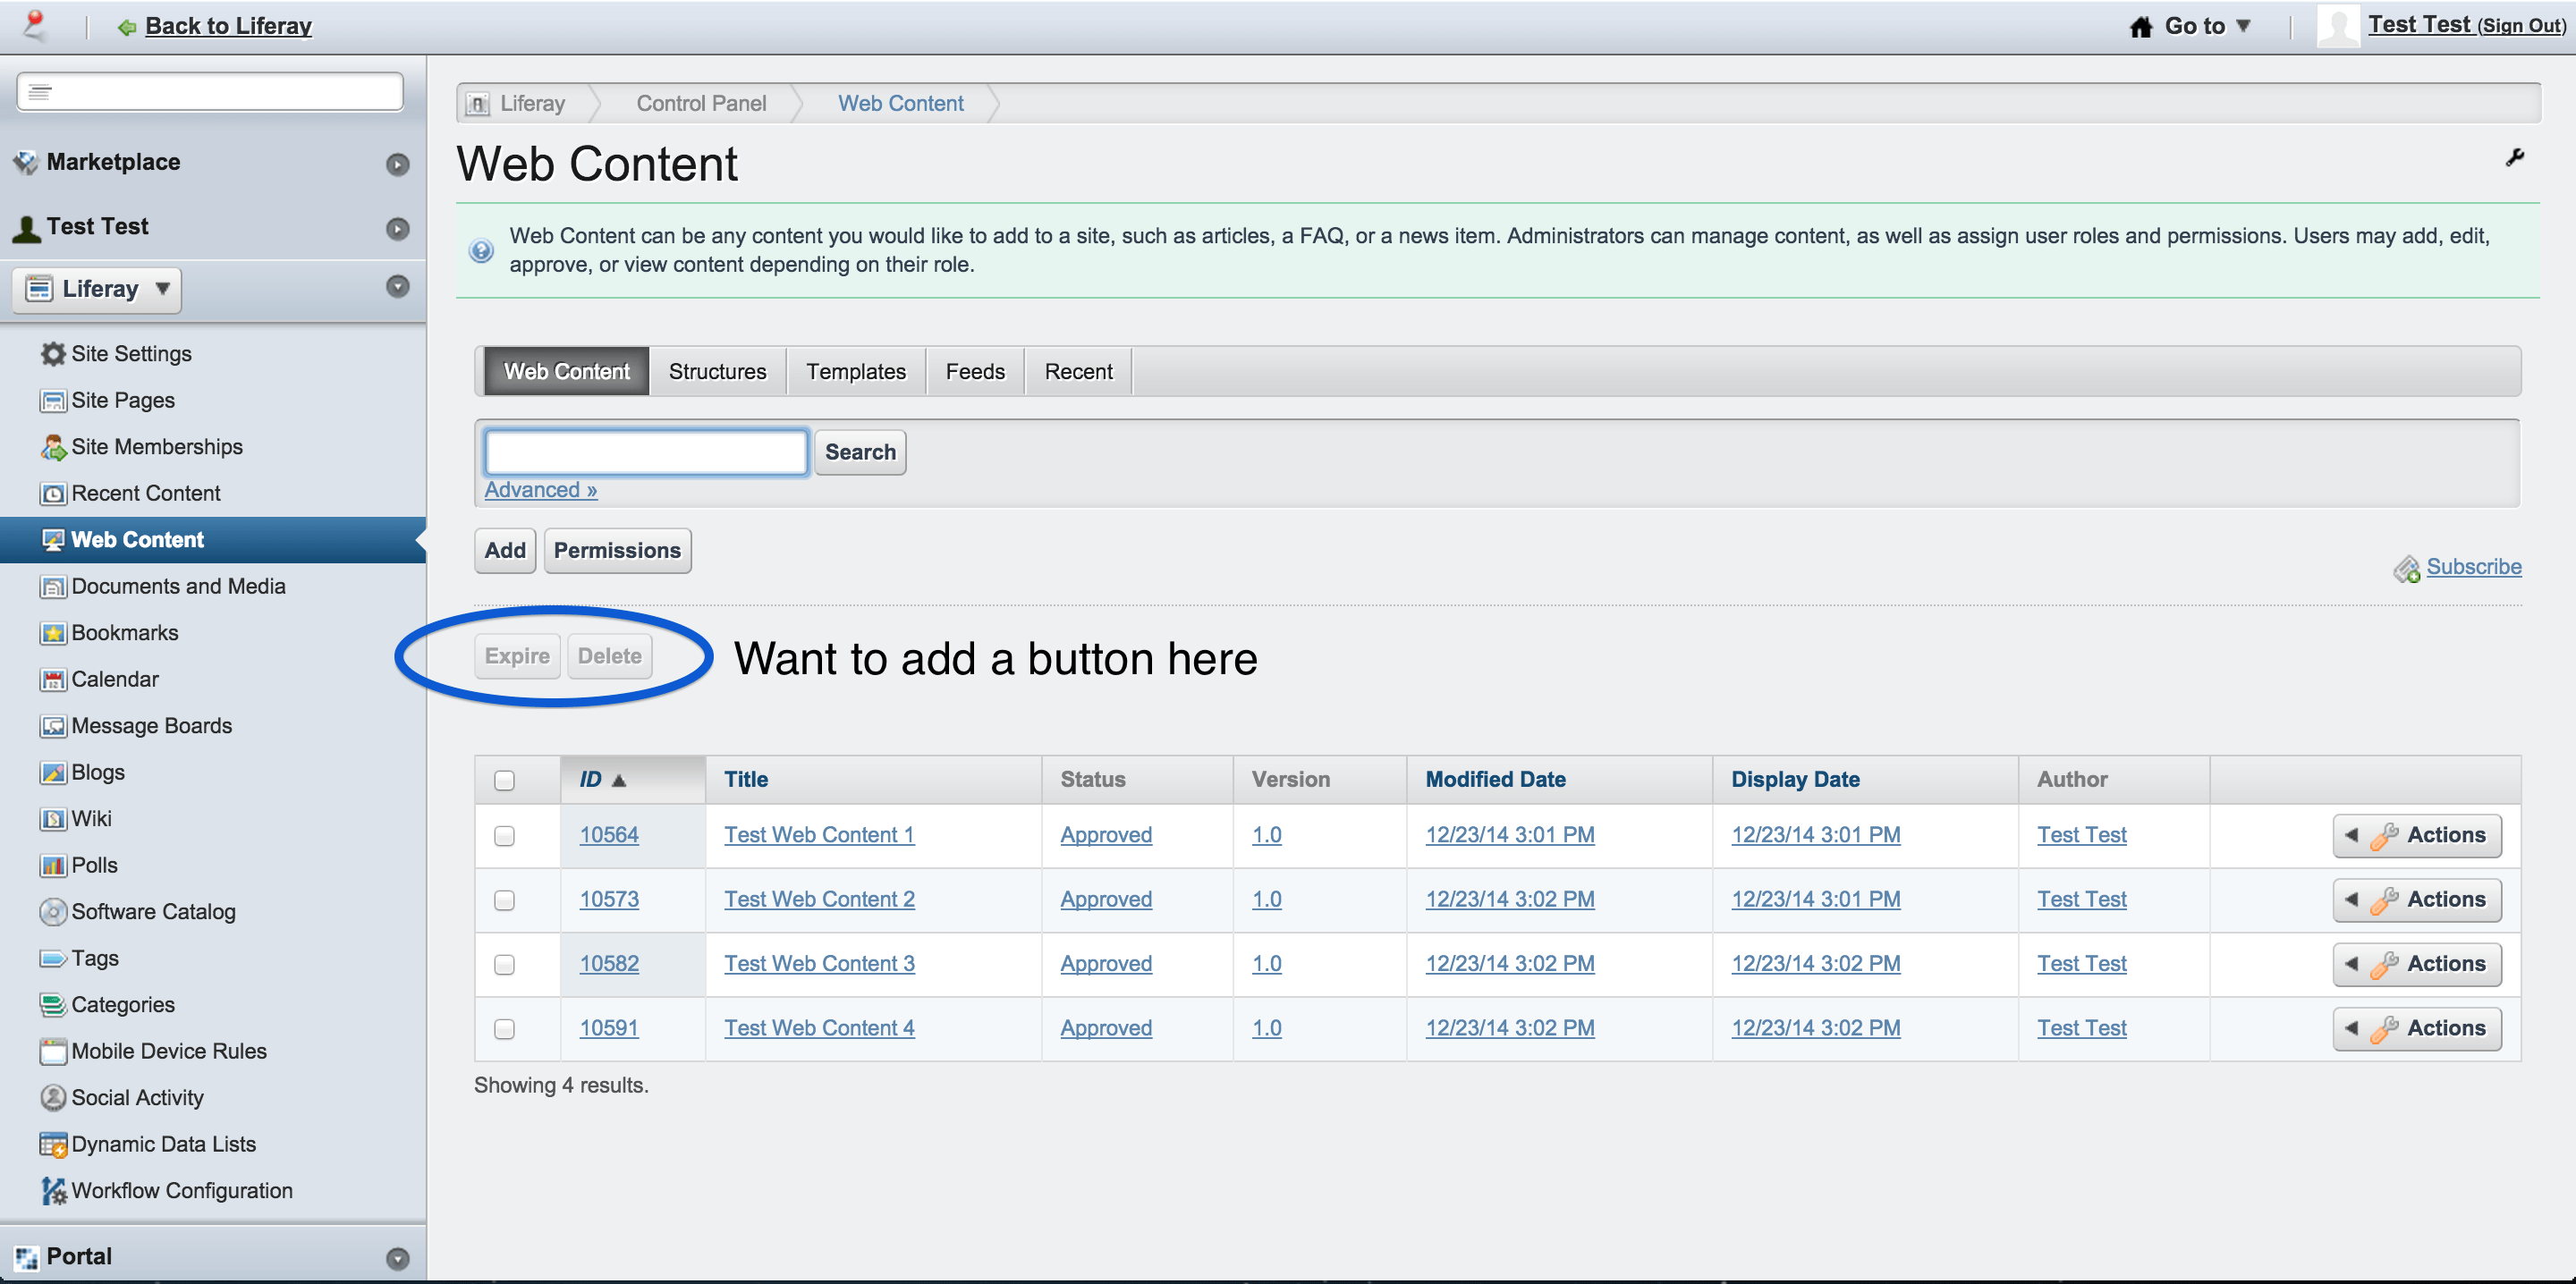
Adding A New button
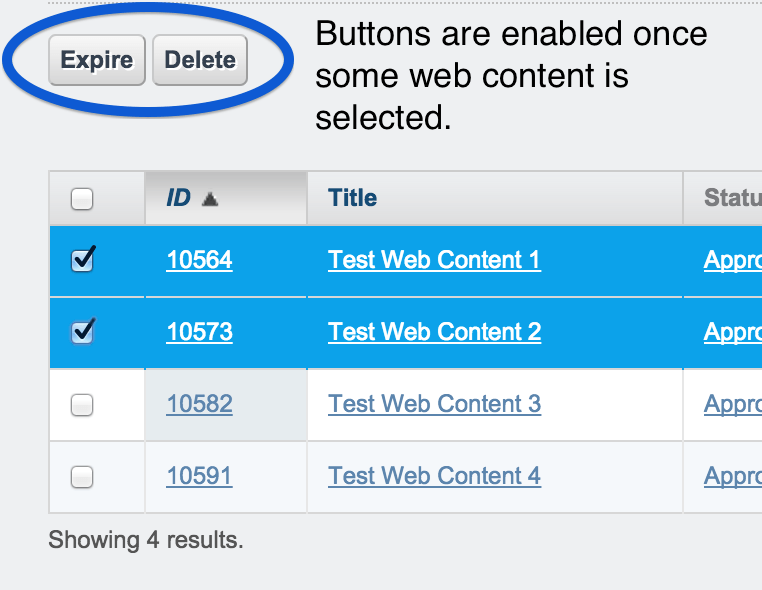
Recently I wanted to add my own button into the list of web content in the Liferay control panel. There were already a couple buttons there that enable and disable when one or more web content items are selected. My plan was to just copy whatever functionality they use and call it my own.
What I didn’t want to do was grab the jsp file from the portal source and add a bunch of custom code to it. This makes long term maintenance more difficult and a headache for upgrades. If you upgrade your portal version the jsp file may have changes in it. You will now have to figure out what custom code you added and migrate it to the new versions jsp file. Instead I used AUI to dynamically update the DOM after the page is loaded.
Here are two images, one of the web content page and a close up of the area where I wanted to add a new button:
Project setup
The first thing you’ll want to do is create a hook project. In my example I’m using Liferay EE 6.1 GA3 SP1 but this process will work fine for any version. Below is what my final project structure looks like in Eclipse:
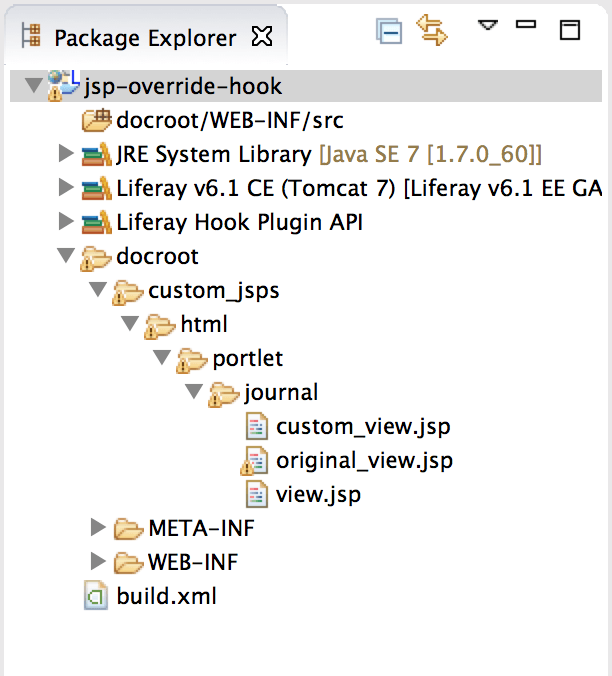
Let’s go over these files at a high level and then dive into them in more detail.
view.jsp – this is the file that we are trying to override. It is the page that is displayed when a user wants to view the list of web content.
original_view.jsp – this is the view.jsp that I copied from the portal source. You dont technically need this file for anything but I copied into the project so I could easily reference it now and later.
custom_view.jsp – this file is where we will place all of our custom AUI code to add in our new functionality.
A closer look at our new view.jsp
The first thing to do once your project is set up is to put some code into view.jsp:
<%@ taglib uri="http://liferay.com/tld/util" prefix="liferay-util" %>
 <liferay-util:buffer var="html">
     <liferay-util:include page="/html/portlet/journal/view.portal.jsp" />
 </liferay-util:buffer>
 <%@ include file="/html/portlet/journal/custom_view.jsp" %>
 <%= html %>
What is all that doing? It is going to take the original, stock view.jsp and display it. Before it is displayed it’s going to put “custom_view.jsp” at the top. So what you end up with is the same page that was already there plus some bonus code that you add at the top.
<liferay-util:buffer var="html">
     <liferay-util:include page="/html/portlet/journal/view.portal.jsp" />
 </liferay-util:buffer>
These lines take the original jsp page and place it into a variable “html”.
<%@ include file="/html/portlet/journal/custom_view.jsp" %>This line includes your custom_view.jsp file at the top of the new page.
<%= html %>This line displays the “stock” page below your custom_view.jsp code.
A closer look at custom_view.jsp
Now that we have our stock page ready to go lets start adding in our custom button into custom_view.jsp.

The first thing to do is inspect the source and find the html for our buttons. In the screenshot above you can see what they look like. You will want to copy the span html for the delete-articles-button and then modify it for your new custom button.
<script type="text/javascript">
 AUI().ready(function(A) {
var parent = A.one('.expire-articles-button').get('parentNode');parent.append('<span class="aui-button custom-button aui-button-disabled">
<span class="aui-button-content"> <input class="aui-button-input"
onclick="<%= renderResponse.getNamespace() %>customButtonClicked();"
type="button" value="Custom Button" disabled=""> </span> </span>');});
</script>Above you can see the AUI block and the new button code. The first line gets the parent of one of the buttons. The second line appends our custom html onto the end of it, which will display it next to the two buttons that already exist. Note that this append is one long string, enclosed in single quotes and broken into multiple lines.
There are two important pieces to take note of:
class="aui-button custom-button aui-button-disabled"
In that snippet we are giving our button a class of custom-button. We will use this later but you can name yours anything.
onclick="<%= renderResponse.getNamespace() %>customButtonClicked();"
That will call a JavaScript method on the page called customButtonClicked(). You can call your method anything you want.
Next up is some code copied straight from the original_view.jsp (the file from the Liferay source):
var buttons = A.all('.delete-articles-button, .expire-articles-button');

if (buttons.size()) {
    var toggleDisabled = function(disabled) {
        buttons.all(':button').attr('disabled', disabled);
        buttons.toggleClass('aui-button-disabled', disabled);
    };

    var resultsGrid = A.one('.results-grid');

    if (resultsGrid) {
        var checkBoxes = resultsGrid.all('input[type=checkbox]');

        if (checkBoxes && (checkBoxes.size() > 1)) {
            resultsGrid.delegate('click',
                        function(event) {
                            var disabled = (resultsGrid.one(':checked') == null);
                            toggleDisabled(disabled);
                        },
                        ':checkbox'
                        );
        }
    }

    toggleDisabled(true);
}
The only thing changed is in the first line. I have used our custom button name .custom-button. This code enables or disables your custom button when web content items are selected or deselected.
Finally is another piece of code, also copied right from the source:
Liferay.provide(
      window,
      '<portlet:namespace />customButtonClicked',
      function() {
         var ids = Liferay.Util.listCheckedExcept(document.<portlet:namespace />fm,
                                                  "<portlet:namespace />allRowIds");
      },
      ['liferay-util-list-fields']
   );
The only thing changed here is our function name customButtonClicked. You should set this to whatever you used above. This injects a JavaScript method called customButtonClicked, which will be called whenever anyone clicks the button.
The journal article ids selected will be in the variable ids. All that is left for you to do is to replace alert(ids); with JavaScript of your own. For example you may call some AJAX or post the ids to a portlets controller.
For More Information
For more information about expert help with your Liferay implementation, check out https://www.xtivia.com/portal/liferay-portal, or contact us at https://www.xtivia.com/contact-us
How to override core jsp? I like to override view_message_thuread.jsp in comment-taglib using custom jsp bag but unable to find good reference example. can you please help me out ?