
Let us take a look at the scenario where you make a configuration change to an AWS Linux instance and reboot the AWS instance for the changes to take effect. However, on rebooting, the instance is not accessible. What would you do if the configuration change you made breaks the AWS instance? Fortunately, we were able to fix that.
Here was the problem scenario. We had an EBS volume mounted as /mnt/backup on one of our AWS instances running Liferay. To mount the volume automatically on instance startup, we added the following line to the /etc/fstab file.
/dev/xvdf /mnt/backup ext4 defaults 0 2With the configuration in place and unfortunately due to a human error, we detached the volume from the EC2-instance via the AWS console. On rebooting the instance, AWS was reporting file system mount errors (since it couldn’t find the volume) and wasn’t starting up. It was also not reachable via SSH.
So how did we go about fixing the issue? In summary, the approach is to take down the faulty instance, attach the volume to another instance so we can fix the faulty /etc/fstab configuration, and then bring up the original instance with the repaired configuration.
The following steps are for Linux, but you can take similar steps for other AWS operating systems.
First, we made a note of the instance ID from the AWS Console.
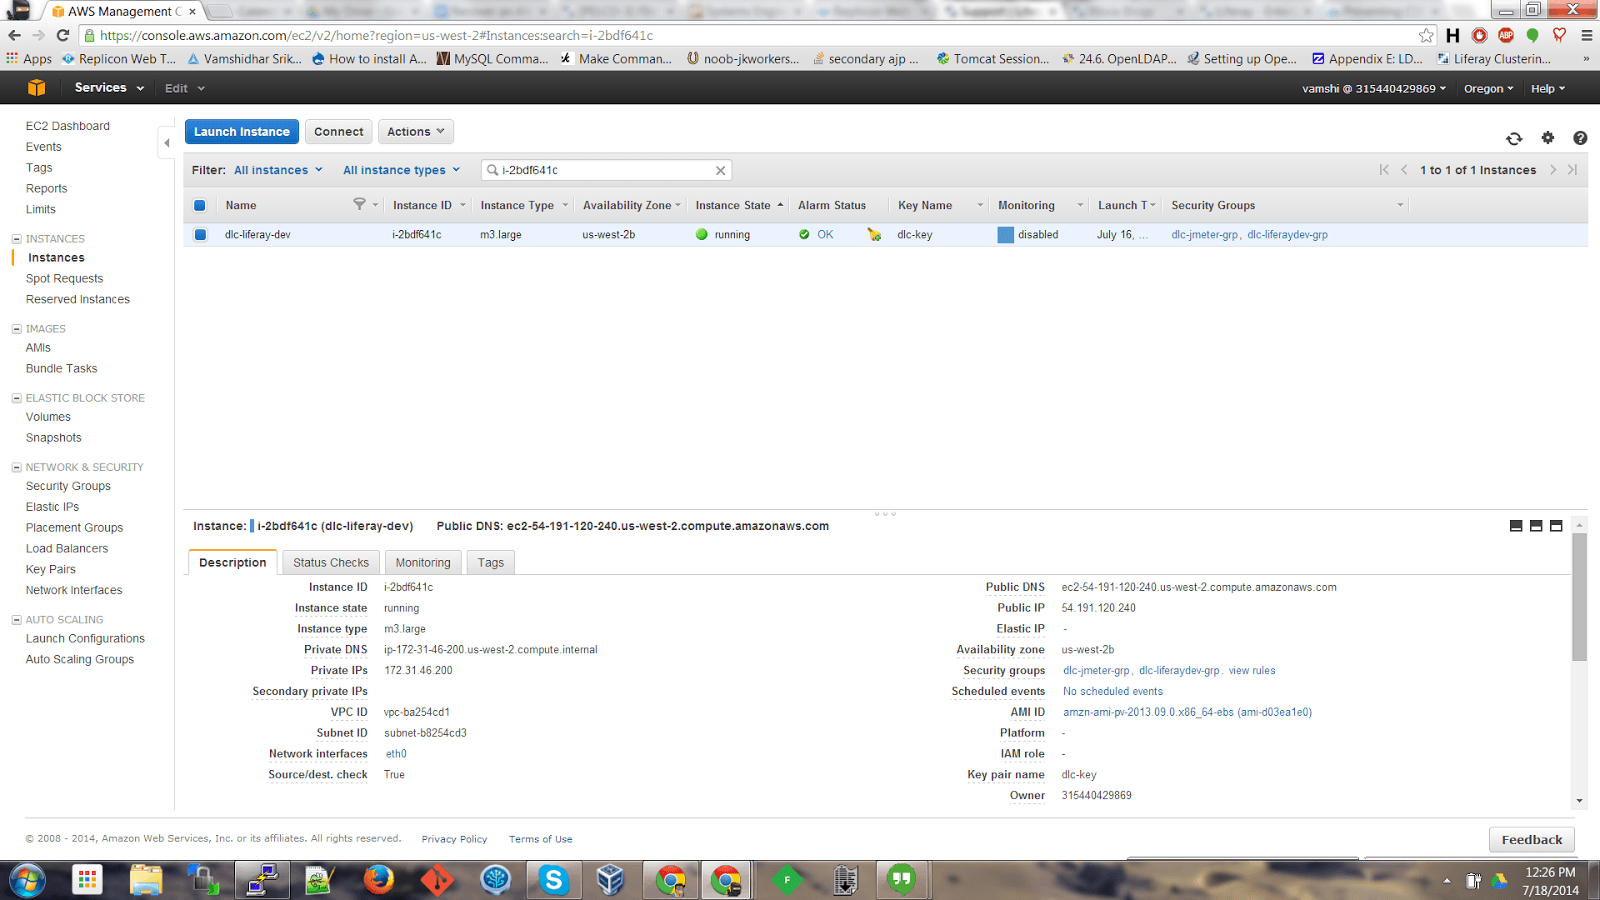
Now shut down the instance that hasn’t booted up properly by selecting Actions -> Shutdown.
As a next step, go to Volumes in the EC2 console and check all the volumes that have been attached to this instance. Since the mount has to be removed from /etc/fstab file, we will be selecting the mount point that is mounted as root for this EC2 instance.
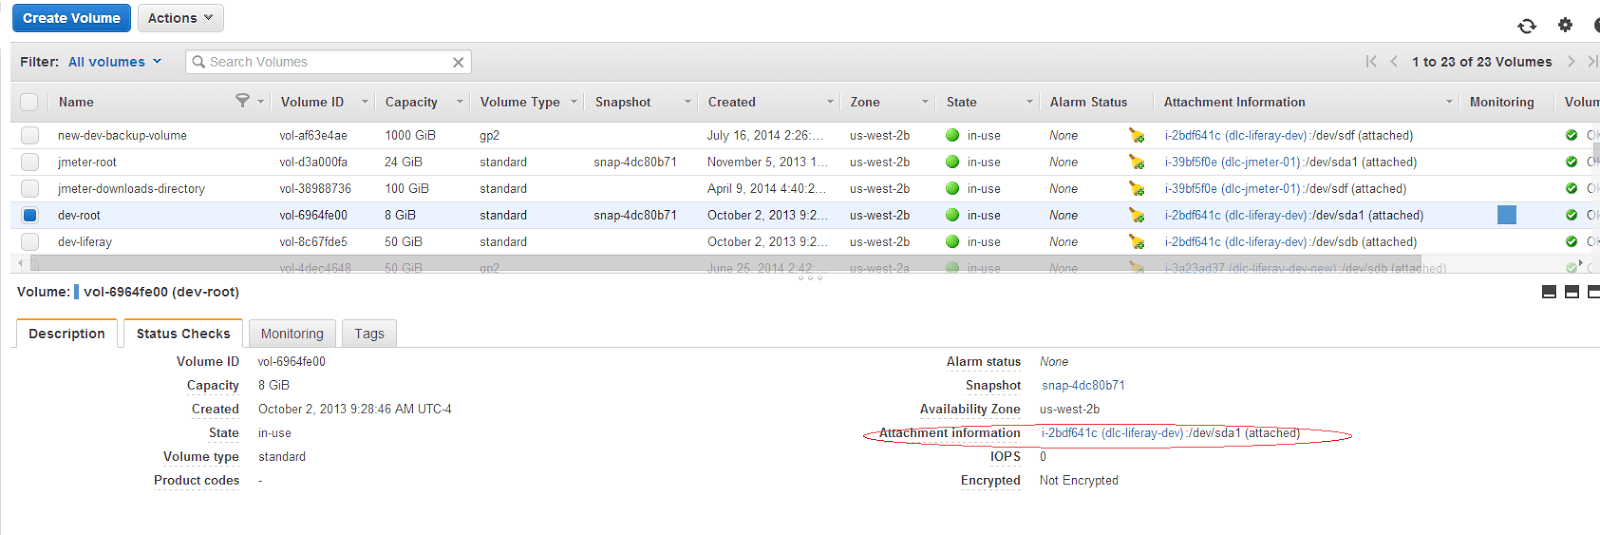
Make sure the instance that has issues has been shutdown and once confirmed, on the Volumes page select the volume and click on Actions -> Force detach volume.
Once the volume has been detached, it should show as “available” in the status field.

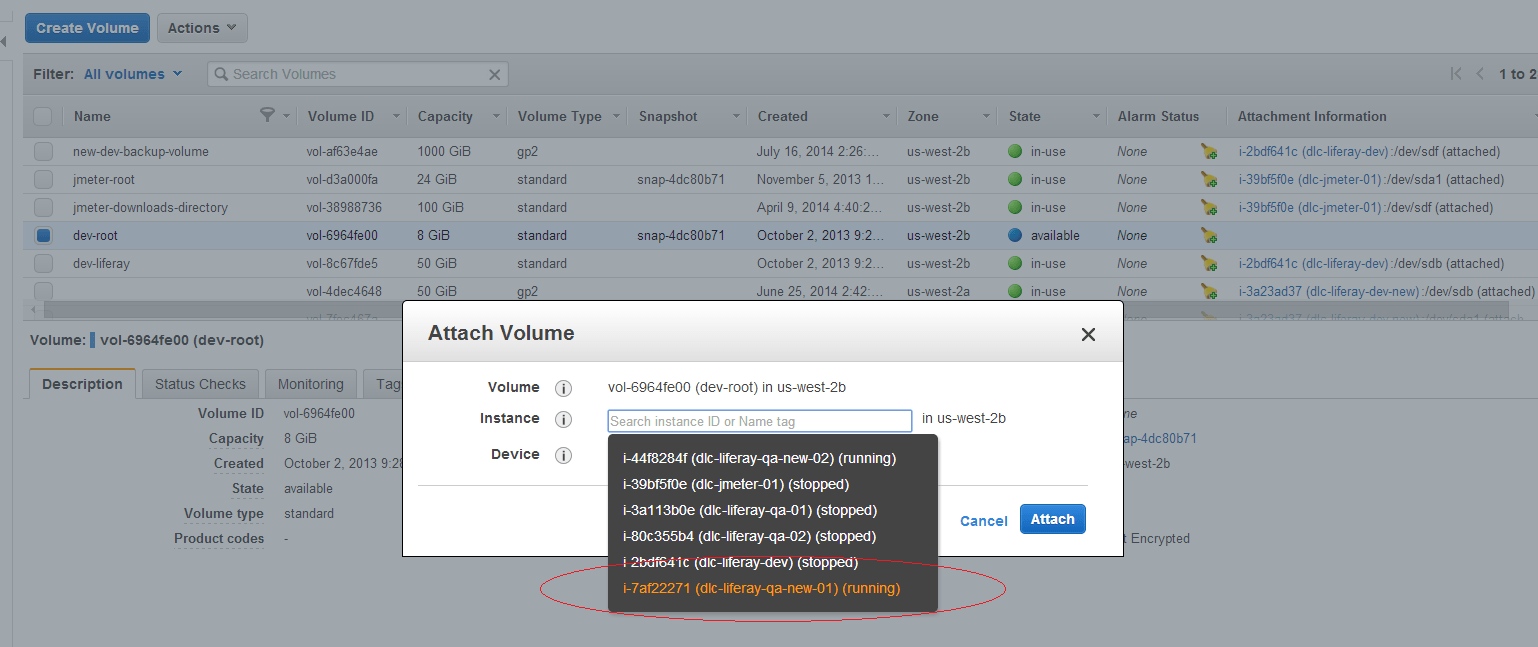
Next, if you don’t already have an EC2 instance in the same Availability Zone as the instance that has issues, spin up a new instance temporarily. The instance size doesn’t matter. Once the EC2 instance is available, go to the Volumes page and select the available volume. Click on Actions -> Attach Volume and select the instance that you will be using to recover the bad EC2 instance.
Once the volume is attached to the new EC2 instance successfully, login to the instance via SSH.
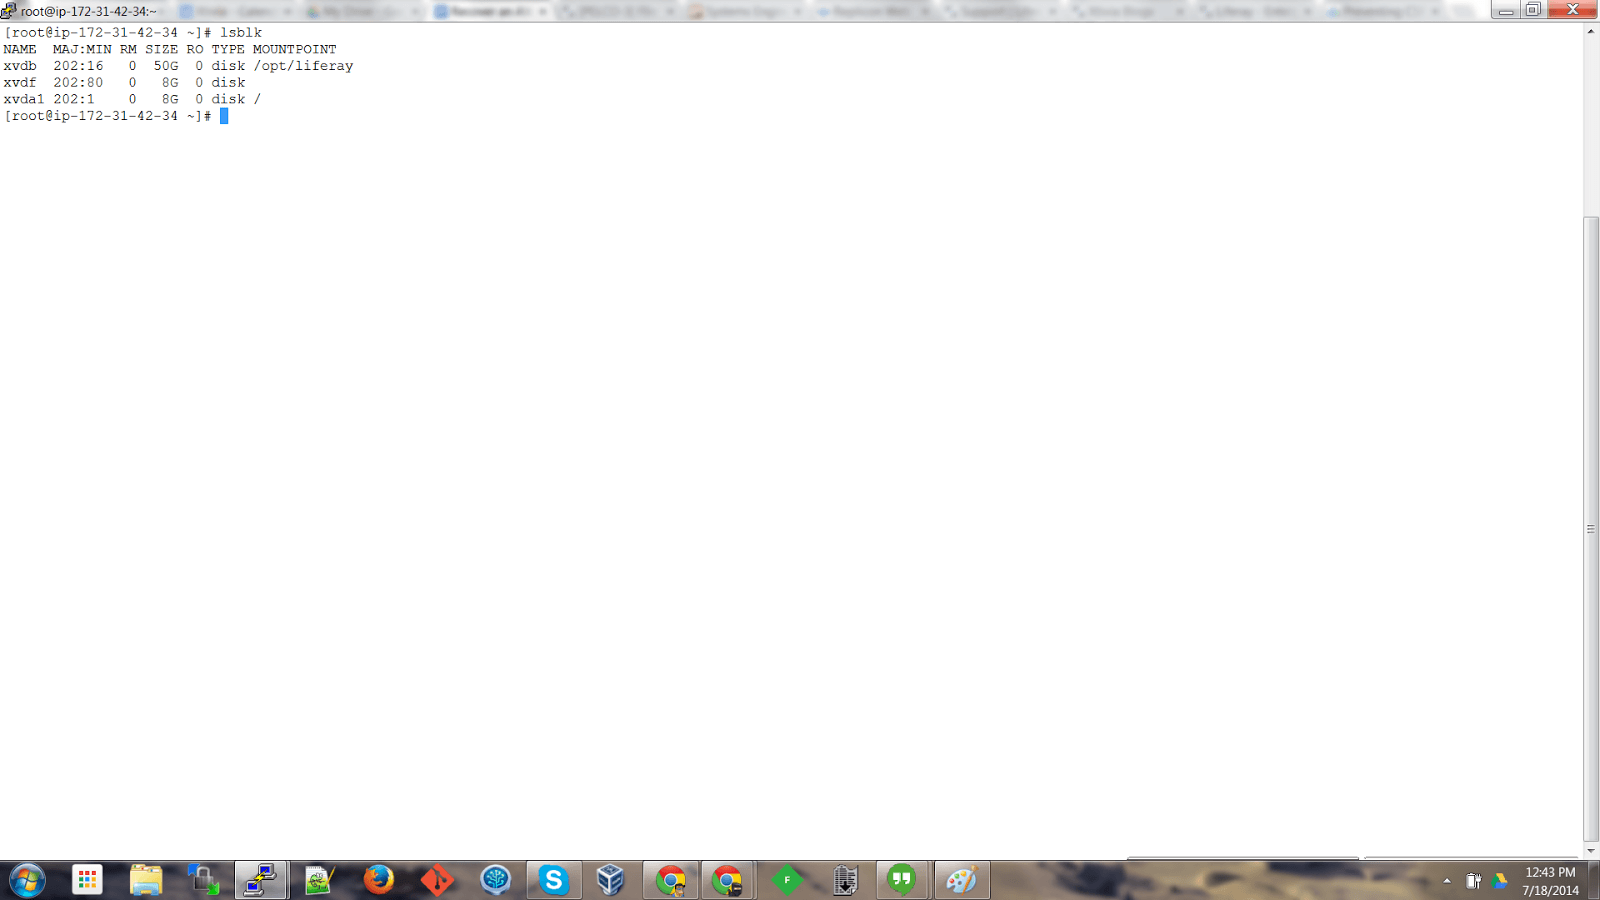
In the recovery instance, type lsblk at the prompt. You will see an instance that’s available and has not been mounted.
Next, create a directory where we will be mounting this file system. We are calling the directory “broken”.
As a next step, you have to mount the /dev/xvdf file system at the “broken” directory.
mount /dev/xvdf broken/Once the file system has been mounted, to confirm, type
df -hDoing this will list the volumes that have been mounted, for example:
Next, we will be editing the bad /etc/fstab file that’s in /root/broken

Because the highlighted mount is no longer available, we will be deleting the following line from the file.
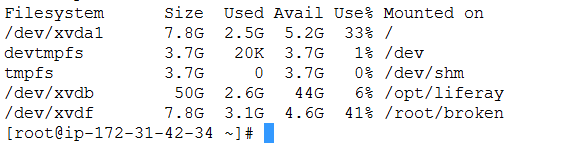
Delete the line and save the file.
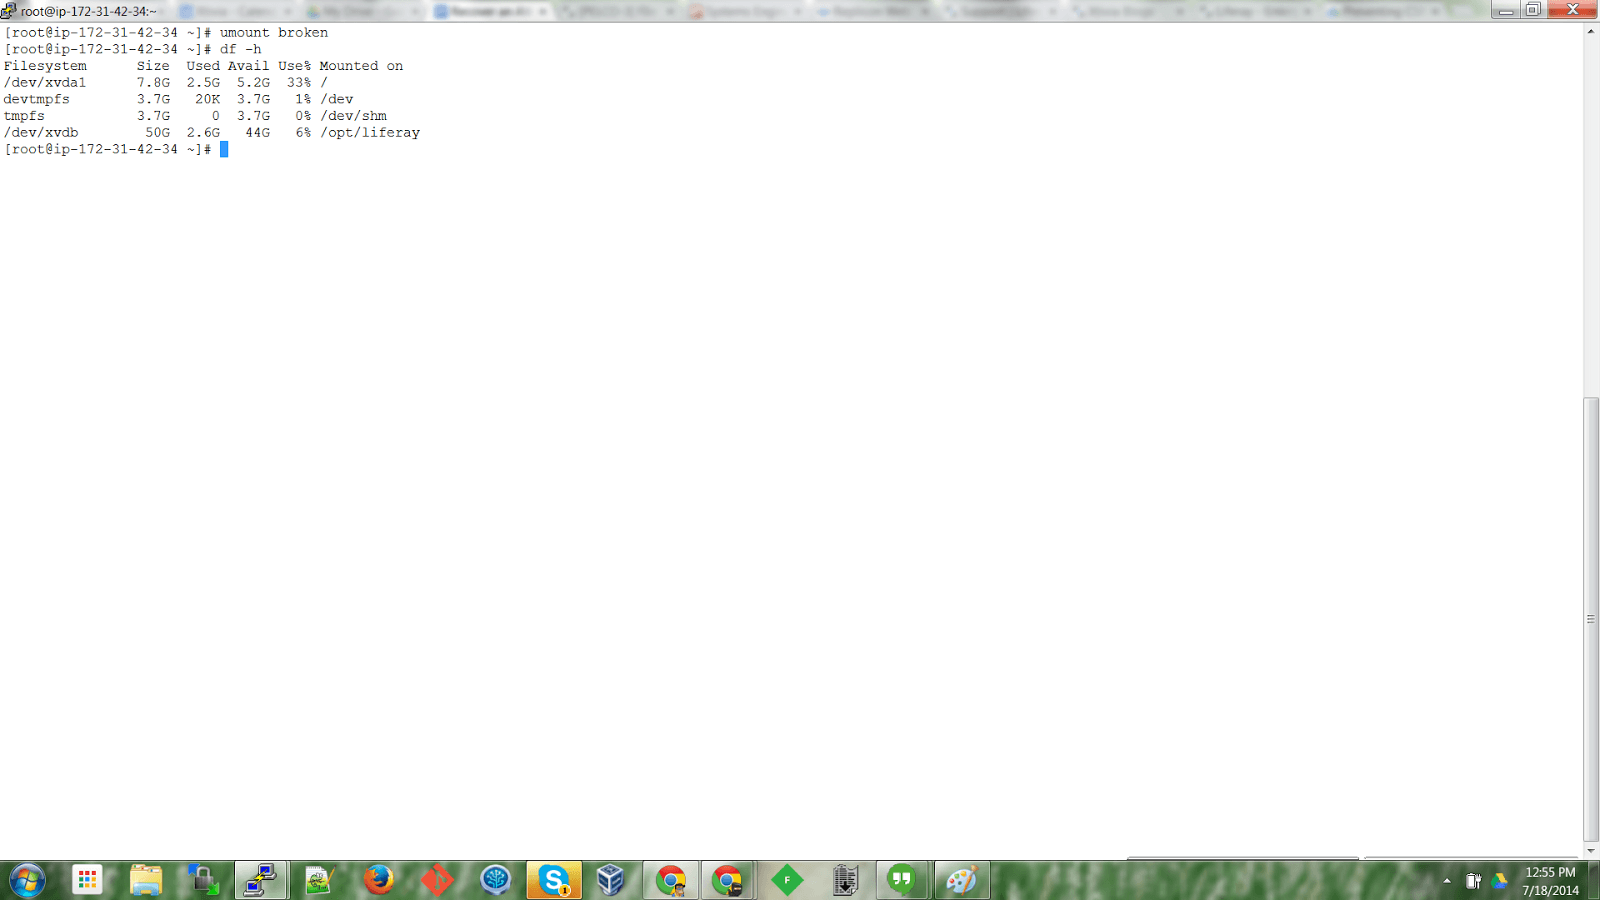
Next, it’s very important to unmount the file system to prevent file system corruption. Unmount the file system using the following command:
umount broken
To confirm, type df -h at the prompt.
As a next step, go to the AWS console, select the volume and click on Actions -> Detach Volume.
Once the volume has detached successfully from the recovery instance, it’s time to attach it back to the original server. We can now mount this volume as /dev/sda1 in the EC2-console.
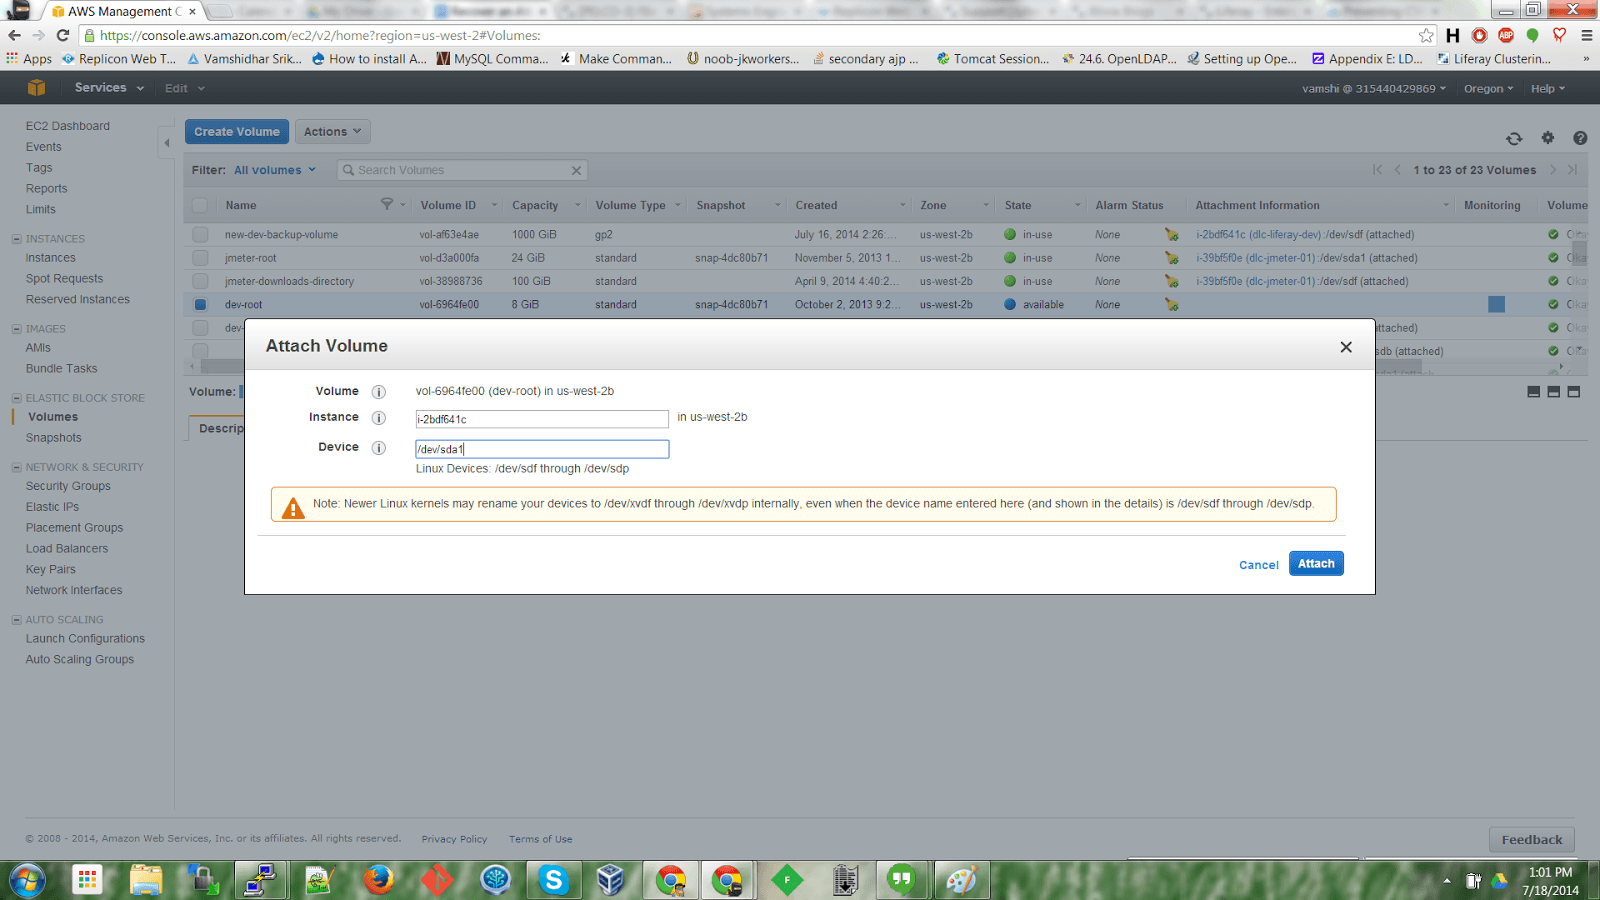
Wait until the volume is attached to the instance, go to EC2-console, and select the instance that was originally shutdown.
From the menu, select Actions -> Start to bring up the instance.

Wait for the instance to start up and login to the instance via SSH to confirm that it’s up and running with no issues.
Many thanks for help,
I had run also command “xfs_admin -U generate /dev/xvdf2” due to conflict in UUID “Filesystem has duplicate UUID” – mount wrote only error:
“sudo mount /dev/xvdf /broken
mount: /dev/xvdf is write-protected, mounting read-only
mount: unknown filesystem type ‘(null)'”
Thanks a lot for this. I had to mount /dev/xvdf1 instead of /dev/xvdf for it to work.
Great!
This helps a lot.
Thanks