Overview
This blog will explore how to automate the build and deployment of the Apigee proxy using Maven. We will also explore how to manage configuration using file system-based storage, how to effectively build configuration bundles, and how to deploy these bundles to the enterprise UI.
There are two primary methods for creating our development workspaces. The first and most widely used is the export paradigm, and the second is using a maven archetype.
Creating a Development Workspace Using the Export Paradigm
Using this method is very simple and can be outlined in these key steps:
- Create your base directory structure on your computer
- Create a new API at enterprise.apigee.com or on your management server (On-Premise Customers Only)
- Export your API
- Decompress your API Bundle
Creating a Base Directory On Your Computer
The primary reason to use the export paradigm over the Maven archetype is to gain the flexibility to create your own file structure to contain your app bundles. Because of the flexibility, we will recommend placeholders for certain items that correspond to items that you will want to have on your file system for effective management.
| Application Bundles | This area will correspond to application bundles that you create to manage APIs, or in simpler terms, “Code” |
| Environments Resources | This placeholder can store XML or JSON to create resources in an environment. i.e., Cache, VirtualHosts, KeyValueMaps, etc. |
| Documentation | We always recommend some general API documentation to live with the API configurations. |
Create a New API
Instructions for creating a new API can be found at this link:
https://cloud.google.com/apigee/docs/api-platform/get-started/create-proxy#apigee-in-cloud-console
Export Your API
Instructions for exporting your API via Apigee Management API can be found at this link:
http://apigee.com/docs/api/api_methods/105-export-an-api
Instructions for exporting your API using the UI can be found at this link:
https://cloud.google.com/apigee/docs/api-platform/fundamentals/download-api-proxies
Decompress API Bundle
The API bundle will come zipped. To achieve access to the contents, use the un-archiving utility of choice and unzip the file.
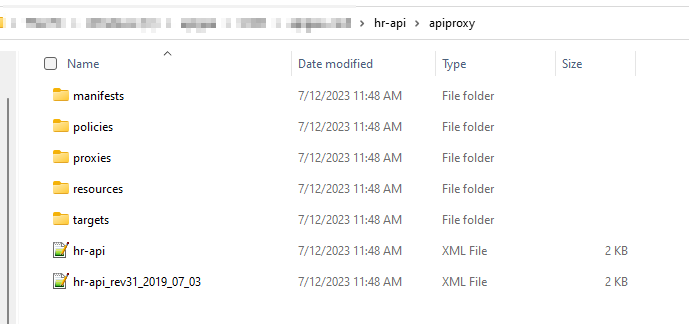
Once unzipped, you will have a folder named apiproxy. This folder contains all of the configuration for your proxy and the folder structure needed for re-importing the configuration.
The composition of the folder can be described below.
{ApiName}.xml – A file that contains descriptors for the content
policies – A folder that contains xml policies
proxies – A folder that contains information about your proxy configurations (inbound)
targets – A folder that contains information about target configurations (outbound)
resources – A folder that contains any scripts (Java, js, and python)
Note: when creating scripts, place your scripts in folders with the name of the script ext, i.e., java, jsc, py.
Building API Bundles
What Is an Apigee Bundle?
Apigee bundles are a zipped file system composed of configuration, scripts, and code. The file system, when extracted, is composed of the following structure.
|-apiproxy
|—proxies
|—policies
|—resources
|—targets
Common API Building Strategies
There are three common building strategies commonly used when doing file-system-based development. All of these processes use the same underlying method of building the bundles. The underlying method comes in the form of using a zip utility to archive the intended file system, and this would also be the first strategy.
Building Strategy – Zipping the File System
This strategy, as noted above, is the basis for subsequent strategies. A common way to zip the Apigee files system is to use a file-system console like cmd (Windows) or Terminal (Mac OSX), then traverse your files system to the folder that contains the root folder that holds your configuration, e.g.,/yourApp/apiproxy/… Note that your containing folder should be named apiproxy.
Once you’re in the folder, you can run this command zip -r nameOfApi.zip * apiproxy
This method creates a zip you can import into your Enterprise Apigee account via one of the acceptable deploy models.
Building Strategy – Maven
The Maven build strategy is a good strategy if your current enterprise build and deploy strategies already use Maven or Maven-compatible tools. Using the Apigee Maven plugin for build and deployment also gives you an extra set of configurations that you can use to change configuration elements based on where you want to deploy your Apigee bundle.
An Example Scenario would be the maven configuration file to replace the number of requests it takes to trip a spike arrest policy. In your non-production environment, you may want this policy to take effect when ten requests a minute are surpassed. In production, you may want this policy to trip when 10,000 requests a minute are surpassed.
Using the maven configuration file, you can build environment profiles, which will allow you to do xpath replacements on certain policies.
When using Maven, some files are involved that include configurations that are used by Maven and the Apigee Maven plugin.
|-apiproxy
|—proxies
|—resources
|—targets
|-pom.xml
|-config.json
POM.xml
The pom.xml file is automatically generated if you build your workspace using the maven archetype. Despite this, you will want to inspect this file to ensure completeness and accuracy (for instance, the environments are generically entered as “test” and “prod”). And if you did not use that method, don’t worry, you can still use Maven. You just need to create a couple of pom.xml files from scratch using examples in this document.
parent-pom/pom.xml example
<?xml version="1.0" encoding="UTF-8"?>
<!--
 Copyright 2023 Google LLC
 Licensed under the Apache License, Version 2.0 (the "License");
 you may not use this file except in compliance with the License.
 You may obtain a copy of the License at
      http://www.apache.org/licenses/LICENSE-2.0
 Unless required by applicable law or agreed to in writing, software
 distributed under the License is distributed on an "AS IS" BASIS,
 WITHOUT WARRANTIES OR CONDITIONS OF ANY KIND, either express or implied.
 See the License for the specific language governing permissions and
 limitations under the License.
-->
<project xmlns="http://maven.apache.org/POM/4.0.0"
    xmlns:xsi="http://www.w3.org/2001/XMLSchema-instance"
    xsi:schemaLocation="http://maven.apache.org/POM/4.0.0 http://maven.apache.org/xsd/maven-4.0.0.xsd">
    <modelVersion>4.0.0</modelVersion>
    <groupId>apigee</groupId>
    <artifactId>sample-hello-cicd</artifactId>
    <version>v1</version>
    <name>sample-hello-cicd</name>
    <packaging>pom</packaging>
    <pluginRepositories>
        <pluginRepository>
            <id>central</id>
            <name>Maven Plugin Repository</name>
            <url>https://repo1.maven.org/maven2</url>
            <layout>default</layout>
            <snapshots>
                <enabled>false</enabled>
            </snapshots>
            <releases>
                <updatePolicy>never</updatePolicy>
            </releases>
        </pluginRepository>
    </pluginRepositories>

    <properties>
        <project.build.sourceEncoding>UTF-8</project.build.sourceEncoding>
        <project.reporting.outputEncoding>UTF-8</project.reporting.outputEncoding>
        <org.slf4j.simpleLogger.defaultLogLevel>info</org.slf4j.simpleLogger.defaultLogLevel>
        <project.root.dir>${basedir}</project.root.dir>
        <target.root.dir>${basedir}/target</target.root.dir>
        <apigee.deploy.version>2.3.5</apigee.deploy.version>
    </properties>

    <profiles>
        <profile>
            <id>test</id>
            <properties>
                <apigee.profile>test</apigee.profile>
                <apigee.env>test-env</apigee.env>
                <apigee.hosturl>https://apigee.googleapis.com</apigee.hosturl>
                <apigee.apiversion>v1</apigee.apiversion>
                <apigee.org>fnicdwdemo</apigee.org>
                <apigee.options>override</apigee.options>
                <apigee.bearer>ya29.c.b0Aaekm1Kj_dOTjy08tqg3ixaZK3W6JyfVsTyjnRCqTaVTJLntgPA8wegAEX95-RDXhVztYO-xsJK7WHKK-_gKmUFklp5kyphhIA0ll0quyqMwGHccOpVvzvdyZKsMOgPH9M9sZuQYdaYRMF6iaM-F5omOtXGZ9rPq5eV_U0wGpNx2M4g4iEMkVMZKnYKSsMstPYgnGcawHfxoky0_uMWpjq7xYf6KdaNbYyG5EFxpBOqvWfPxH7TdulQiFhJxDXnE3wAIxuWrgrzkGoG9Hyl8AAQis4IXAIBAklw3O0JuAMaF0obeo5uHvJ89GFrldm0HYq6jK7_35mVhbF_hkeYE348CWrsh7zonx9-iBrJ2_QkMjXdnR4y6SS_Sy_QR7sUWolRg9oZtxo_jZS1g0-UYi493Xvm8_hze4tUak5QZl0hQmdW69p5jR8RF86Rm94Zd8lSpZl05Obmt522wQWW3hyOeM9awB7M1ayc6c0f43izOh9UhmXsV5YnVaOBg5IrwXyl6tbhIiiog2k6Bnu98qJ1cQXWZx7gYp_0iBodFnMYV_urokkpwY6_wkypp4ZeFIlx_liet9IQVSXb1ekl4_9Bgzv72kvVfYVd9Up_Za1bWO-FhQXg-et8hBlabpwg6o9b0U_dFh6MwVF2vSIrp3y94SVjU9Yx7ZhQo2F_mO__7jnyp9V9WjJYj82sz6kgsBvpuz2vn8Vh2Y5918QOxQRm-01i9Sa8Ym7qwrbmf7dox5V0v5h8J7qd4kQSBci7ImnZ1x6v_af7I4lqhXqp3YpiedJyzgb7jd8r4mZgi0B9VyZeBfZX1304W4yexfvYRig-Ikg68Ft6SBJFZiroc5Uw8t-2ln-22j91jJuqjx9BlxduMaO0ic1w-cj1y9tSd0JIOWtt-rve0YmfO4jbeUxhh_nYprR1-Fcv6ux6gxZlv8IrzehraieRZaxsQdw48fMaiiZzixrWXfrqamuJIdRXSmkmYckwtZw9xUOn45-_3rFRoFSVwUWO</apigee.bearer>
            </properties>
        </profile>
    </profiles>

    <build>
        <pluginManagement>
            <plugins>
                <plugin>
                    <groupId>io.apigee.build-tools.enterprise4g</groupId>
                    <artifactId>apigee-edge-maven-plugin</artifactId>
                    <version>${apigee.deploy.version}</version>
                </plugin>
            </plugins>
        </pluginManagement>
        <plugins>
            <!-- copy the full apiproxy folder to target folder -->
            <plugin>
                <artifactId>maven-resources-plugin</artifactId>
                <version>2.6</version>
                <executions>
                    <execution>
                        <id>copy-resources</id>
                        <phase>process-resources</phase>
                        <goals>
                            <goal>copy-resources</goal>
                        </goals>
                        <configuration>
                            <overwrite>true</overwrite>
                            <resources>
                                <resource>
                                    <!--source -->
                                    <directory>${project.root.dir}</directory>
                                    <filtering>true</filtering>
                                    <includes>
                                        <include>apiproxy/**</include>
                                    </includes>
                                </resource>
                            </resources>
                            <!--target -->
                            <outputDirectory>${target.root.dir}</outputDirectory>
                        </configuration>
                    </execution>
                </executions>
            </plugin>
            <plugin>
                <groupId>io.apigee.build-tools.enterprise4g</groupId>
                <artifactId>apigee-edge-maven-plugin</artifactId>
                <version>${apigee.deploy.version}</version>
                <executions>
                    <execution>
                        <id>configure-bundle-step</id>
                        <phase>package</phase>
                        <goals>
                            <goal>configure</goal>
                        </goals>
                    </execution>
                    <!--deploy bundle -->
                    <execution>
                        <id>deploy-bundle-step</id>
                        <phase>install</phase>
                        <goals>
                            <goal>deploy</goal>
                        </goals>
                    </execution>
                </executions>
            </plugin>
        </plugins>
    </build>

</project>
groupId element’s content should match the same element in the parent pom.xml. You can leave this asApigee for default.
artifactId element’s content should be a unique name, typically set to the folder name or the name of the API.
name element’s content should match the artifact name.
With the pom.xml files created, you only need to create a config.json file.
Config.json
The config.json acts as your build time configuration modification descriptor. The file’s root object is called configurations; configurations are an array of proxy configurations scoped to an environment. Note: it is important that the name of the configurations match the name of the profiles in the parent-pom.
For instance, in the example below, you have two configurations: one for the test profile and one for the production profile. This example also shows how you can use XPath to replace environment-specific settings.
Config.json Data Structure
- configuration – an array of API definitions
- name – Name of the maven profile
- proxies – Array of proxy definitions, directly correlates to the proxies folder in your API Bundle
- name – Name of file to configure
- tokens – Array of Actions to Invoke on Elements
- xpath – Path to element that your want to change the value of
- value – The replacement value
- policies – Array of proxy definitions, directly correlates to the policies or step definition folder in your API Bundle
- name – Name of file to configure
- tokens – Array of Actions to Invoke on Elements
- xpath – Path to element that your want to change the value of
- value – The replacement value
- targets – Array of proxy definitions, directly correlates to the proxies folder in your API Bundle
- name – Name of file to configure
- tokens – Array of Actions to Invoke on Elements
- xpath – Path to element that your want to change the value of
- value – The replacement value
config.json Example
{
"configurations":[
{
"name":"test",
"proxies":[
{
"name":"default.xml",
"tokens":[
{
"xpath":"/ProxyEndpoint/HTTPProxyConnection/BasePath",
"value":"/somepath/"
}
]
}
],
"policies":[
],
"targets":[
{
"name":"default.xml",
"tokens":[
{
"xpath":"/TargetEndpoint/HTTPTargetConnection/URL",
"value":"http://test.api.testapi.com/proxy/test/testapp.svc"
}
]
}
]
}, {
"name":"production",
"proxies":[
{
"name":"default.xml",
"tokens":[
{
"xpath":"/ProxyEndpoint/HTTPProxyConnection/BasePath",
"value":"/someProductioPpath/"
}
]
}
],
"policies":[
],
"targets":[
{
"name":"default.xml",
"tokens":[
{
"xpath":"/TargetEndpoint/HTTPTargetConnection/URL",
"value":"http://api.testapi.com/proxy/test/testapp.svc"
}
]
}
]
}
]
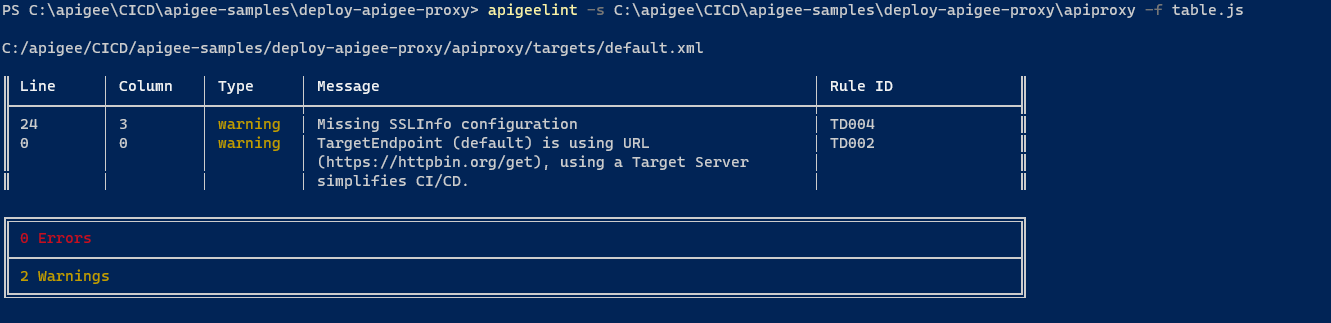
}Static Code Analysis
apigeelint -s HR-API/apiproxy/ -f codeframe.js
Deploying
1. Install gcloud by following instruction shown here:
https://cloud.google.com/sdk/docs/install
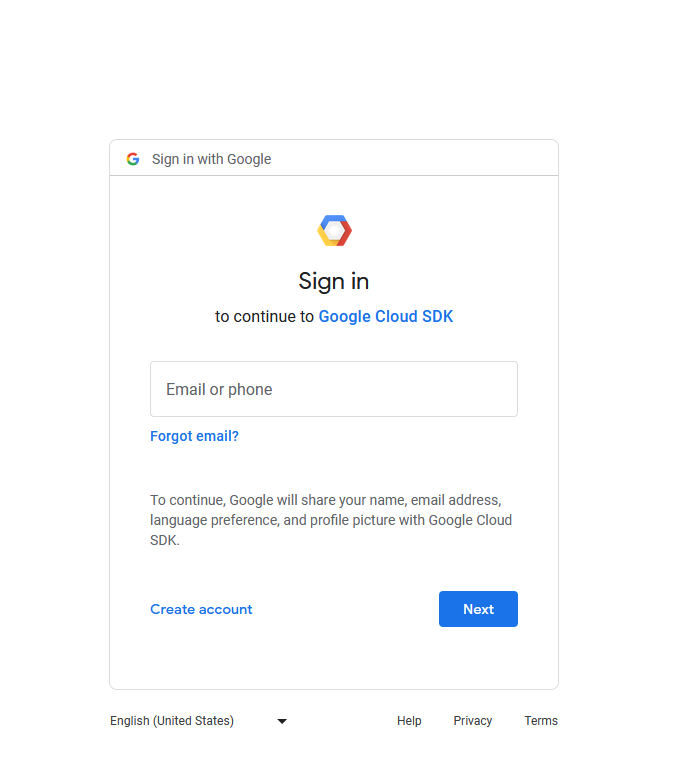
2. Authenticate : Open windows powershell
gcloud auth login

3. Set project ID:
PS C:\apigee\CICD\apigee-samples\deploy-apigee-proxy> gcloud config set project fnicdwdemo

4. Print Access Token:
PS C:\apigee\CICD\apigee-samples\deploy-apigee-proxy> gcloud auth print-access-token

5. Update POM file with the Bearer Token:
Navigate to <apigee.bearer> and replace the token

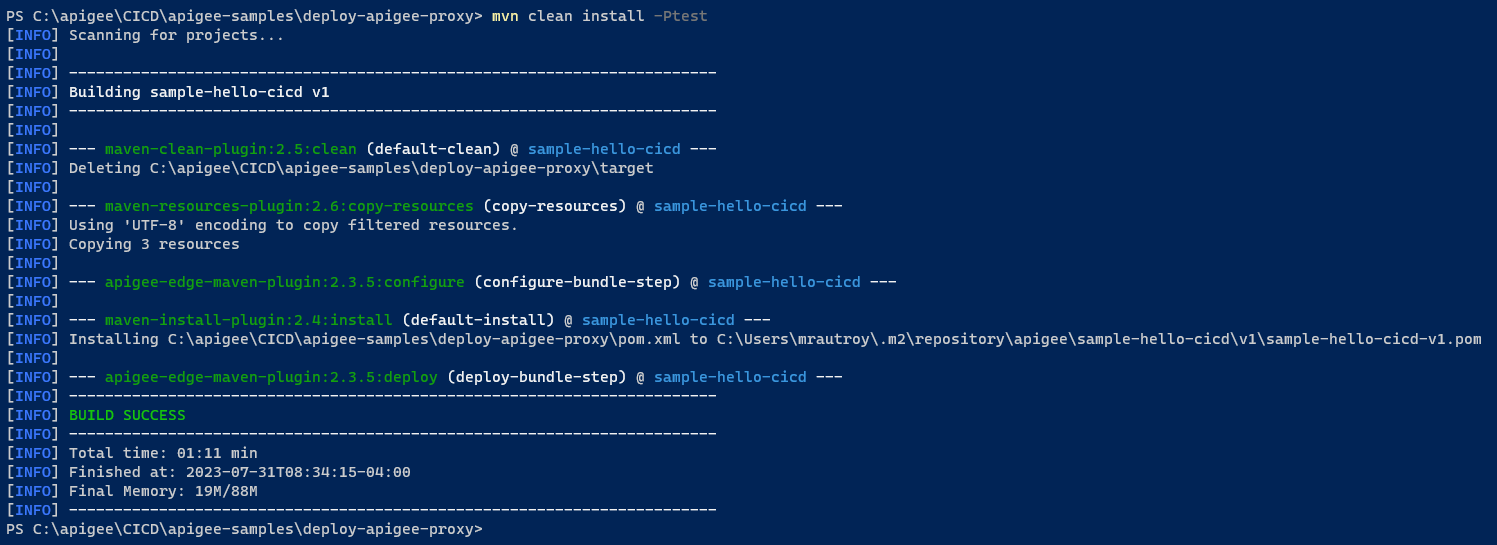
6. To deploy, run the following command line in the subdirectory of your API proxy name:
mvn install -Ptest
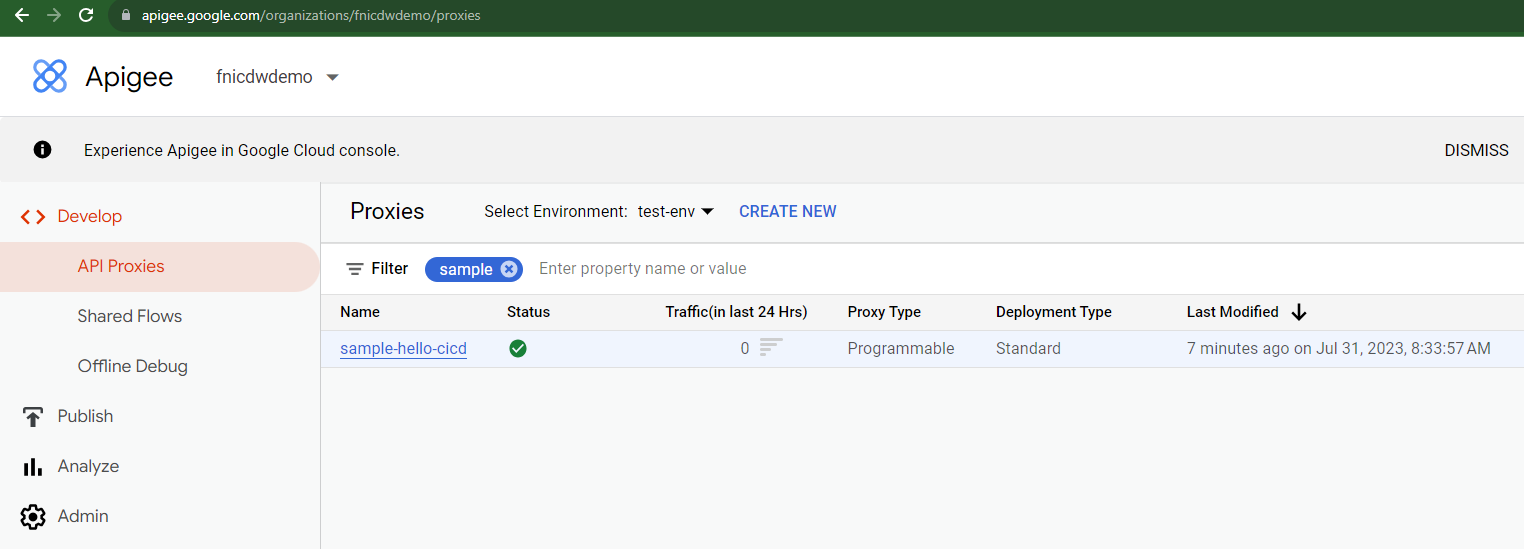
7. Open https://apigee.google.com/edge and navigate to API proxies and you will notice the Proxy just got deployed
Conclusion
In conclusion, automating the build and deployment of Apigee proxies with Maven presents a robust and efficient pathway for managing API configurations and ensuring seamless integration into CI/CD pipelines. By leveraging the flexibility of the export paradigm and the power of Maven archetypes, developers can create a structured and maintainable codebase that aligns with their organization’s operational dynamics.
For more information, please contact XTIVIA today! We can answer any of your questions.