
So, you have created your first application and now want to deploy this application to IIS. Congrats!
In this blog, I will show you a step-by-step process for deploying an application to IIS. First, what is IIS?
IIS – Internet Information Services – is a flexible web server from Microsoft that runs on Windows. It provides service requests to Web pages and applications; if you were to go to a page on a web application, IIS would accept the request and return the web response. If all goes well and there are no errors, the correct web page will be returned.
This article is a brief overview of IIS, but this blog aims to show you how to deploy an application to IIS, so let’s get started.
1. Getting Started
I have created a basic web application using ASP.NET MVC. When you are ready to deploy to IIS, you’ll want to create a deployment package in Visual Studio.
Before creating a deployment package, you must ensure your application builds with no errors. This is important because you do not want to avoid developing mistakes to be published on a live site.
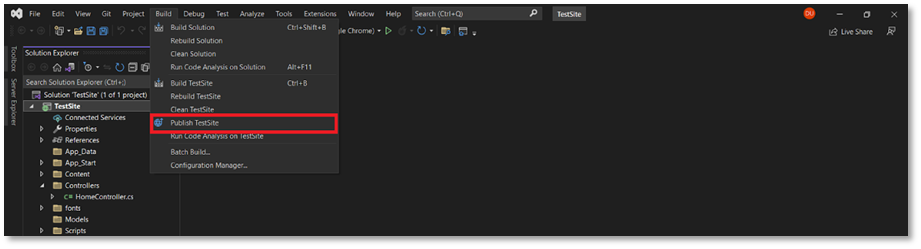
You can create a deployment package by navigating to the Build tab and selecting Publish [Your_Application_Name]. You can see below, as I have highlighted it:
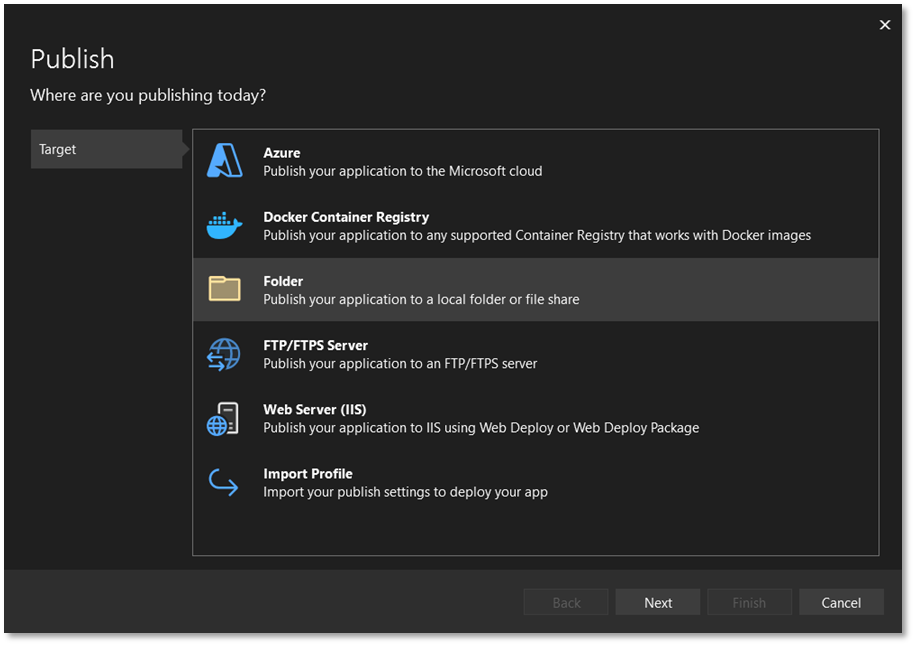
You will then see the following screen with a few options as to where you would like to publish your application:
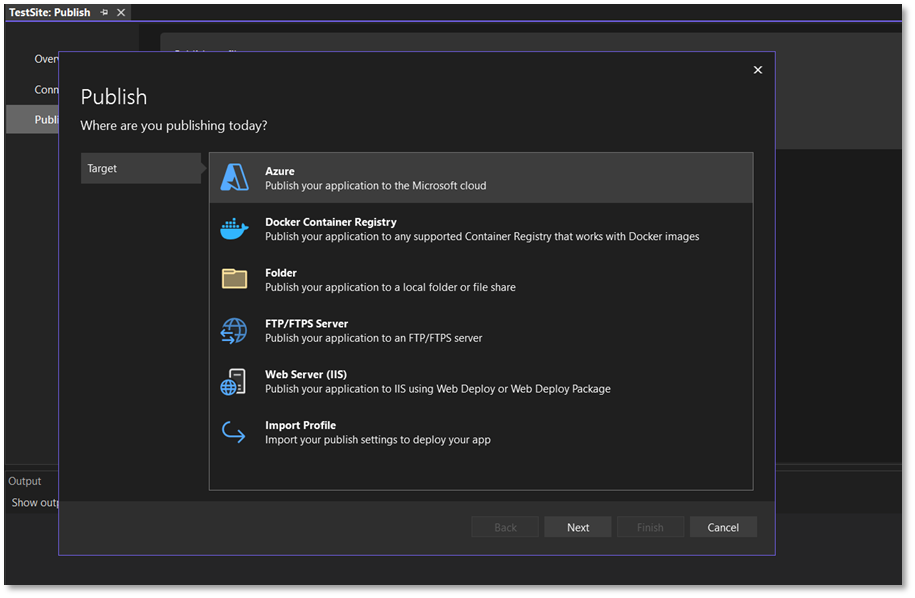
For now, we will focus on two of the above options, Folder and Web Server (IIS). First, we will focus on Web Servers (IIS).
2. Publishing To Web Server (IIS)
When shoes the option to publish directly to a web server, you will see two options:
- Web Deploy
- Web Deploy Package
We are going to focus on Web Deploy Package for now.
Select Web Deploy Package.
3. Internet Information Services
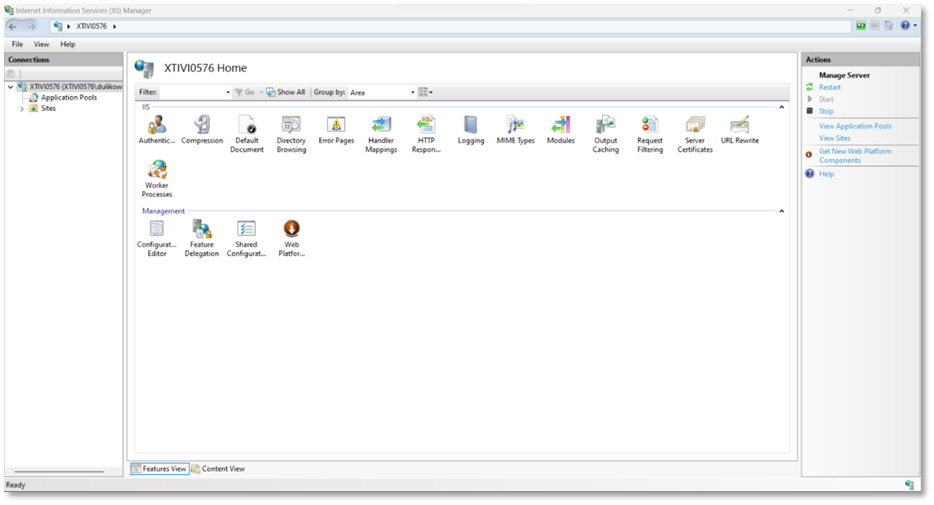
The next step will be to work inside IIS, so navigate to the Windows search bar, type IIS, and open it.
Once open, IIS will look like this:
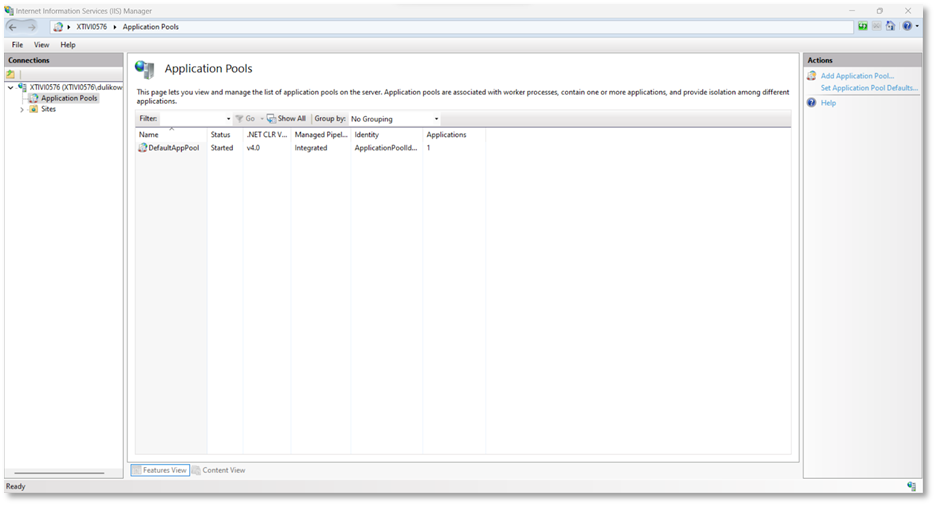
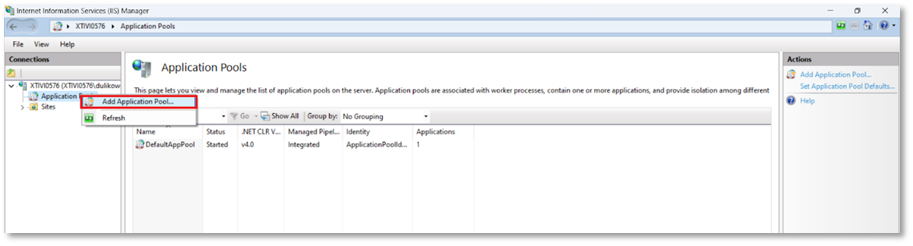
On the left-hand side, select Application Pools. Here you will see a list of all application pools under IIS. Notice there is only a DefaultAppPool, as there are no other applications deployed through IIS at this time:
We will now create an application pool for our web application for which we just made a Publish profile. To do this, right-click on Application Pools and select Add Application Pool:
Give your application pool a name. I like to name my application pools the same name I gave the site when I created the publish profile in Visual Studio.
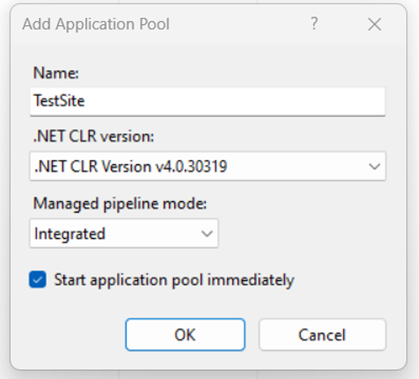
Press OK.
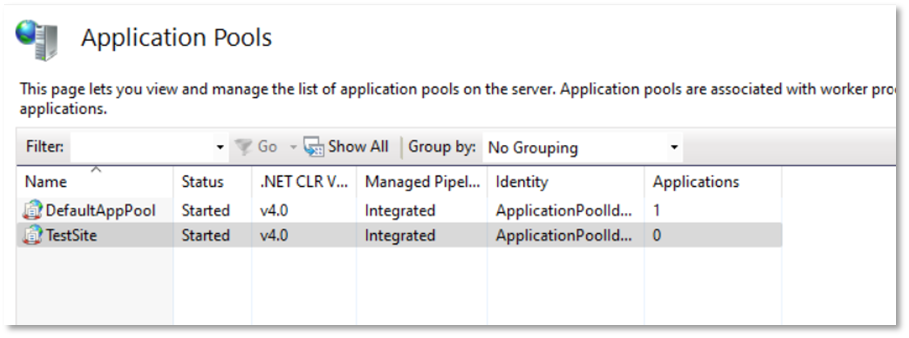
You can now see that you’ve added an application pool to the IIS Application Pools. However, the new app pool has no applications assigned to it. Notice below, under the Applications column, there are no applications assigned. This is because we have not yet added an application to this specific application pool.
4. Adding an Application
We will now add an application to the application pool that we just created.
First, expand the site Folder on the left-hand side of IIS. It is located underneath the Application Pools options:
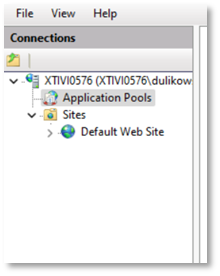
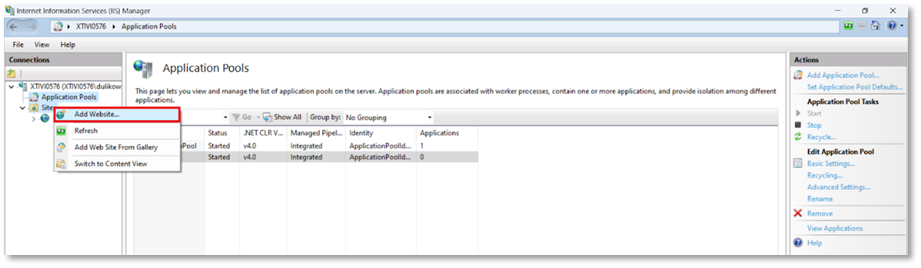
Here you will see any applications that you’ve added to IIS. There is only the Default Web Site because we have not yet added any applications to IIS.
Right-click the Sites folder and select Add Website.
Give your site a name; again, I like to name it the same as our application and application pool to avoid confusing things.
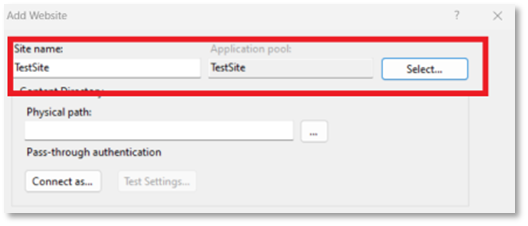
Next, click Select for the Application Pool and select the application pool you created earlier. Here is another reason I like to give my app pool and site the same name: when you need to choose the application pool for the site, you know exactly which one to select.
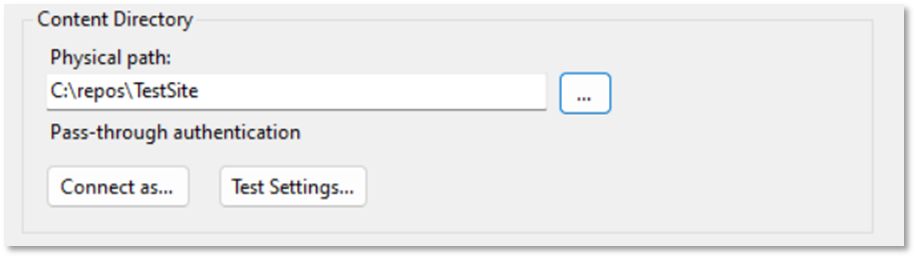
Now, select the path to where your application is stored.
As my naming conventions are all the same, I have no problem knowing which application to choose when selecting the application path.
The Physical path will tell IIS where the application is so that it can run. This should contain all aspects of the application, including all source code of the application itself, binaries, packages, and the publish profile created earlier.
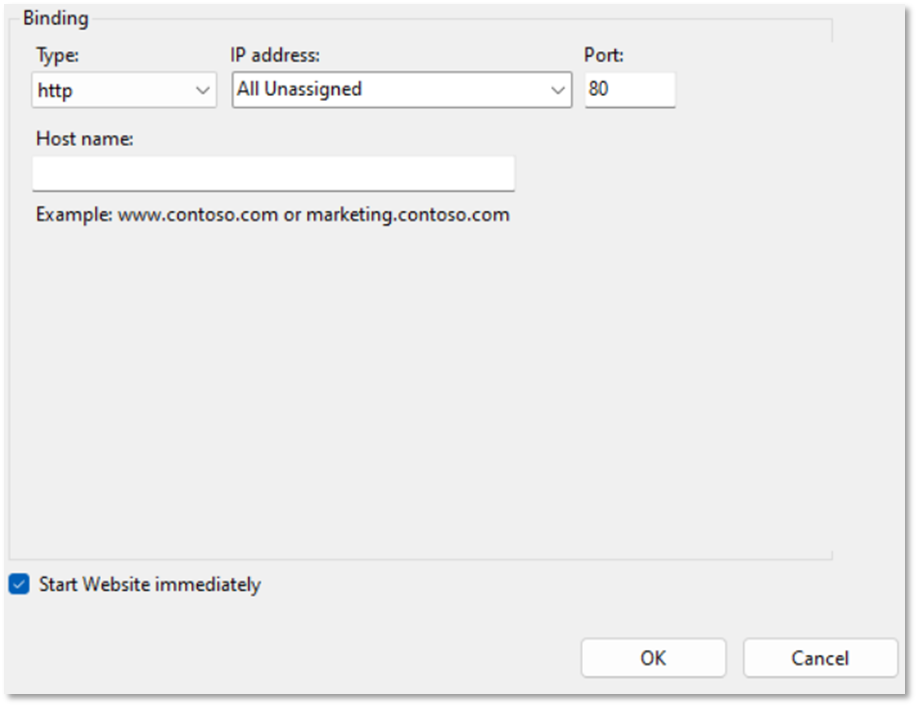
Now we will focus on the last bit of necessary information IIS needs. This is the Binding section of adding a website.
Here you will see:
- Type – HTTP or HTTPS
- IP Address – a dropdown of available IP addresses you wish to assign to your Website if you wish to post one. If you are not posting an IP address, leave it as All Unassigned.
- Port – the port you wish to assign to your Website. You can only assign one port to your Website, so note which ports are used for any application pools and websites that may already be deployed.
- Host name – this is self-explanatory and gives you an example. If you are not assigning a hostname, you can leave this blank.
- Start the Website immediately – if this is checked, as soon as you click OK, your Website will be up and running. Otherwise, you must manually start your Website by navigating to the Application Pools, right-clicking the appropriate app pool you created for this Website, and clicking the Start option.
Once you have your bindings set, click OK, and you will see that your Website is up and running!
If we look at our IIS application, we will notice a couple of things:
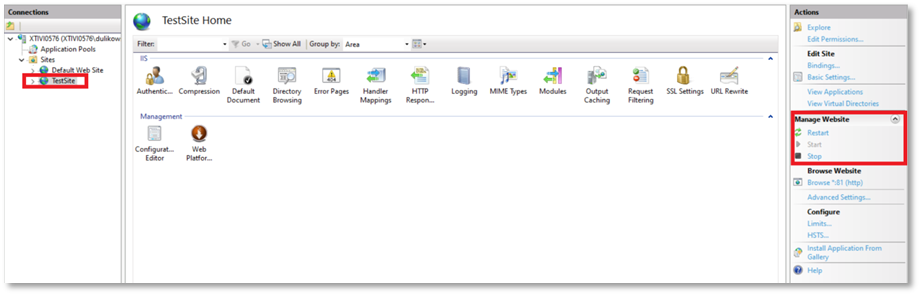
Notice that our new site is under the Sites folder on the left side. Now look over to the right-hand side under Manage Website; you’ll see options to Restart, Start, and Stop the Website.
Since we selected Start Website immediately when adding this Website to the IIS Sites, the Start option is grayed out and not accessible. This will tell us if our site is running. We could start the site here if we did not select Start Website immediately.
Let’s backtrack and learn how to create a Folder publish profile.
5. Create a Folder to Publish the Profile
I’ll now show you how to create a Folder publish profile. You might ask yourself, “Why would we want to do this if we created a publish profile under Web Server (IIS)?“
Not every application you build and want to publish will be on the same machine, let alone the same server as the IIS application you’ll be deploying the application or site to.
This is where Folder publishes profiles come in handy. For instance, say you’ve pulled a web application repository to your local machine, but you will be deploying this application to/on another server. You can’t use your local instance of IIS to deploy the application to the required server, but you can create a publish profile that will be stored on this server.
This isn’t to say you can’t use the Folder option to create a publish profile locally; you absolutely can. I prefer to do it this way since there are fewer steps than creating a publish profile for Web Server (IIS). But creating a Folder publish profile is beneficial when deploying to IIS on another server.
Using the TestSite application, I’ll show you how to create this. Follow the same steps we did for making the Web Server (IIS) publish profile – navigate to the Build tab and select Publish [Your_Application_Name] again.
This time click Folder and click Next.
You should now see the below screen:

Here you can see instructions for saving the published profile locally or on a machine on another network.
Note, though, that if you are deploying the application on another server, the application repository also needs to be on this server; otherwise, you will just be sending this publish profile there with no application to be selected in IIS when you are ready to deploy. I will ensure the Folder location is in the application repository on the server where it is being deployed to IIS.
Once you set the folder location, click Finish, and you’re done! You’ve created a Folder publish profile.
Deploying to IIS is the same as when we created the Web Server publish profile, so you can go back and follow steps 3 and 4 for the IIS deployment process.
Conclusion
First, take a second and congratulate yourself for deploying your first application to IIS. This is a big step in becoming a more complete developer. You’ll be able to take this experience into any interviews or positions you may come across, as well as able to deploy any web applications you may create on your own.
I’ve just covered the basics here, but this is the bulk of the work. Once you deploy a website, you can learn more about security settings, directory browsing, handler mappings, and any other settings under the deployed Website.
But now you can successfully create a publish profile and deploy all your hard work for the world to see and use!
Let XTIVIA help you with your MS Dynamic needs with our certified experts; we provide Microsoft consulting services – contact us today!