Setting up a lab environment on your local machine to run CockroachDB is very helpful for learning about this exciting database platform and testing applications locally. This article outlines the procedure for setting up a local installation of CockroachDB on a Windows system. It’s based on CockroachDB’s documentation but adds significant quality-of-life enhancements.
All steps are performed in a PowerShell terminal.
Steps for Installing CockroachDB 23.2.1
1. Install CockroachDB:
PS C:\> $ErrorActionPreference = "Stop"

PS C:\> [Net.ServicePointManager]::SecurityProtocol = [Net.SecurityProtocolType]::Tls12

PS C:\> $ProgressPreference = 'SilentlyContinue'

PS C:\> $null = New-Item -Type Directory -Force $env:appdata/cockroach

PS C:\> Invoke-WebRequest `
>> -Uri https://binaries.cockroachdb.com/cockroach-v23.2.1.windows-6.2-amd64.zip `
>> -OutFile cockroach.zip

PS C:\> Expand-Archive -Force -Path cockroach.zip

PS C:\> Copy-Item -Force `
>> "cockroach/cockroach-v23.2.1.windows-6.2-amd64/cockroach.exe" `
>> -Destination $env:appdata/cockroach

PS C:\> $Env:PATH += ";$env:appdata/cockroach"
2. Verify installation:
PS C:\> cockroach version
Build Tag:        v23.2.1
Build Time:       2024/02/15 22:46:32
Distribution:     CCL
Platform:         windows amd64 (x86_64-w64-mingw32)
Go Version:       go1.21.5 X:no coverage redesign
C Compiler:       gcc 6.5.0
Build Commit ID:  898cd6a363fd47bb92a03bac216f9bed0f64bc08
Build Type:       release
Enabled Assertions: false
After installation, you must add the CockroachDB path to your PowerShell profile to run Cockroach commands. This is necessary because after you spin up a local Cockroach node, you will need to use a new PowerShell terminal for all other work, and without setting the environment path, the cockroach commands will fail.
3. If the profile file does not exist, create it and add a line to append the location of the cockroach executable to your path:
PS C:\> if (!(Test-Path -Path $PROFILE)) {
>>   New-Item -ItemType File -Path $PROFILE -Force
>> }


    Directory: C:\Users\mpetros\Documents\WindowsPowerShell


Mode                LastWriteTime         Length Name
----                -------------         ------ ----
-a----        2/22/2024   8:03 AM              0 Microsoft.PowerShell_profile.ps1


PS C:\> Add-Content -Path $PROFILE '$Env:Path += ";$env:appdata/cockroach"'
This completes the steps required for installation.
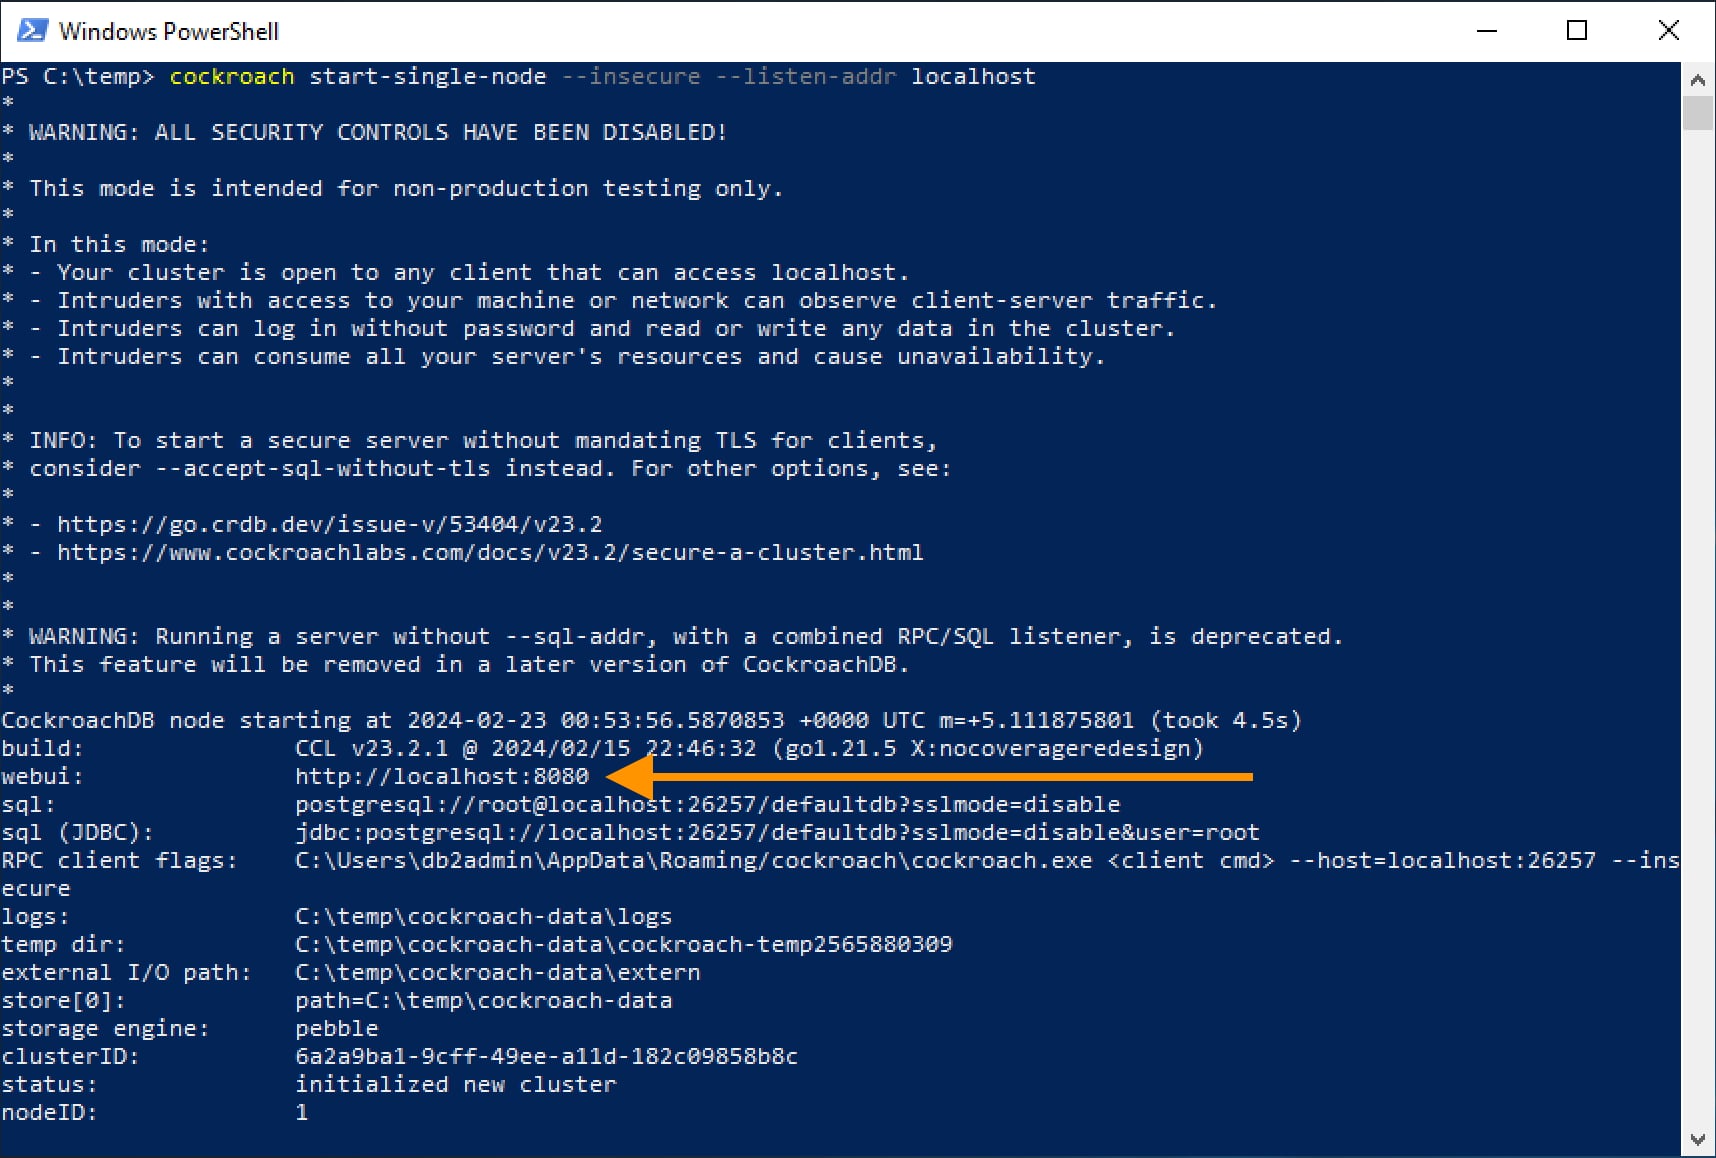
To start a single-node CockroachDB cluster:
4. Start a local single node cluster:
PS C:\> cockroach start-single-node --insecure --listen-addr localhost
*
* WARNING: ALL SECURITY CONTROLS HAVE BEEN DISABLED!
*
* This mode is intended for non-production testing only.
*
* In this mode:
* - Your cluster is open to any client that can access localhost.
* - Intruders with access to your machine or network can observe client-server traffic.
* - Intruders can log in without a password and read or write any data in the cluster.
* - Intruders can consume all your server's resources and cause unavailability.
*
*
* INFO: To start a secure server without mandating TLS for clients,
* consider --accept-sql-without-tls instead. For other options, see:
*
* - https://go.crdb.dev/issue-v/53404/v23.2
* - https://www.cockroachlabs.com/docs/v23.2/secure-a-cluster.html
*
*
* WARNING: Running a server without --sql-addr, with a combined RPC/SQL listener, is deprecated.
* This feature will be removed in a later version of CockroachDB.
*
CockroachDB node starting at 2024-02-22 16:09:49.0881121 +0000 UTC m=+5.528598401 (took 5.0s)
build:               CCL v23.2.1 @ 2024/02/15 22:46:32 (go1.21.5 X:no coverage redesign)
webui:               http://localhost:8080
sql:                 postgresql://root@localhost:26257/defaultdb?sslmode=disable
sql (JDBC):          jdbc:postgresql://localhost:26257/defaultdb?sslmode=disable&user=root
RPC client flags:    C:\Users\mpetros\AppData\Roaming/cockroach\cockroach.exe <client cmd> --host=localhost:26257 --insecure
logs:                C:\Users\mpetros\cockroach-data\logs
temp dir:            C:\Users\mpetros\cockroach-data\cockroach-temp2685956849
external I/O path:   C:\Users\mpetros\cockroach-data\extern
store[0]:            path=C:\Users\mpetros\cockroach-data
storage engine:      pebble
clusterID:           e45c29dc-d1c7-4332-83ac-6879dd264a64
status:              initialized new cluster
nodeID:              1
5. Verify that the cluster is running as expected:
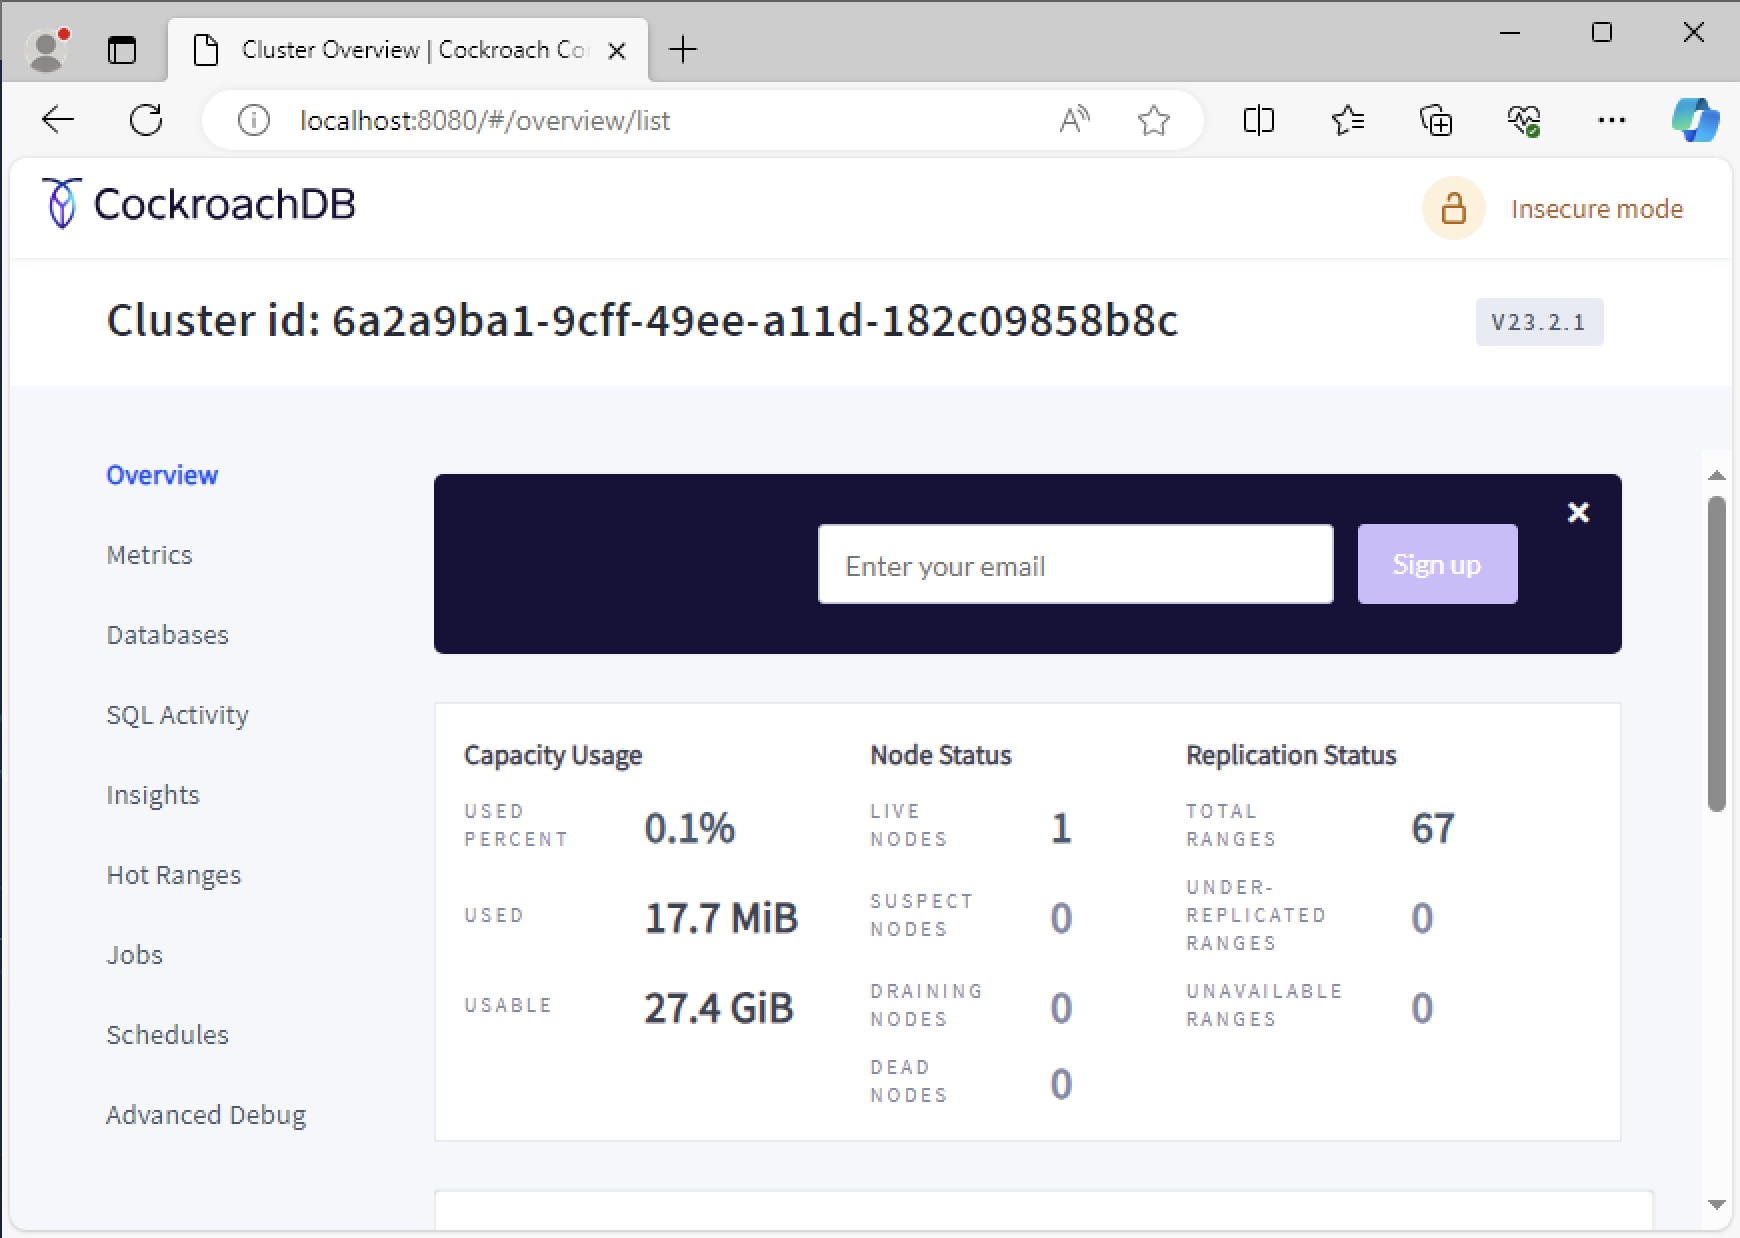
- Copy the WebUI address from the output of the previous command:
- Open a browser and paste the address. If everything worked, you should see the CockroachDB admin console.
6. To query the database, open a second PowerShell terminal and start Cockroach SQL:
PS C:\> cockroach sql --insecure
#
# Welcome to the CockroachDB SQL shell.
# All statements must be terminated by a semicolon.
# To exit, type: \q.
#
# Server version: CockroachDB CCL v23.2.1 (x86_64-w64-mingw32, built 2024/02/15 22:46:32, go1.21.5 X:nocoverageredesign) (same version as client)
# Cluster ID: b10b6a9e-7600-4ca5-bfa2-769aab09778d
#
# Enter \? for a brief introduction.
#
root@localhost:26257/defaultdb>
You are ready to run CockroachDB commands from here and learn how to do things on this exciting platform.
The official site for CockroachDB learning and knowledge can be found at: https://www.cockroachlabs.com/docs/
Conclusion
Setting up a CockroachDB lab on Windows is a straightforward process that enables you to explore and test this powerful database platform locally. Following the outlined steps, you can quickly establish a local single-node CockroachDB cluster and experiment with its features and capabilities.
For questions or more information, please get in touch with XTIVIA today!
This post was originally published here.