Session Manager is an AWS-managed service that provides users access to their instances without using a Bastion Host or opening inbound ports, such as 3389 for RDP & 22 for SSH. It can also offer access when an instance is unresponsive. There are a couple of essential things to note before enabling Session Manager.
- Internet access is required unless you have set up AWS PrivateLink.
- AWS Systems Manager Agent (SSM Agent) needs to be installed and running on the instance. The majority of AMIs available to launch instances come with it already installed. If, for some reason, your instance does not, you can install it manually for Linux or Windows.
- Session Manager is part of AWS Systems Manager, which provides a whole suite of options for managing your instances in one centralized location. Once you follow the steps to enable Session Manager, your instance will also be added to Systems Manager.
- Connections are console-based, so when a session is created, you will not see a GUI if the OS installed is GUI-based when a session is created. In those cases where the GUI is needed or preferred, there is a slightly different way to connect, but it still requires Session Manager to be set up.
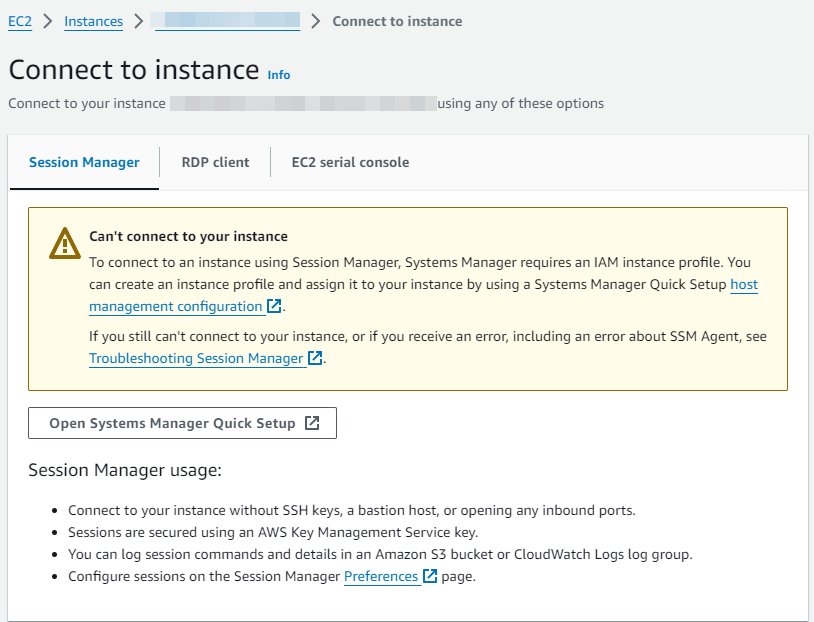
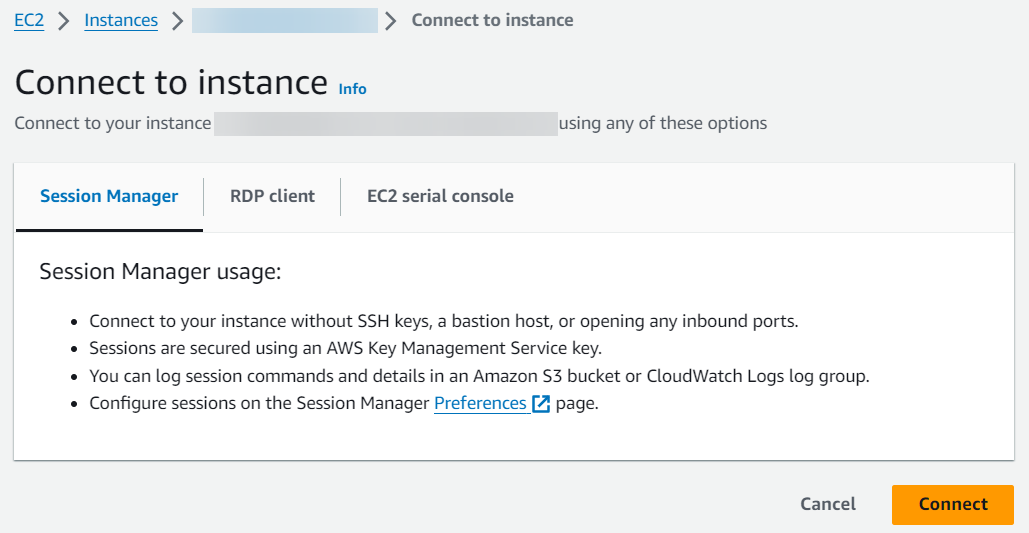
After logging into your AWS account, select an instance you want to access. Choose Connect at the top, and you will be greeted with this message. You can go through the setup by clicking “Open Systems Manager Quick Setup,” but that process will not fully set up Session Manager access and will require more steps to complete.
1.Create a Role for your instance to use Session Manager.
- Go to the Search bar at the top of the page and search for and select IAM. This brings up the Identity Access Management (IAM) page, where you can control access to your account and for your services inside of AWS.
- On the left menu, select Roles.
- Click Create role on the top right.
- Choose AWS Service for Trusted entity type.
- Select EC2 from the Use Case drop-down menu.
- Select the option for EC2 Role for AWS Systems Manager.
- Click Next on this page and the following page.
- Give your role a helpful name, such as SSMRole.
2. Attach the newly created Role to your instance(s).
- Go back to the Instances page under EC2.
- Select the instance you want to have access via Session Manager.
- Select the Actions drop-down menu and choose Security -> Modify IAM role.
- Select the IAM role you just created from the drop-down menu.
- Click Update IAM role.
3. Verify that the process is completed successfully.
- Go to the Search bar at the top of the page and search for and select Systems Manager. This brings up the Systems Manager page, which we just gave access to for each instance with the new Role added.
- On the left menu, select Fleet Manager under Node Management.
- Once your instance(s) show up here, they should be accessible via Session Manager. This could take several minutes if it has not shown up within an hour.
4. To connect to an instance with a GUI installed, you will connect through Fleet Manager.
- Go back to the Systems Manager page.
- On the left menu, select Fleet Manager under Node Management.
- Select the instance you want to connect to.
- Select the Node actions drop-down menu and choose Connect -> Connect with Remote Desktop.
- Enter your user credentials on the Remote Desktop page or provide the Key pair used to connect to your instance.
- Click Connect.
For more information or questions about our AWS-managed services, please contact us.