
SUMMARY:
This guide provides developers with a step-by-step process to embed a SharePoint document library, complete with drag-and-drop functionality, directly into a Microsoft Dynamics 365 model-driven app using the IFrameVirtualPCF component.
- First, prepare your Power Platform environment by downloading the IFrameVirtualPCF managed solution and importing it into your target environment.
- Next, create a new custom page within your Power Apps solution and add the IFrameVirtualPCF component, configuring its source property with the URL of your SharePoint folder.
- Finally, integrate the custom page into your model-driven app’s navigation so users can access the embedded SharePoint folder directly from the app interface.
Following these steps enables you to streamline document handling and significantly enhance the user experience by allowing file uploads without leaving the Dynamics 365 environment.
Table of contents
Introduction
Seamlessly integrating SharePoint document libraries into Microsoft Dynamics 365 can dramatically streamline file management processes for end users, especially in scenarios where document upload is central to business operations. While there are several Power Platform Component Framework (PCF) controls available to embed external content using <iframe>, one of the most efficient and elegant solutions for model-driven apps is IFrameVirtualPCF, developed by Greg Garcia. This is a step-by-step guide to embedding a SharePoint folder directly into a model-driven app custom page. By leveraging the IFrame Virtual PCF component, we can recreate drag-and-drop functionality in the folder. We will guide you from setup to deployment, enabling you to enhance end-user experience and streamline document handling without leaving Dynamics 365.
Introducing IFrameVirtualPCF and Its Purpose
Several PCF components enable you to embed an IFrame in a Canvas or Model-Driven App. To build a SharePoint upload page within Dynamics, I prefer the IFrame Virtual PCF.
The IFrameVirtualPCF is a lightweight and versatile Power Platform Component Framework (PCF) control that enables seamless embedding of external web content into model-driven apps. Built using React, this PCF acts as a wrapper for the standard HTML <iframe> element, making it ideal for integrating rich web-based experiences—such as SharePoint document libraries—directly within a Dataverse-powered interface.
One of its most practical applications is exposing a SharePoint upload folder inside a custom page in a model-driven app. This approach enables users to upload, view, and manage documents within the Dynamics 365 environment, thereby significantly enhancing the overall user experience.
Key features of the IFrameVirtualPCF
- Dynamic URL Integration: Accepts a configurable src property to render any embeddable web resource.
- Fullscreen Capability: Provides a full-screen toggle for enhanced usability, particularly on mobile devices or smaller screens.
- Model-Driven & Custom Page Compatibility: Optimized for use in custom pages and model-driven applications.
- Security-Compliant Embedding: Avoids issues commonly encountered with cross-domain iframe restrictions by adhering to Microsoft Power Platform policies and guidelines.
Prepare Your Environment
Before integrating the SharePoint upload folder into your model-driven app using IFrameVirtualPCF, ensure that your development environment is configured correctly. This involves downloading the component, importing it into your Power Platform environment, and enabling necessary features.
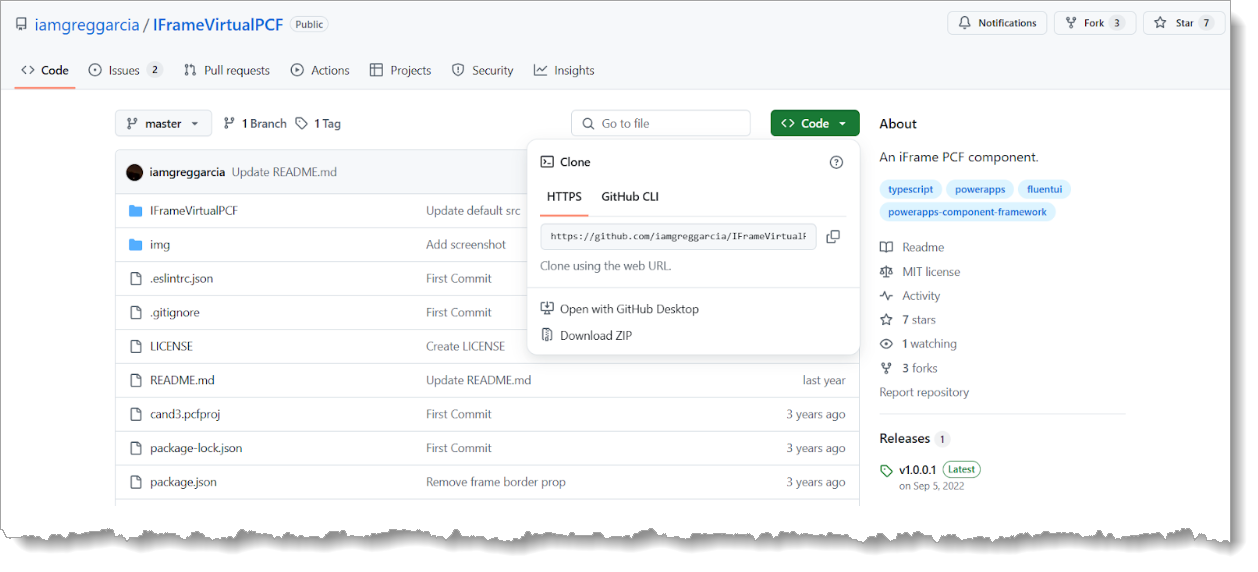
Download or Clone the PCF
You can get started by downloading the managed solution or cloning the source code of the IFrameVirtualPCF control:
- Managed Solution: Visit the PCF Gallery listing to download the ready-to-import managed solution.
- Source Code: Alternatively, access the complete source code from Greg Garcia’s GitHub repository to explore, customize, or extend the component.
Import into Power Platform
Once you have the managed solution file:
- Navigate to the Power Platform Admin Center.
- Select your target environment and go to Solutions.
- Click Import, browse for the managed solution file, and complete the import process.
This will add the IFrameVirtualPCF control to your list of available components, making it usable within custom pages and forms.
Enable PCF Code Components
For the PCF control to function correctly within your environment:
- Go to Settings in the Power Platform Admin Center.
- Open Features.
- Ensure that the “PCF code components” setting is enabled.
This feature is required to enable modern code components (such as IFrameVirtualPCF) to render correctly on model-driven and custom pages. If this setting is disabled, the control will not appear in the component library, and any custom pages referencing it may fail to load.
For more guidance, refer to Microsoft’s official documentation or community resources, such as matthewdevaney.com and pnp.github.io.
Create a Model‑Driven Custom Page
To embed your SharePoint upload experience directly into your model-driven app, begin by designing a Custom Page that will host the IFrameVirtualPCF control.
Add a Custom Page to Your Solution
- Navigate to your target solution in Power Apps Studio.
- Click + New → Page → Custom.
- Name the page (e.g., SharePointUploadsPage) and choose a layout suitable for content embedding (a single-column layout is recommended).
- Save and open the page in the designer to begin customization.
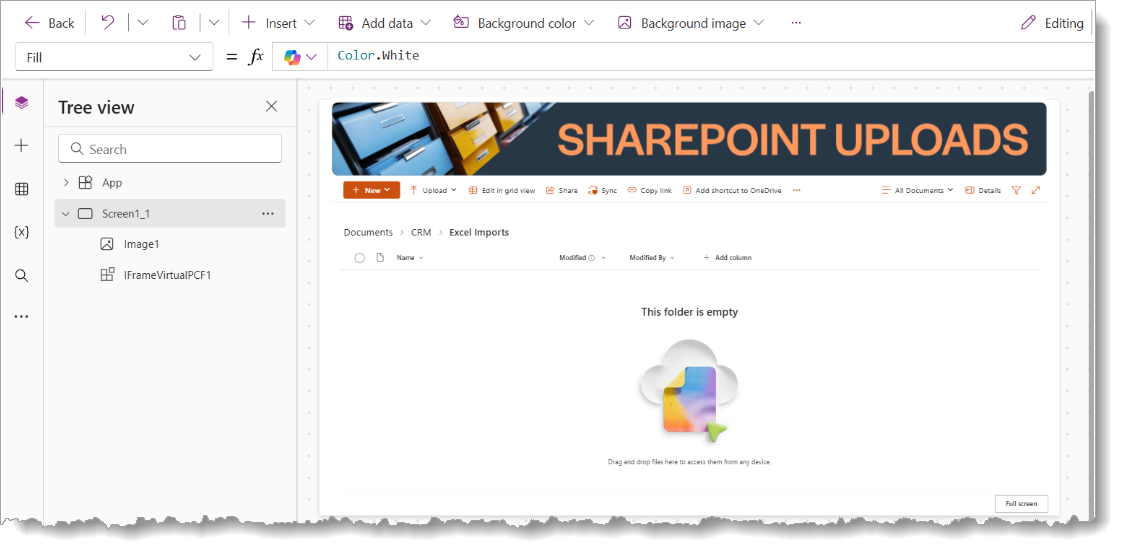
Design the Page Layout
As illustrated in the screenshot, your custom page should present a clear and functional interface. Consider these elements:
- Header Image or Branding
At the top of the page, add an Image control to visually label the section, such as a banner reading “SHAREPOINT UPLOADS”. This helps orient users and sets the context for the embedded SharePoint view. - Instructional Text (Optional)
You may optionally use Label controls above or beside the upload area to guide users. Example:
“Drag and drop your files into the section below to upload them to SharePoint.” - Embed the IFrameVirtualPCF Control
Insert the IFrameVirtualPCF component from your custom components:- Select the canvas area, click Insert → Get more components → Code, and choose IFrameVirtualPCF.
- Set its src property to the target SharePoint folder URL (e.g., a document library such as https://yourdomain.sharepoint.com/sites/CRM/Shared%20Documents/Excel%20Imports).
- Adjust the sizing and alignment as necessary to ensure the iframe content is obvious.
The result should resemble the layout in the provided screenshot, with a clean top banner, a visually embedded SharePoint folder interface, and an optional full-screen toggle for user convenience.
This design enables users to drag and drop files directly into SharePoint without needing to navigate away from the model-driven app, creating a seamless and professional user experience.
Integrate the Custom Page into Your App
Once your custom page is built and configured with the IFrameVirtualPCF control, the final step is to make it accessible within your model-driven app. This ensures that end users can navigate to the embedded SharePoint upload folder as part of their standard app experience.
Add the Custom Page to Your Model-Driven App
- Open your model-driven app using Power Apps Studio.
- In the App Designer, click on the Pages tab in the left-hand navigation.
- Select + New → Custom page, then choose the custom page you previously created (e.g., SharePointUploadsPage).
- Optionally, rename the navigation link or set a relevant icon to improve clarity for end users.
- Save your changes and click Publish to apply the update to the live app.
Accessing the SharePoint Upload Folder
After publishing, users will see the new page listed in the app’s navigation menu. Upon selecting it, they will be presented with the embedded SharePoint document library directly inside the Dynamics 365 interface, streamlining the upload experience without ever leaving the model-driven environment.
This seamless integration enhances document handling efficiency and ensures that files are properly stored and accessible within your organization’s existing SharePoint architecture.
Our certified MS Dynamics CRM experts are available to assist you. Consider XTIVIA your trusted guide during your MS Dynamics CRM implementation, and remember to inquire about our MS Dynamics CRM Admin On-Demand service.
Give us a call today!