
SUMMARY:
Organizations can eliminate manual data entry bottlenecks by leveraging the Microsoft Document Automation Toolkit—specifically Power Automate and AI Builder—to intelligently extract data from purchase order PDFs and automatically populate Dataverse tables.
- Administrators must first train a custom AI Builder model by choosing the “Fixed template documents” option, defining extraction fields (such as PO Number or Table data), and tagging sample documents to ensure high accuracy.
- The automation workflow is orchestrated by a Power Automate flow that triggers upon document receipt and uses the published AI model to process the file and retrieve specific data points.
- Complex data, such as repeating line items, is handled using “Apply to each” loops and validation conditions, ensuring that only complete and relevant data rows are inserted into the Dataverse backend.
- Once the flow is configured and tested, the system provides a seamless, low-code solution that significantly reduces administrative overhead and frees teams to focus on high-value tasks.
Partnering with experts like XTIVIA allows businesses to scale these custom automation strategies across various departments, unlocking the full potential of the Microsoft Power Platform.
Table of contents
The Tools: Microsoft Document Automation Toolkit
Microsoft’s Document Automation Toolkit offers a straightforward way to implement a comprehensive and robust document processing solution, leveraging the capabilities of AI Builder, Power Automate, Power Apps, and Microsoft Dataverse.
- Power Automate: a tool designed to facilitate automated workflows between various applications and services. It handles tasks such as file synchronization, notification management, and data retrieval, and can connect to other Power Platform tools and a multitude of external services. Its primary function is to streamline repetitive tasks and optimize business processes, all without needing extensive coding expertise.
- AI Builder: a Power Platform tool that allows users to add AI capabilities to their business applications and processes, even without extensive coding or data science knowledge. It provides pre-built AI models and options for custom model creation for tasks such as form processing, object detection, text recognition, and prediction, enabling automation and enhanced decision-making within Power Apps and Power Automate.
The solution leverages a combination of Microsoft Power Platform components to automate the process. Power Automate will be responsible for orchestrating the entire workflow. AI Builder provides the necessary intelligence to extract information from documents efficiently. Dataverse serves as the central data management system, handling the document queue, storing all data, files, and configuration details. Finally, Power Apps enables users to perform manual review and approval of the documents.
Now, let’s dive into a tutorial showing you exactly how to implement this solution!
Microsoft AI Builder: Creating an AI Model
First, we will create an AI model to extract the relevant data from our PDFs. On the Power Automate dashboard, we go to the AI Hub tab, click the AI Models button, and select the “Extract custom information from documents” option to start training a new model.
We are guided through the steps of creating our document processing AI model.
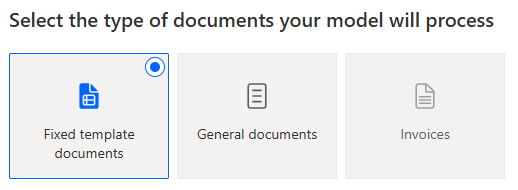
1. Choose document type: We pick the “Fixed template documents” option because we’re expecting documents with similar structure and data.
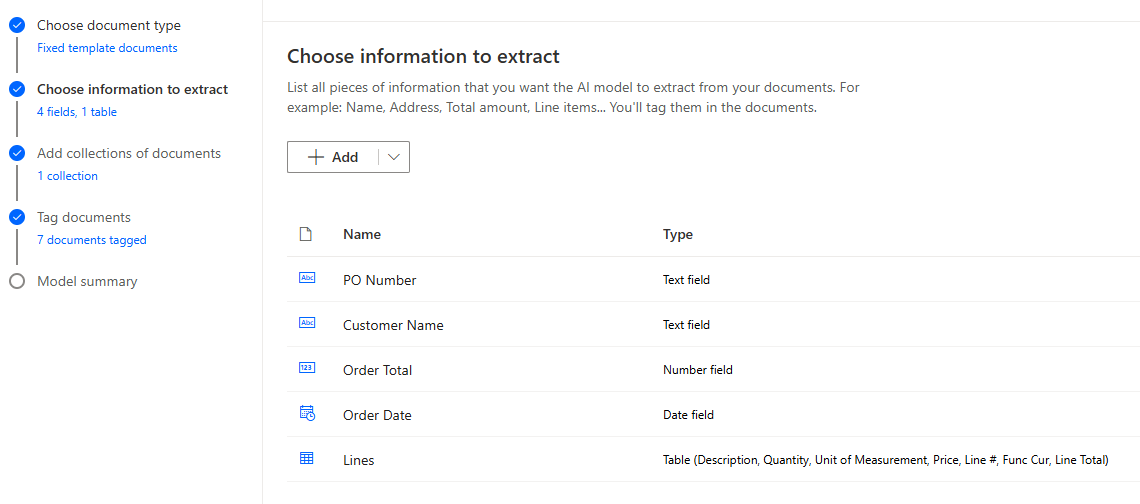
2. Choose information to extract: We select the data points from all database tables & columns we want to populate, such as PO Number, Order Date, Customer, Shipping Address, etc. For the line items, we define a Table data type: a collection of repeating rows and columns that the model will recognize as a list.
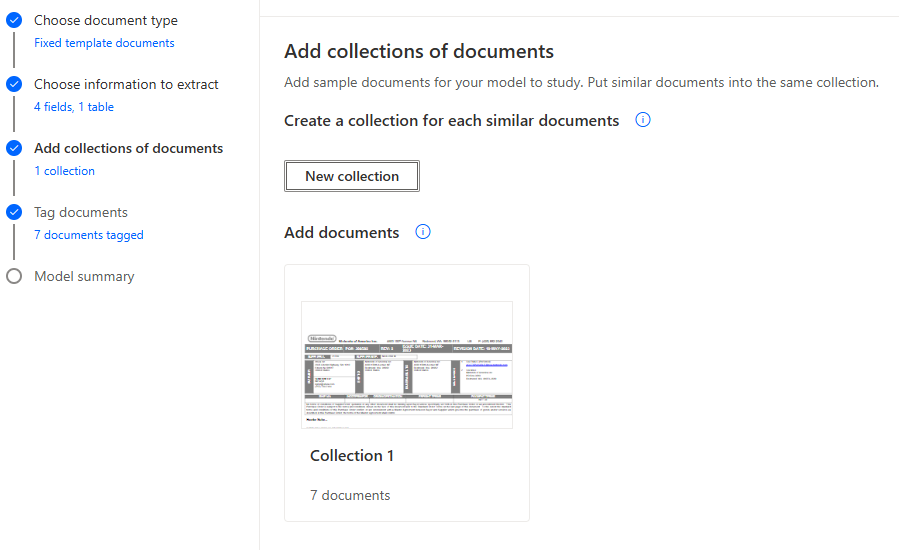
3. Add collections of documents: This is where we upload the documents we’ll use to train the model. We can add multiple collections for different PO formats, but today we are only looking at one format, so we only need one collection. There is a minimum of 5 documents per collection, but the more documents you supply for training, the more accurate your model will be.
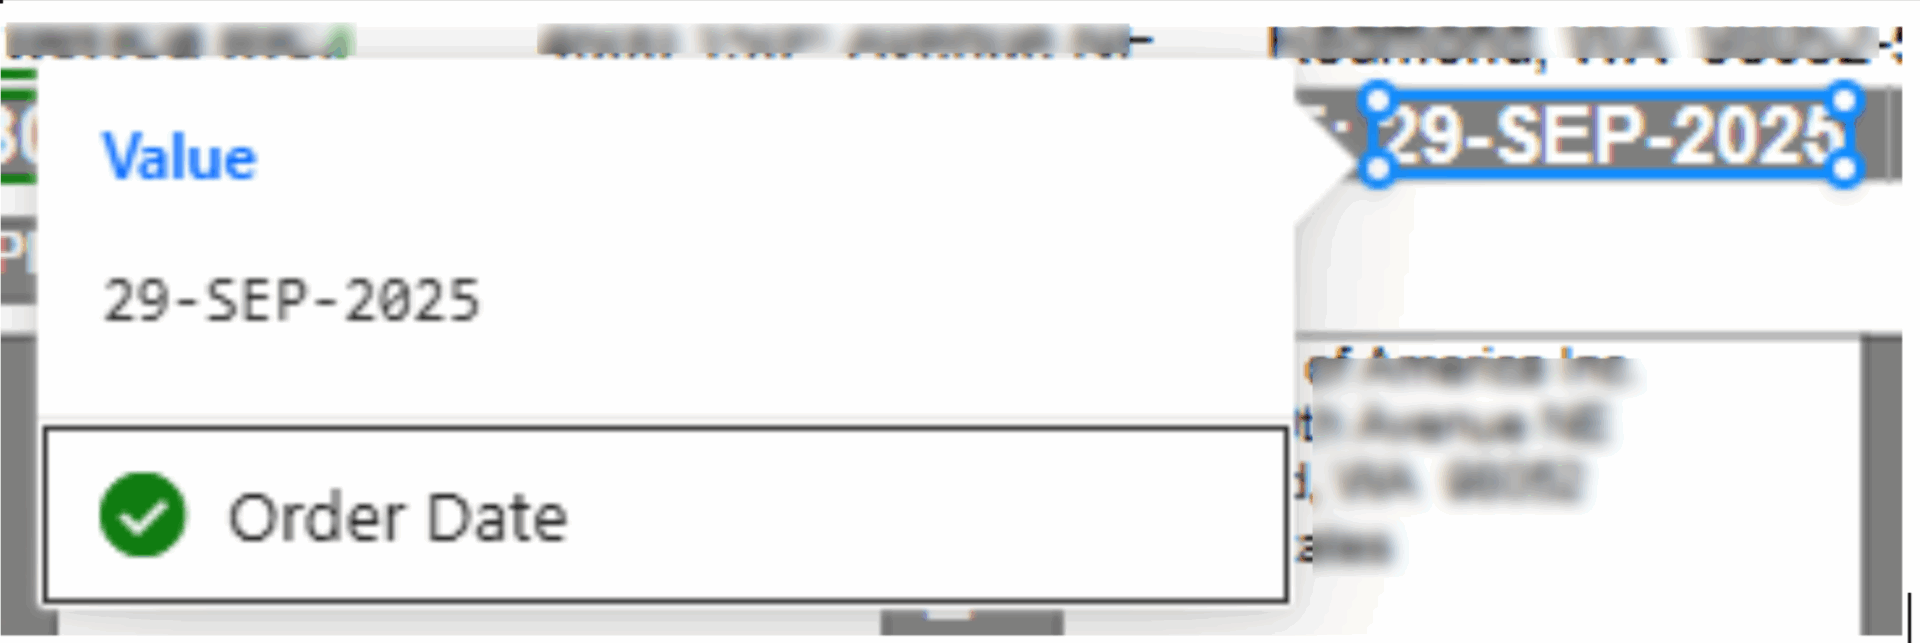
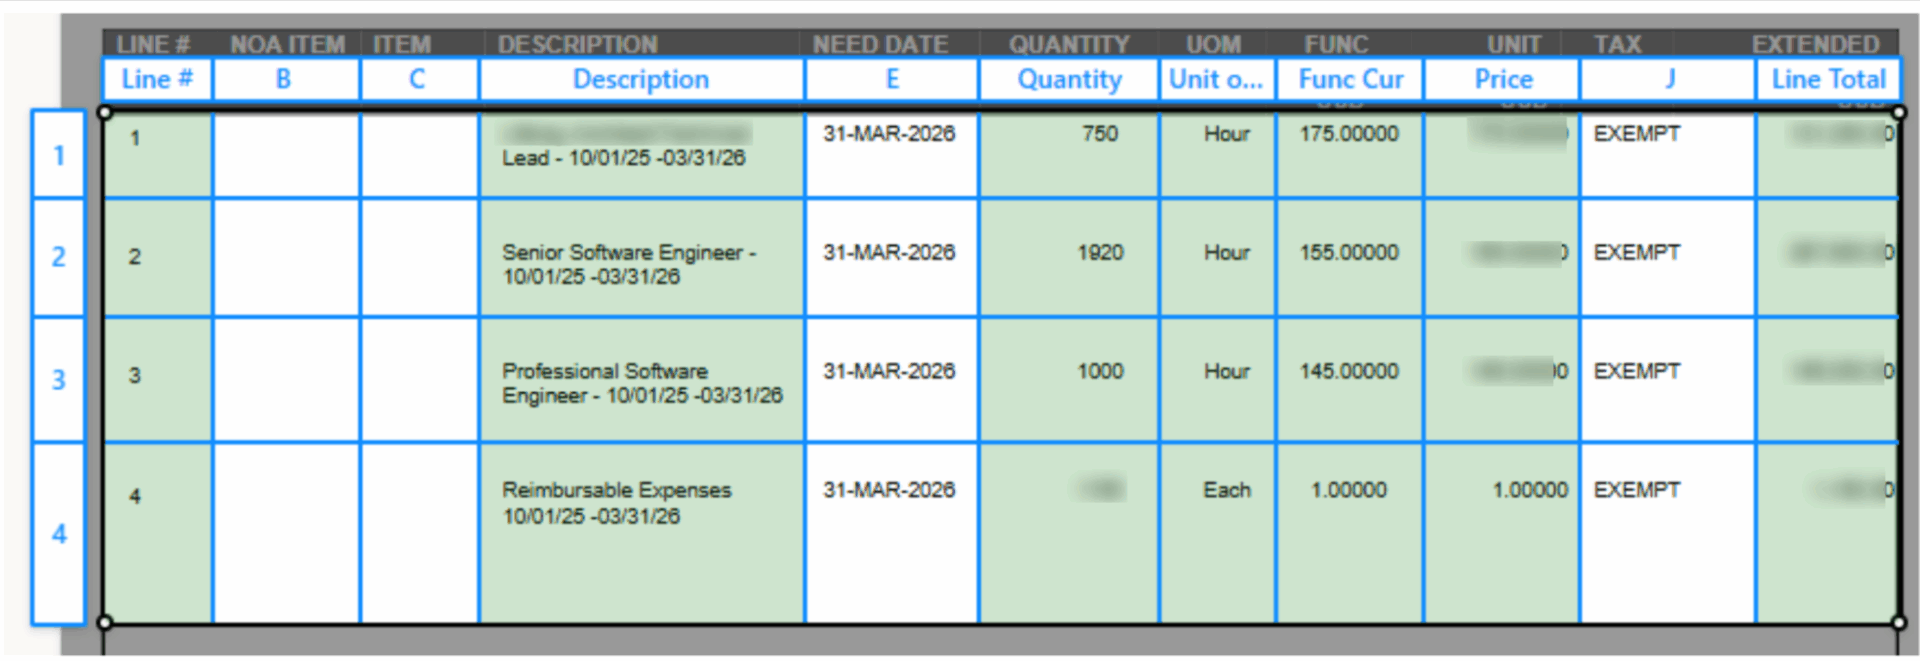
4. Tag documents: This is where we match document sections to our data points. For the repeating line items, we divide the lines on the PO into columns and rows to tag the data for each one.
5. Model summary: We get an overview of the model and are alerted to any potential issues. If everything looks good, we can now train the model.
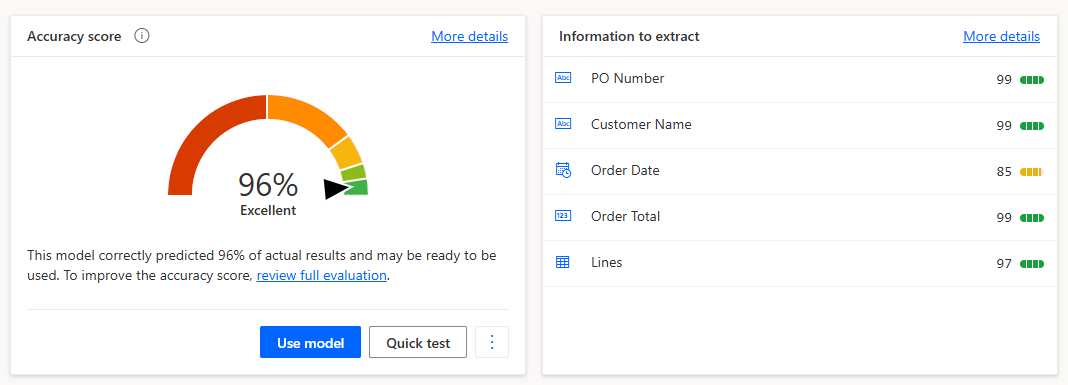
Once it’s finished training, we can see the overall accuracy score and scores for individual data points. We can also do a quick test. Then, once we’re confirmed it’s working and the accuracy is acceptable, we publish the model so it can be used in our Power Automate flow.
Building the Power Automate Flow
Now we can set up our Power Automate flow to make use of our AI model and add rows to Dataverse tables. We have a PurchaseOrder table and a PurchaseOrderLines table. We’re using an instant cloud flow with a manual trigger to keep things simple, but we could also set up an automated flow that pulls documents from an email inbox, a SharePoint folder, or any number of sources. We will add the following steps:
1. Manually trigger a flow: Because it’s a manual flow, this step is added out of the box. We add a file input to our manual trigger.

2. Process documents (AI Builder): Here, we make use of our AI model to process the document uploaded in the first step.

3. Add a new row (Dataverse): We will add a row to our PurchaseOrder Dataverse table. We get Customer Name, Order Date, PO Number, and Total from the results of our process documents step, and use these fields to create the row.

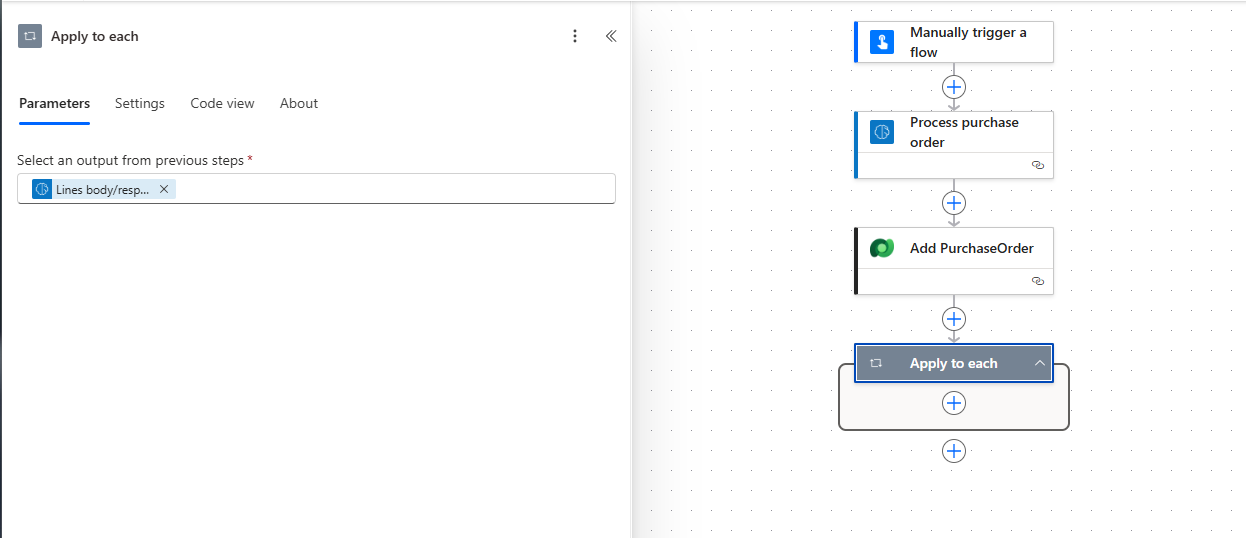
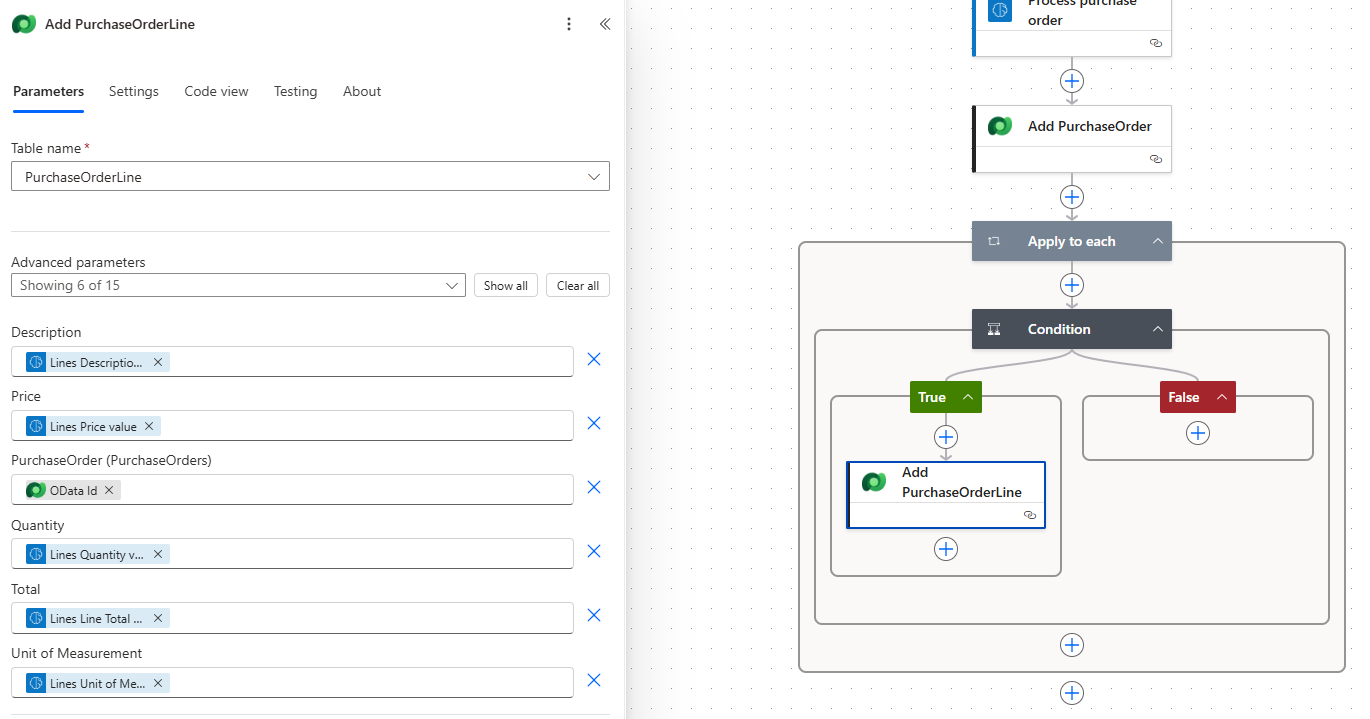
4. Apply to each: Creating PurchaseOrderLine rows for each row in our document is a little more complicated. We will need to add an Apply to each control step, and set it to loop over the Lines table items.
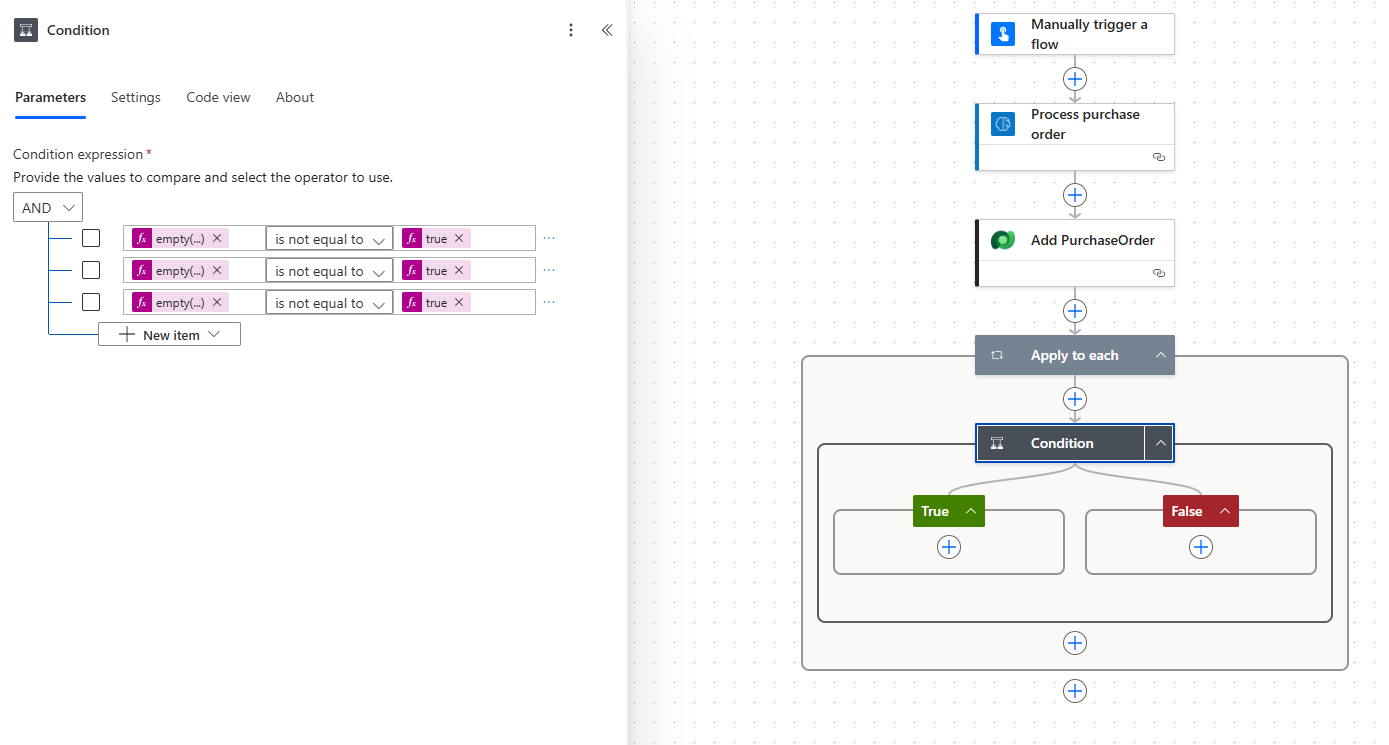
5. Condition: Here, we can do a little data validation. Some of our POs may have additional information between line items that is not relevant, but our AI model will interpret it as a row with missing data points. We want to disregard these rows, so we add a Condition step to check that the data we need is present. If it is, we move on to the next step; if not, the iteration will terminate.
6. Add a new row (Dataverse): The final step in the Apply to each loop is to add a row to our PurchaseOrderLine table. We pull the Description, Price, Quantity, Unit of Measurement, and Line Total from the current line in the Process documents output. We get the ID of the related PurchaseOrder from the output of the Create PO step.
Now we can save our flow and test. We upload a PO PDF and run the test. We can see the flow in action, and once it’s done, we can see the outputs of each step and make sure there were no errors. To confirm that everything worked, we can check our Dataverse tables to see that they are updated with all the correct data from the PDF.
Conclusion
And there we have it! With just a few straightforward processes, we’ve successfully streamlined a highly repetitive data entry task. These Power Platform tools enabled us to build an intelligent, custom automation solution using a low-code approach, freeing up our team to focus on more valuable work.
Ready to Transform Your Business Processes?
The Microsoft Document Automation toolkit, leveraging Power Platform tools like Power Automate and AI Builder, provides a low-code path to solving repetitive data-entry challenges, as you’ve seen in this Purchase Order example.
Don’t let manual document processing hold your company back. XTIVIA can help you unlock the full potential of these intelligent automation solutions across various departments, from Sales to Operations, HR to Finance, and more.
Partner with XTIVIA to design and implement a custom automation strategy that streamlines your operations and frees your team to focus on high-value work.
Contact us today to start your automation journey!
This post was originally published here.