
SUMMARY:
This guide provides a step-by-step process for developers on how to use Python’s FastAPI framework to build an API that connects to and interacts with an OpenAI chatbot
- Begin by installing the necessary prerequisites, including Python, FastAPI, Uvicorn, and the OpenAI Python package.
- Structure your application by creating separate Python files to handle the API endpoints and the logic for communicating with the OpenAI service.
- Implement the core function that calls the OpenAI API.
- Run the application with the Uvicorn server and test the connection by sending requests through an interface like Postman to receive responses from the chatbot.
The role of Artificial Intelligence in our daily lives is increasing day by day. By leveraging AI, we can implement smart assistants in our application as needed.
Table of contents
Here is the step-by-step guide to know how to connect and interact with Chatbot (using OpenAI) from FastAPI.
Prerequisites
- Python
- OpenAI Python package
- OpenAI API key
- FastAPI
- UVICORN
Step 1: Download and Install
- Download and install Python and pip with the latest versions.
- Install the Python prerequisites packages.
- Install the packages by using pip (package management tool for Python)

FastAPI -> Here FastAPI is the Python web framework to build the REST API.
Uvicorn -> This is a lightweight ASGI (Asynchronous Server Gateway Interface) server that integrates with FastAPI.
If packages are already available, then you will get this message below; otherwise, they will be installed.
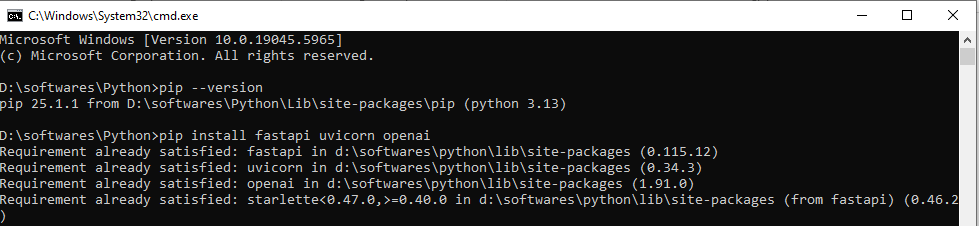
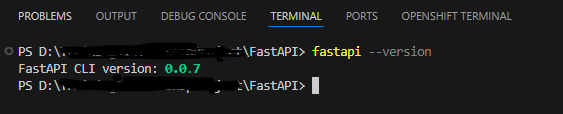
To verify FastAPI and Uvicorn versions are installed successfully, we can use the commands below.

Step 2: Connect with API
To connect with OpenAI, signup and get the API KEY from this https://platform.openai.com/api-keys url.
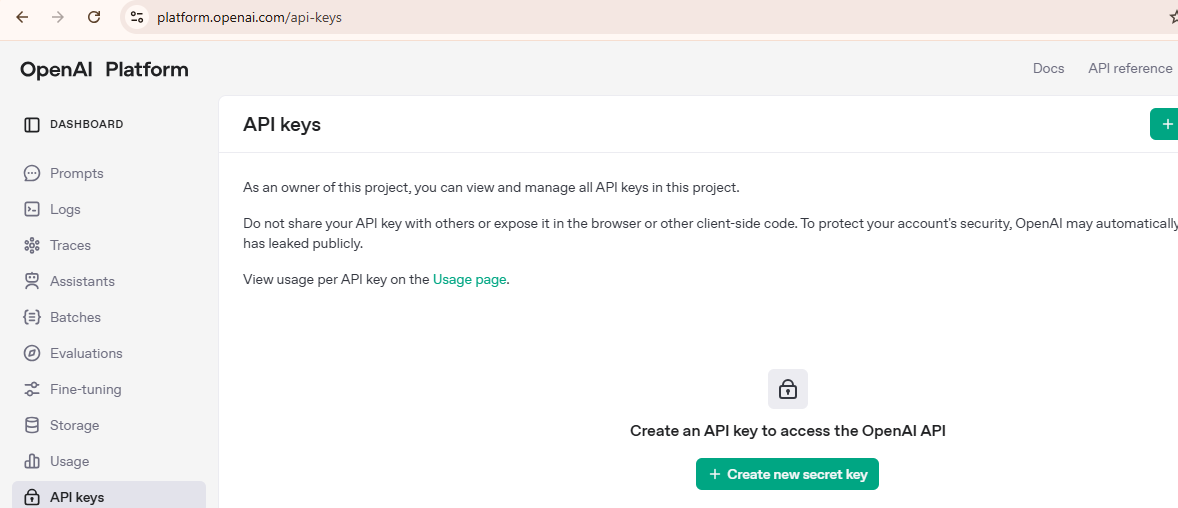
Click on the “Create new secret key” button.

Enter the name if needed; otherwise, the default will be “My Test Key”, and click on the “Create secret key” button.
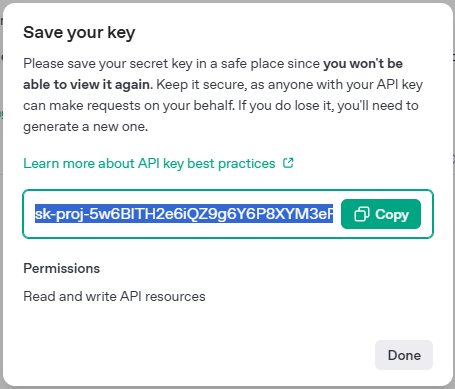
Copy the above key created. And create a dot environment file and include this key.

Step 3: Open an Editor
Open a VS Code editor or any other editor. Create a folder called “FastAPI”.
Or a name you prefer. Create the Python class file. “main.py”
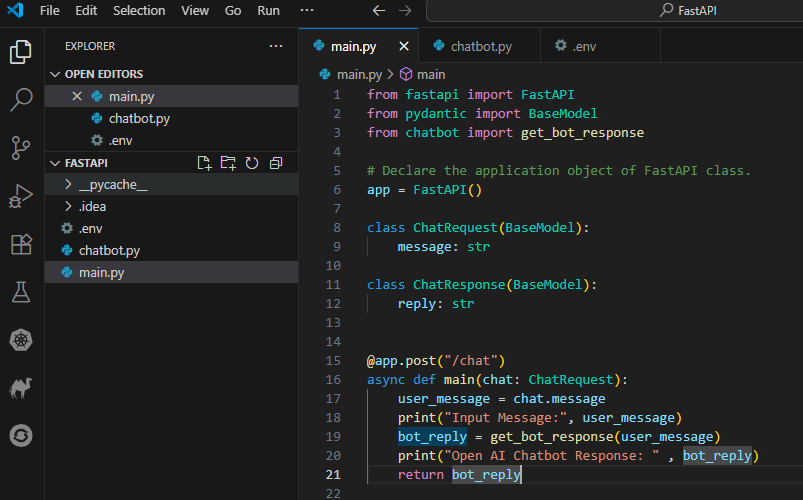
In this class, import the required packages. Initialize the FastAPI instance “app” as mentioned in the above code line# 6. And declare the ChatRequest class with a message variable of string type. Also, declare the ChatResponse class with a reply variable of string type.
A main() function will have the input parameter of ChatRequest type to capture the user input message.
This function will have an annotation with “POST” HTTP method and path as “/chat”.
This function will call the get_bot_response() method with the user_input parameter.
And the print() method to print the message on the terminal console. And return a response.
Now, create another Python class called “chatbot.py”.

In this class, load the environment file (“.env”), which was created in Step 2 by importing load_dotenv from dotenv and invoking the load_dotenv() method.
And initialize the OpenAI API key as mentioned above in the code.
The get_bot_response() function will have the code to connect to OpenAI using the client.chat.completion.create() function. The required OpenAI model needs to be initialized, and user input messages will be passed as a messages array with role as “user” and content as user_input as create () method arguments. This function will be surrounded by a try block to throw errors in case of any exceptions. On successful connection, the response from Chatbot (OpenAI) will be returned. Otherwise, the exception will be thrown.
An OpenAI response will be returned from this class to the main.py class.
Step 4: Execute the Application
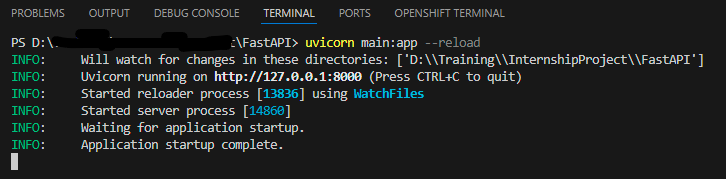
Now we are good to executing the application. To run the program, execute the command below from the Terminal window by passing the main file name.

On successful execution and starting of the application below, log messages will print in the terminal console.
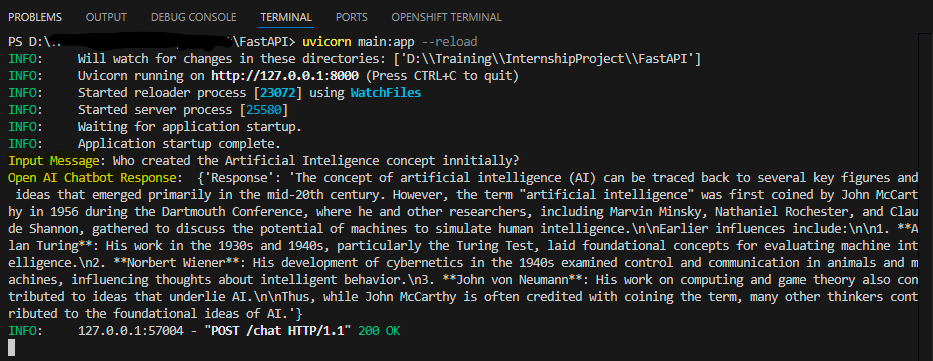
Now that the application has started, we can test from the postman interface.
As soon as the request from the postman is submitted, it will get accepted by FastAPI, and it will submit the request to the chatbot (OpenAI). And the response from OpenAI will be received in FastAPI, which will forward the response to the Postman interface.
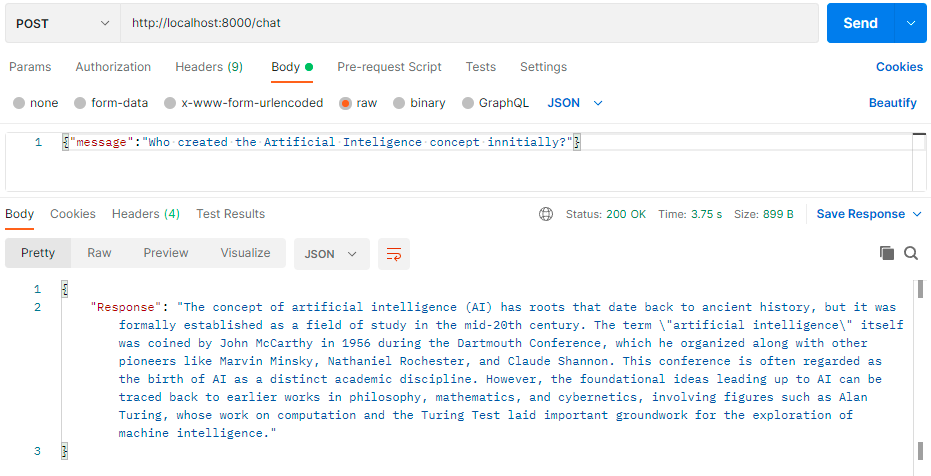
Below is the Postman screenshot with the request and success response with status code 200.
Conclusion:
This is how successfully we are able to connect with a chatbot (OpenAI) and interact with the help of FastAPI code. We can connect to other chatbots, like Google Gemini, MS Copilot etc., as well by using their respective API key. And we can leverage the AI for our applications’ smart assistant as per the requirement.