
SUMMARY:
XTIVIA’s technical guide explains how developers can seamlessly integrate artificial intelligence into Java applications by leveraging Spring AI to connect Spring Boot services to external models such as OpenAI.
- Prerequisites for the integration include installing Java 11 and Spring Boot 2.5 or higher, alongside obtaining a valid API key from a provider such as OpenAI, Anthropic, or Hugging Face.
- The setup process requires configuring the spring.ai.openai.api-key within the application properties and creating a ChatClient controller to manage user requests and generate responses.
- Developers verify the integration by sending POST requests through tools like Postman to ensure the application successfully retrieves real-time, AI-generated answers.
This approach empowers teams to modernize their software architecture by embedding smart assistants that leverage multiple AI backends, including Google Gemini and Microsoft Copilot.
Table of contents
Introduction
As we enter the AI era, Artificial Intelligence is playing a vital role in our daily life activities. Additionally, you can target various business sectors, including e-commerce, insurance, transportation, automotive, and healthcare. AI chatbots are playing a crucial role in assisting customers in a very smart way. By leveraging Spring AI technology, we can implement these requirements in our applications.
Step-by-Step Guide – How to connect and interact with a Chatbot from Spring AI
Prerequisites
- Java 11 or higher version.
- Maven or Gradle for dependency management.
- Spring Boot (version 2.5 or higher).
- Knowledge of Spring Framework.
- Understanding of AI concepts.
- API key of an AI service provider like OpenAI, Anthropic, or Hugging Face.
Step 1: Install Software
Download and install the Java, Spring Boot, and other required software with the required versions. And complete the required setup for Spring Boot and Maven.
Step 2: Obtain and Configure the OpenAI API Key
As in this demo, we will use the OpenAI API to connect to and interact with the Chatbot. To connect with OpenAI, sign up and get the API KEY from this URL: https://platform.openai.com/api-keys
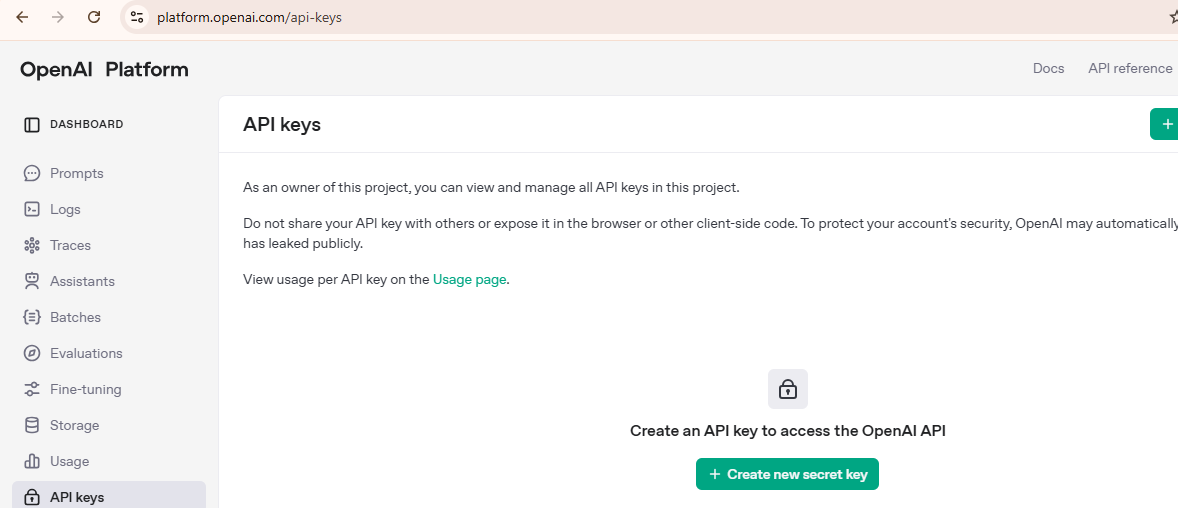
Click on the “Create new secret key” button.
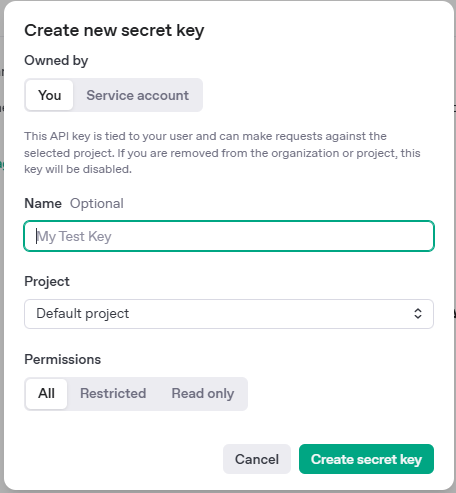
Enter the name if needed; otherwise, the default is “My Test Key,” and click the “Create secret key” button.
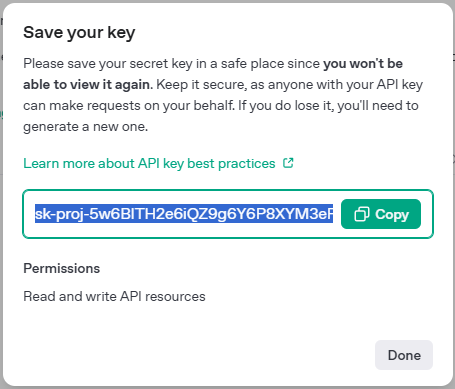
Copy the above key and assign it to the “spring.ai.openai.api-key” property in an application properties file of a SpringBoot application.

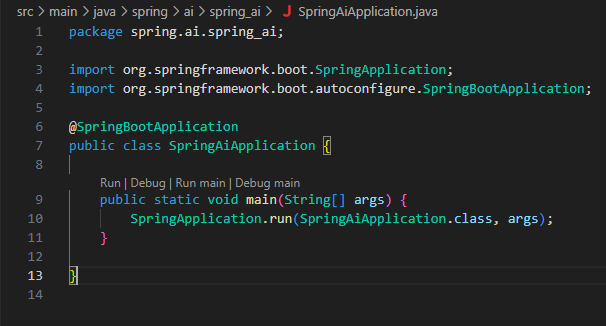
Step 3: Implement the Spring Boot Chat Application
Write a Spring Boot application Main class like the screenshot below:
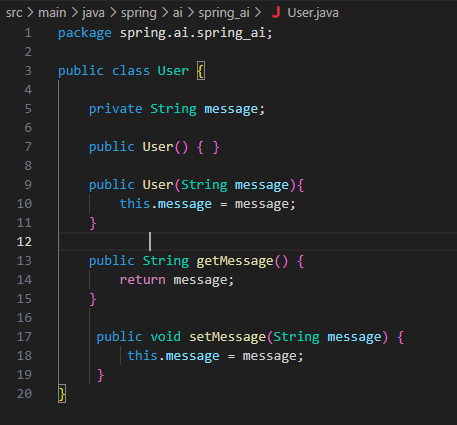
Then create a Java POJO class for the message property.
Next, create a Spring Controller class called MyController.
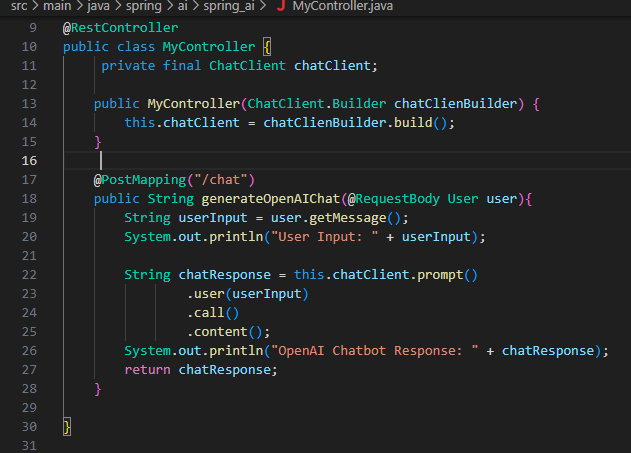
This controller class will have a ChatClient object. The ChatClient object will be initialized in the Controller class’s constructor. Builder method.
The generateOpenAIChat() method will be annotated with the REST API Post method. Which accepts the User input as RequestBody type parameters as a method argument. In this method, the chatClient prompt() method will be invoked, as it receives a POST request from the Postman interface containing the user input data. Then it invokes a call to the OpenAI API with the user input message. OpenAI will return a response, which will then be returned to the Postman interface that initiated this request.
Step 4: Test the Chatbot Interaction and Verify Results
Below is a screenshot of the Spring Boot application console logs.

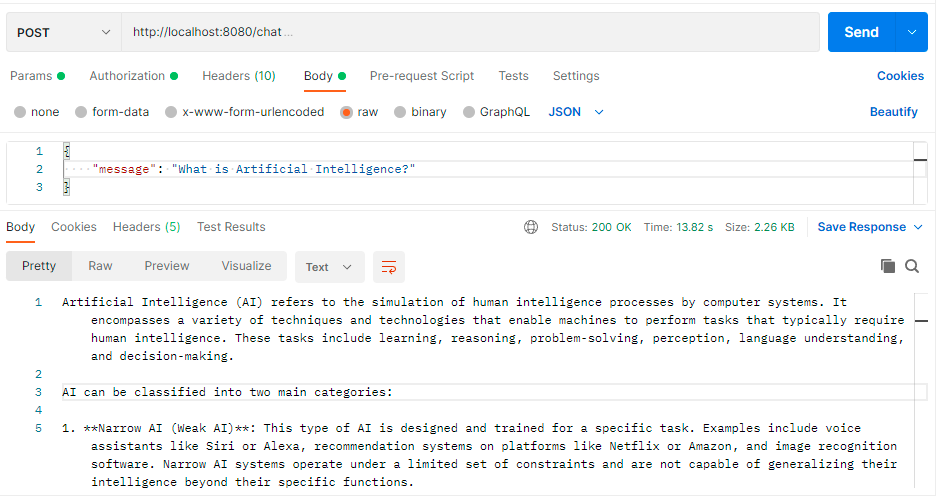
Below is also the Postman interface screenshot showing the request and the success response with HTTP status code 200.
Conclusion
Spring AI, which is built on top of Spring Framework to leverage and integrate with Artificial Intelligence. In this demo, we used the OpenAI API, but Spring AI also supports other AI models, such as Google Gemini and MS Copilot, using their respective API keys. And we can leverage AI for our applications’ smart assistants as required.