
Reporting in Infor CRM is done using Groups and Dashboards, using Crystal Reports, or using a BI tool like Qlikview or Spotfire (although these are add-ons and not available in typical installations). In most use cases, however, Groups and Dashboards meet the users reporting needs and provide the most flexibility. However, they do have their limitations, especially when it comes to grouping data, subtotalling data or preventing duplicate data from displaying due to 1 to Many records. This is when we have to leverage the power of Crystal Reports. This blog article will show you how to add/edit a Crystal Report in Infor CRM (SalesLogix).
As of this writing, all Infor CRM on-premise customers are provided one license of Crystal Reports Designer (Cloud customers can access Crystal Reports on their Infor CRM cloud server). On-premise customers should ideally install Crystal reports on the same server where they have the Infor CRM Architect (legacy) installed because these applications work together to allow you to add and modify Crystal Reports that run within Infor CRM.
This blog post assumes you have basic knowledge of creating Crystal Reports. (There are many tutorials available on the web if you’d like to learn how!)
The only thing to be aware of when building a Crystal Report specifically for Infor CRM is that the report MUST make the connection to the database using the SalesLogix OLEDB Provider. Do not use ODBC or a SQL Native Client connection as this will not work. Thankfully it’s fairly easy to update the Database connections to use the provider later on, even if you’ve already built a report using another database connectivity method.
Jump to:
Adding a New Crystal Report
Editing an Existing Crystal Report
Adding a New Crystal Report
So let’s assume you’ve built your new fancy report for the CEO in Crystal Reports and you have an RPT file ready to go. Here’s how you’d add the report to Infor CRM:
- Login to the Architect (preferably as the ADMIN user)
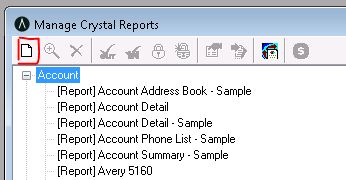
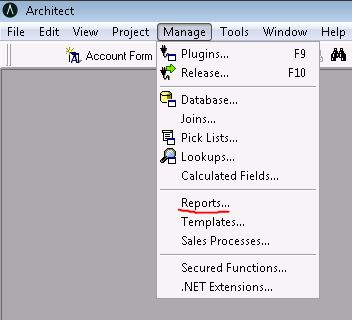
- Click on Manage menu → Reports

- Click on the “New Report” toolbar icon
- Browse out to the RPT file that you’ve created
- You will now be presented with the following screen:
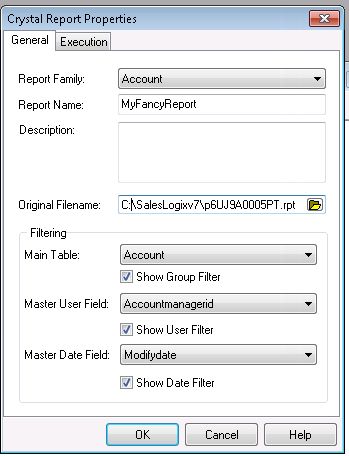
- The report family is just a way to categorize the report, you want to place it in a family that is meaningful to the report’s data. For example, if the report summarizes Account based information, then you’d use the Account family to help users find this report easily.
- The Report Name is any name that you’d like to give the report. This is the name that shows up in the Infor CRM Reports section.
- Description – briefly describe what the report does (example: Summarizes Account Sales Data by Month).
- Original Filename – this is the file you browsed out to.
- Filtering
- Main Table – Selecting a main table allows you to build filters and restrict the number of records that are returned by the Crystal Report, based on the Main Table. Make sure the “Show Group Filter” is selected if you want to use this feature for your report.
- Master User Field – Similarly, this lets you define a master user field to restrict the records that are returned by the Crystal Report. A typical use case would be the AccountManager on the Account. Once again, check the “Show User Filter” checkbox if you’d like to use this feature for your report.
- Master Date Field – Similarly, this lets you define a master date field to restrict the records returned by the Crystal Report. A typical use case would be the CREATEDATE or MODIFYDATE. This way you can restrict the data shown on the report only to Accounts created after a specified date.
- Note: The screen also has an Execution tab. On this tab, you can define a custom VBScript to run when the report is Opened or Closed. However please be aware that this is a LAN client feature only and does NOT work on the Web client. Typically this tab is not used in our experience.

- Click OK and that’s it! You’ve added your new report to Infor CRM!
- Dynamic Parameters – if your report uses Dynamic Parameters you have one extra step. Dynamic parameters are report filter selections that load dynamically from the database each time the report is run. So for instance, if an Account based report is run, the report first prompts the user to select which Accounts to run the report for (and the list of accounts is loaded Dynamically from the Infor CRM database). Dynamic parameters are not typical, but there are definitely use cases where having them makes great sense. If you are unsure if your report uses dynamic parameters, follow the steps below anyway and you’ll find out fairly quickly if you’re using these or not!
Note: If you are running Infor CRM v8.1 with Core Update 02 or prior, you are out of luck, Dynamic Parameters are not supported (and you will not be able to follow the steps below since this feature will not exist). Your only option is to convert your Crystal Report to use static parameter values.
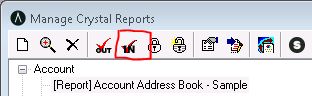
However, if you are on Infor CRM v8.1. Core Update 3b or higher (including v8.2 or v8.3) Dynamic Parameters are supported with the following extra steps: - Highlight the report and click on the Reporting Assistant toolbar icon.

- You will be prompted to login using your Infor CRM credentials.
- After you login, click on the “Prompt Parameters” tab. You will notice that the assistance is processing the report to determine if it has Dynamic Parameters.
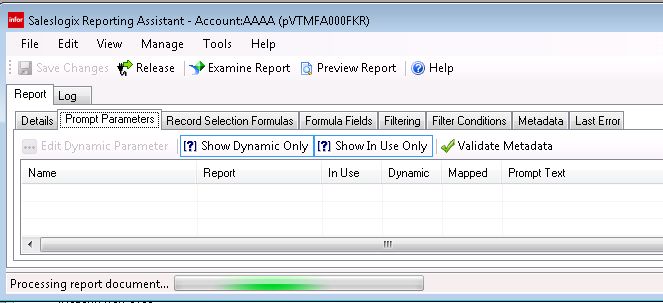
- Wait till the progress bar completes (it can take about 10-20 seconds) and if your report has any Dynamic Parameters, they will be displayed. If no dynamic parameters are displayed, you can proceed to step 10 below.
- If a dynamic parameter is displayed, you want to look at the color it is highlighted with.RED
YELLOW
GREEN
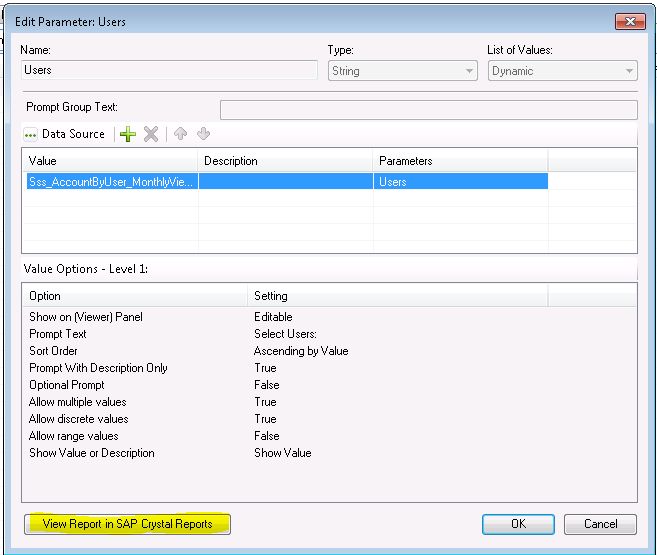
- Select a parameter that needs addressing and double-click it.
- Click the button called “View Report in SAP Crystal Reports”.
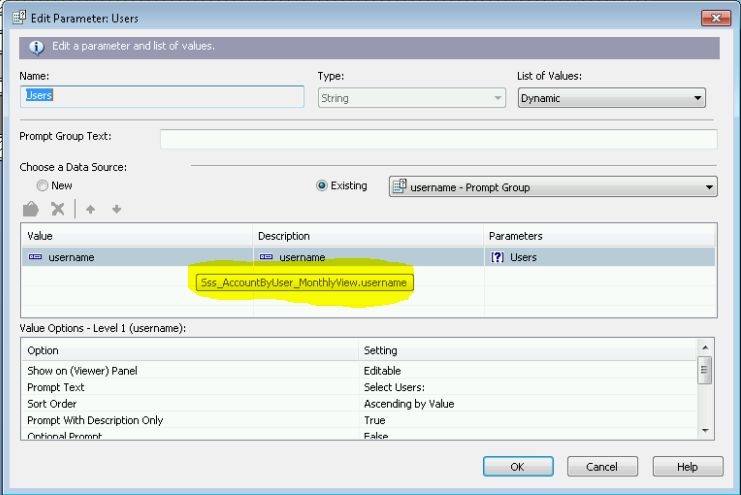
- In the Field Explorer, expand Parameter Fields, and double-click the parameter.
- In the Edit Parameter dialog box, note if the Value or Description contains information. Some parameters may have both a Value and a Description.
- Hover your mouse over the Value or Description and note the table and field identified in the tooltip.
- Close the report and you should return to the Saleslogix Reporting Assistant.
- If the parameter had a Value defined in the Crystal Report designer, then map the Value to the correct table and field.
- Click the Data Source button. The Select Data Source dialog box opens.
- Under Data Source Kind select Value.
- The Suggestions may provide the name that matches the tooltip. However, if it’s not listed, then ensure the table name and field is selected that matches the tooltip noted above.

- Click OK.
- If the parameter has a Description defined in the Crystal Report designer, then map the Description to the correct table and field.
- Select the parameter and click the Data Source button. The Select Data Source dialog box opens.
- Under Data Source Kind select Description.
- The Suggestions may provide the name that matches the tooltip. However, if it’s not listed, then ensure the table name and field is selected that matches the tooltip noted above.
- Click OK.
- Click OK on the Edit Parameter screen
- Repeat these steps for all other parameters needing attention.
- Click the Preview Report button to ensure the parameters work.
- When finished updating one or more reports, click Save Changes and close the SalesLogix Reporting Assistant.
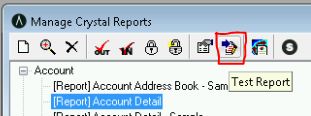
- You should now quickly test the report to ensure it runs ok. This can be done by clicking on the “Test Report” button and ensuring the report runs ok.

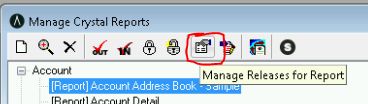
- Now that you’ve tested your report and its working great, it’s time to release it to the necessary users/teams. Click on the Manage Releases for Report button.

- You can now release the report to the necessary Users/Departments or Teams.
Editing Existing Crystal Reports
Overview of the Process:
Crystal Reports are saved as Plugin BLOBS in the PLUGIN table in the Infor CRM database. To edit them they need to be extracted from the blob and written to the hard drive so they can be edited as a regular RPT file. Once the RPT file has been edited, it has to be converted back to a Plugin in Infor CRM.
Steps:
- Login to the Architect (preferably as the ADMIN user).
- Click on Manage menu → Reports.
- Highlight the existing report you wish to edit.
- Click the Check Out button on the Toolbar.
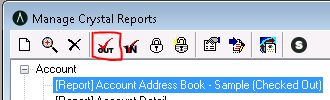
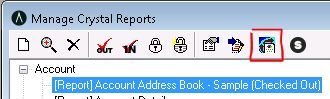
This will extract the RPT file to the local hard drive. It typically saves it to the following folder:SalesLogixReportsArchitect You will notice the report will now be listed as Checked Out. - Now click on the Launch Crystal Report System button to open the report in Crystal.
Note that this step requires that Crystal Reports be installed on the machine. - Make the necessary changes to the report and save and close Crystal Reports.
- Click the Check In button. This will copy the modified RPT file back to the PLUGIN table in the Infor CRM database.
You will notice the report will no longer be listed as Checked Out. - If you have any dynamic parameters added to the report, you will be prompted to run the SalesLogix Reporting Assistant. Follow the process outlined in Step #8 in the Adding a New Crystal Report instructions.
- You should now quickly test the report to ensure it runs ok. This can be done by clicking on the “Test Report” button and ensuring the report runs ok.
- Now that you’ve tested your report and its working great, it’s time to release it to the necessary users/teams. Click on the Manage Releases for Report button.
- You can now release the report to the necessary Users/Departments or Teams.