We can use a JSP override to customize the default behavior of the portlets that are provided by Liferay out of the box. This article describes how to add an additional menu in user admin portlet and display additional details of the user (example: additional data added from service builder) from users admin portlet and perform a certain action on the data.
Declaring a fragment host and providing the override JSP:
There are two steps for providing and declaring the JSP to override the default JSP.
- In bnb.bnd declare the Fragment-Host (contains the bundle symbolic name and the exact version of host module)
Fragment-Host: com.liferay.users.admin.web;bundle-version=”2.3.11″ - Provide the JSP that you want to override in /src/main/resources/META-INF/resources/
For overriding the user admin menu for user list we should override the user_action.jsp
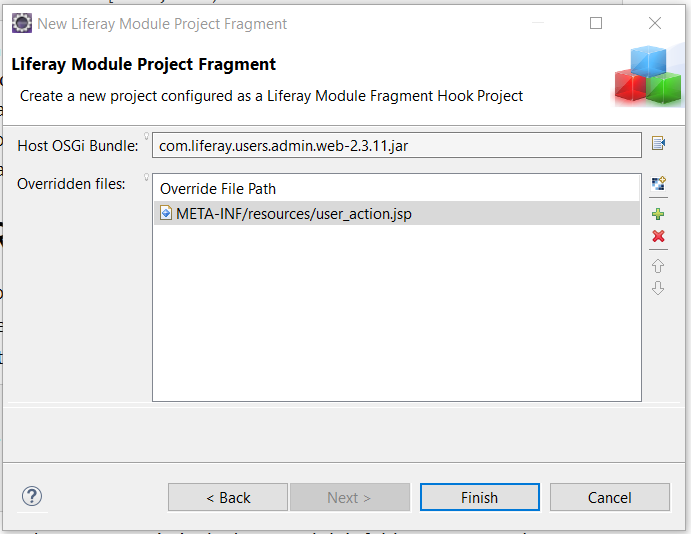
To find the default JSP you can use eclipse to create new “Liferay Module Project Fragment”. In the Host OSGi Bundle field search “com.liferay.users.admin” and select com.liferay.users.admin.web-2.3.11.jar (or suggested version), and in override files use the add button to add a new override file and search for user_action.jsp
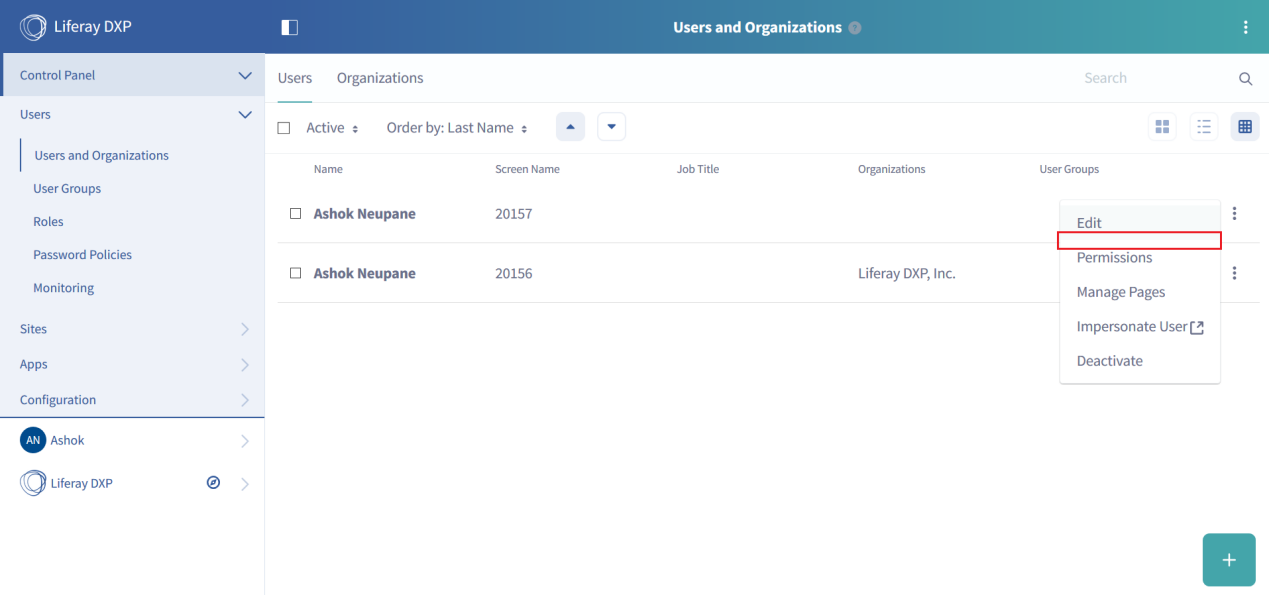
Adding the menu to user_action:
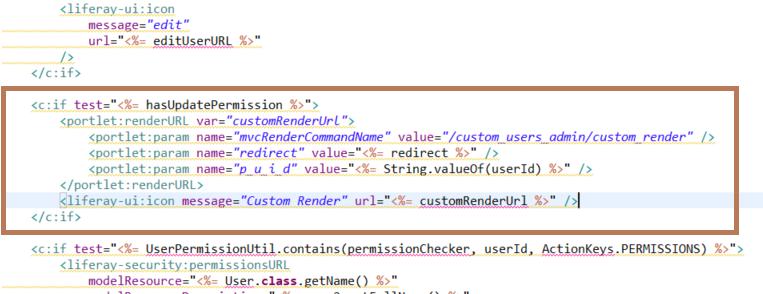
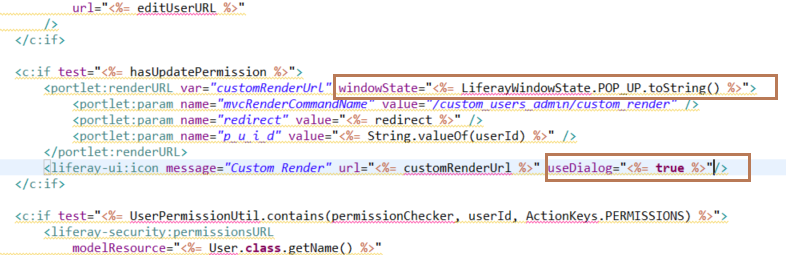
In the user_action.jsp find a suitable place where you want to add the menu. For me, I put it in between Edit and Permission:
Note: If you just want to display additional details in popup menu you can do the following:
Adding Render Command:
Create a new Liferay Module project with template mvc-portlet, and add a class CustomRenderCommand as follows:

Creating custom_render_page.jsp
Create new file in the project used for OSGI fragment override:
/src/main/resources/META-INF/resources/custom_render_page.jsp and Include init.jsp. We can get the selected user details from PortalUtil as:
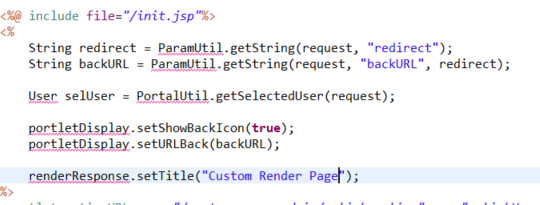
You can display the additional information that you want in this page that can be from a custom data table created using the service builder. To perform a certain action on data we have to create a form and provide the action URL.

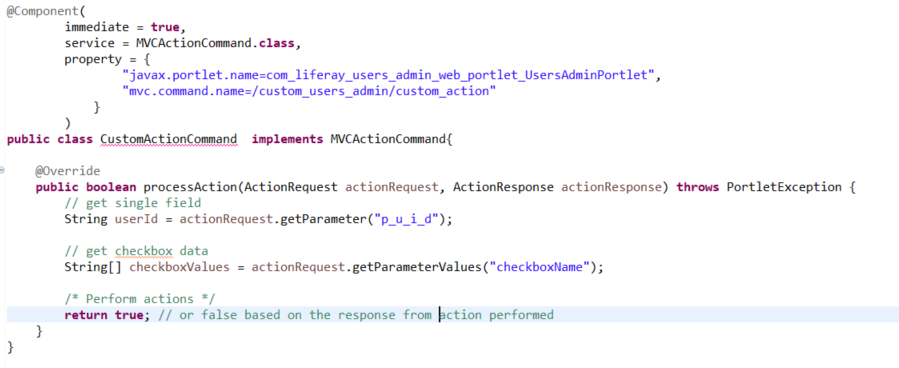
Adding Action Command:
In the previously created Liferay module project, add a class CustomActionCommand as:
Troubleshooting:
If you are having issues getting your JSP fragment to display in the portal, you will want to verify the OSGi module version. If the OSGi module version is not correct, then Liferay will not render your JSP fragment. You can easily verify that within the GOGO shell by running this command:
In this example, the version is 2.5.2 and needs to match the version specified within your bnd.bnd file.

Summary:
You can use these steps to modify the default behavior and look’n’feel of any Liferay out of the box feature. This can be done by simply creating a JSP fragment module, ensuring your Fragment-Host & version are correct, and creating a JSP file with same name as original JSP. This example uses the User Admin control panel screen to provide all the necessary steps, however, you can use the same concepts to override other features within Liferay. If you have questions or need help with this topic, please engage with us via comments on this blog post, or reach out to us.
Additional Readings:If you would like to learn more about Liferay JSP overrides, you can visit Liferay Developer Tutorial. You can also check Liferay MVC action command and Liferay MVC render command. You can continue exploring blogs about Liferay DXP and other topics on https://www.xtivia.com/blog/ such as generating JAX-RS REST services for Liferay DXP using XTIVIA JetService, Upgrading tips from Liferay DXP 7.0 to 7.1, Linking Alexa with Liferay DXP using OAuth 1.0a, Sending Audit message notification to Slack using Liferay DXP Audit Service, and more.