
SUMMARY:
This tutorial walks through the precise, multi-step configuration required to establish a serverless, continuous, and near-real-time data ingestion pipeline, utilizing Snowpipe to automatically load data from AWS S3 into Snowflake
- The setup begins by establishing necessary components in AWS, including an S3 bucket, an IAM Policy for S3 read access, and an IAM Role designed to be assumed by Snowflake.
- The Snowflake configuration requires creating a database, table, and a Storage Integration, which subsequently provides the necessary IAM user ARN and external ID to configure trust relationships in AWS.
- A Pipe is created in Snowflake with the
AUTO_INGEST = TRUEparameter, which dictates that new files arriving in the defined external stage will be automatically copied into the target table. - To trigger auto-ingestion, AWS Event Notification must be set up on the S3 bucket to send “All Object Create Events” to the SQS queue channel value obtained from the Snowflake pipe description.
Successfully implementing these steps results in an automated pattern that scales well for continuous data loads, reduces operational overhead, and ensures near-real-time data availability.
Table of contents
ELT Data Pipeline
Data ingestion is a crucial part of any data pipeline, enabling the reliable and efficient movement of data from storage into analytical systems. Snowpipe, a Snowflake feature, provides a serverless, continuous data ingestion mechanism. It can respond to events (such as new files in cloud storage) to load data almost in real-time.
In this blog, I’ll walk through how to set up Snowpipe to automatically ingest files from AWS S3 into a Snowflake table.
1. AWS Setup
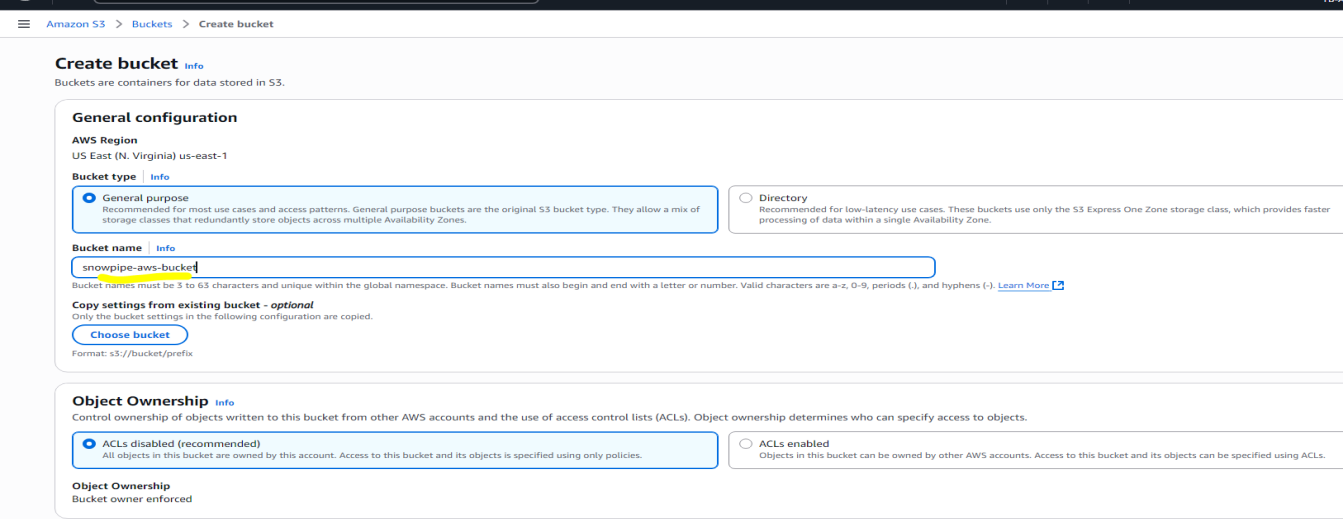
Create or Choose an S3 Bucket
Create a new AWS S3 bucket (or choose an existing one) where you will drop the files to ingest. Let’s call it snowpie-aws-bucket.
Create IAM Policy for S3 Access
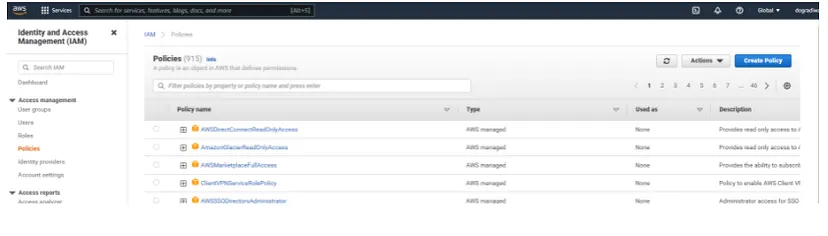
- In AWS IAM → Policies → Create Policy.
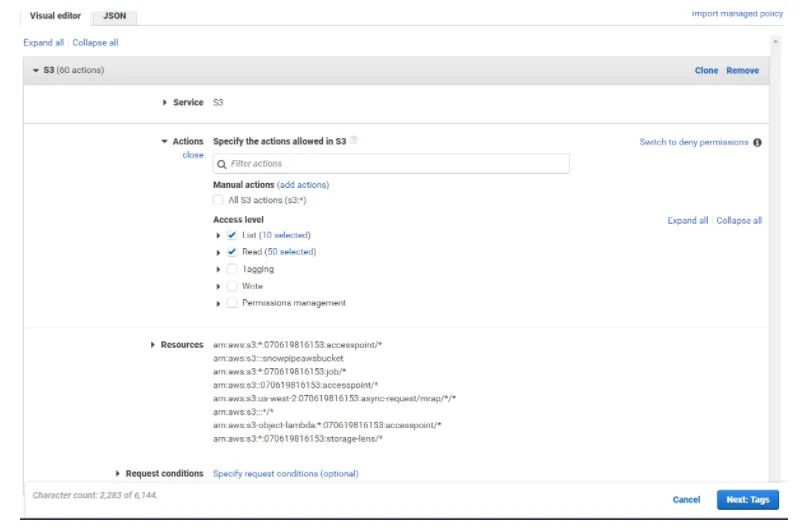
- Choose Service = S3, actions: at least List and Get (read) permissions.
- Limit the policy’s resource to only the bucket (and maybe specific prefixes) you intend to use.
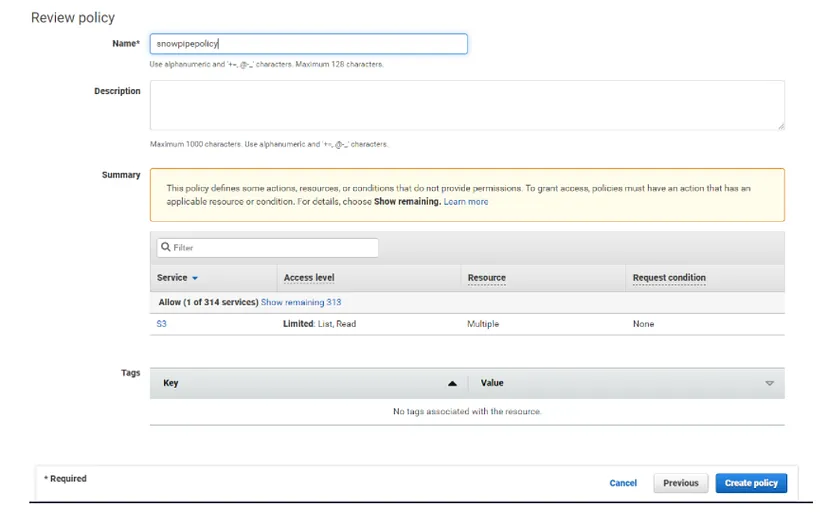
- Give it a name, e.g., snowpipepolicy.
Create IAM Role
Create a new Role that can be assumed by Snowflake.
- Go to IAM → Roles and Create Role.
- Select “Another AWS account”, provide Account ID, Select “Require EXTERNAL ID”, and provide 0000 as ID.
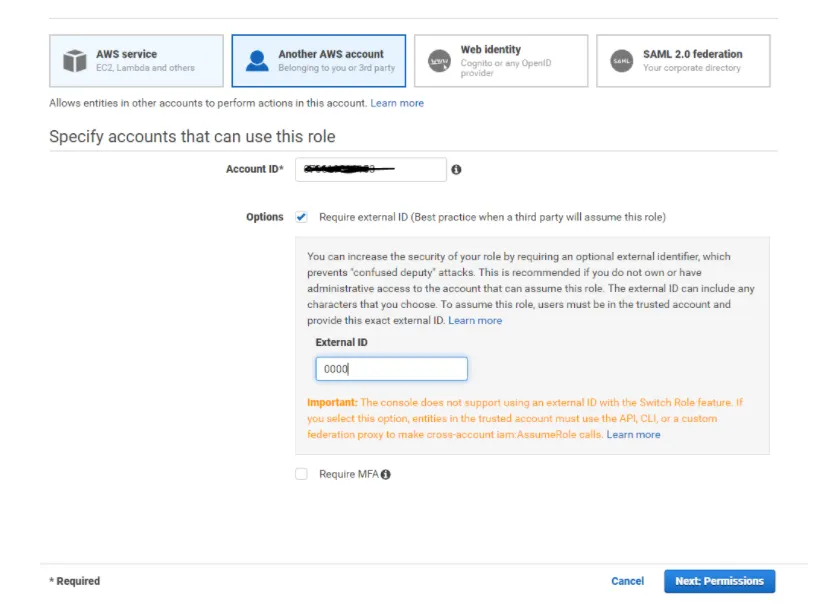
- When creating the role, select Another AWS account as the trusted entity. You’ll need Snowflake’s account ID or use the role-based external ID mechanism.
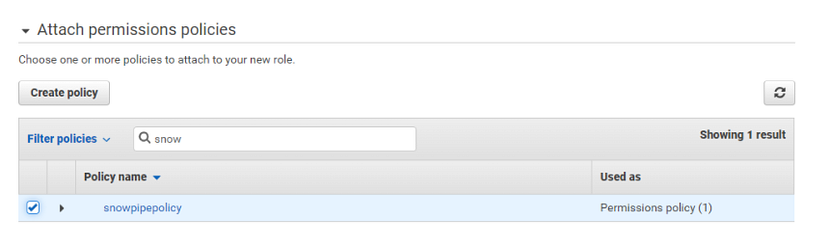
- Attach the policy you created (the S3 read policy).
- Provide the Role name and click on Finish.
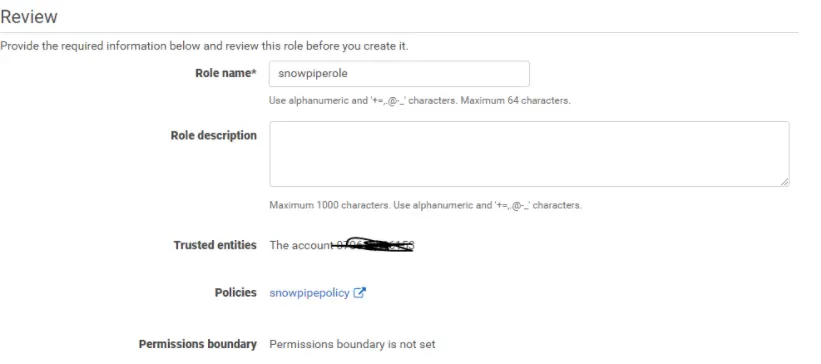
- Copy the Role ARN for Snowflake configuration.

Note the Role ARN — you’ll use this later in Snowflake configuration.
2. Snowflake Configuration
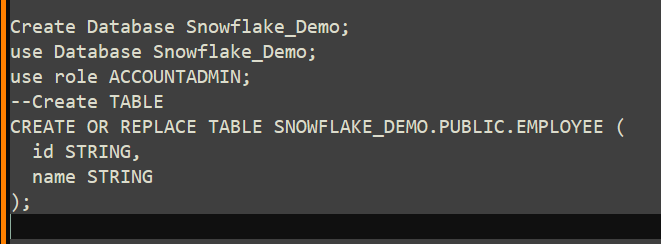
Create Database & Table
In Snowflake, run the query below.
Create Storage Integration
This integration allows Snowflake to assume the AWS role you created to access the S3 bucket.
–create Integration in Snowflake.
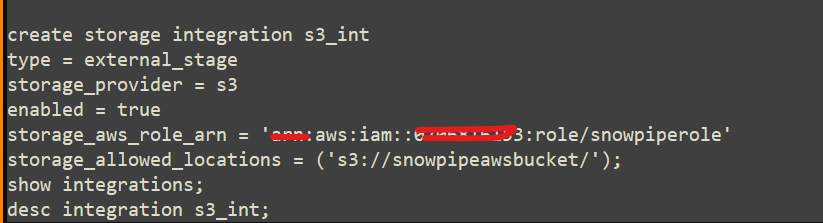

After creating, run DESC INTEGRATION s3_int; to get its STORAGE_AWS_IAM_USER_ARN and STORAGE_AWS_EXTERNAL_ID. These details are needed to configure trust in AWS.
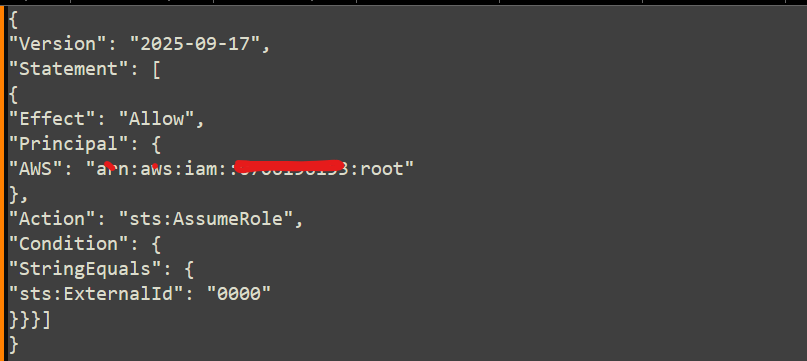
Grant IAM Role Trust to Snowflake
In AWS console:
- Go to the IAM Role you created.
- In the Trust relationships tab, edit the trust policy to allow Snowflake’s IAM user to assume this role, using the external ID and the Snowflake IAM user ARN you got from DESC INTEGRATION.
- Example trust policy JSON:
Create External Stage
Define a stage in Snowflake pointing to the S3 bucket via the storage integration.

Create Pipe with Auto-Ingest
Create a Pipe in Snowflake that uses the stage. Set AUTO_INGEST = TRUE so that new files arriving in the stage (S3) automatically get copied into the target table.
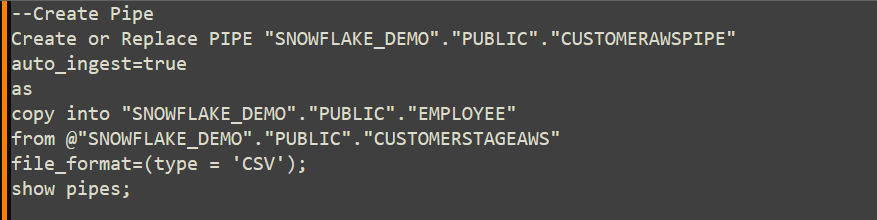
On running the show pipes, copy the value of the notification channel.
3. Set Up AWS Event Notification
To enable auto-ingest, AWS must send notifications to Snowflake when objects are created in the S3 bucket.
Enter the Event name and select “All Object Create Events” under the Object creation.
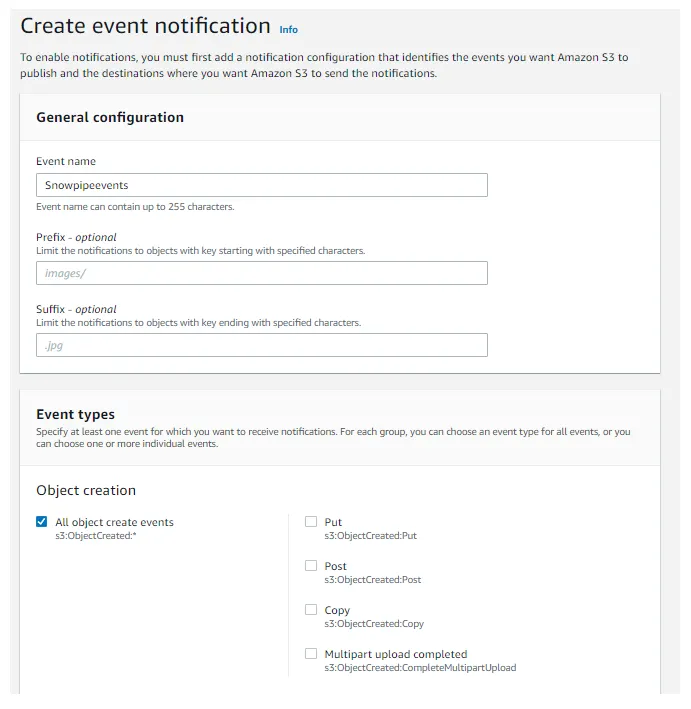
Under Destination, select “SQS queue” as the destination and enter the value of notification_channel from the Snowflake pipes description into the “SQS queue” field.
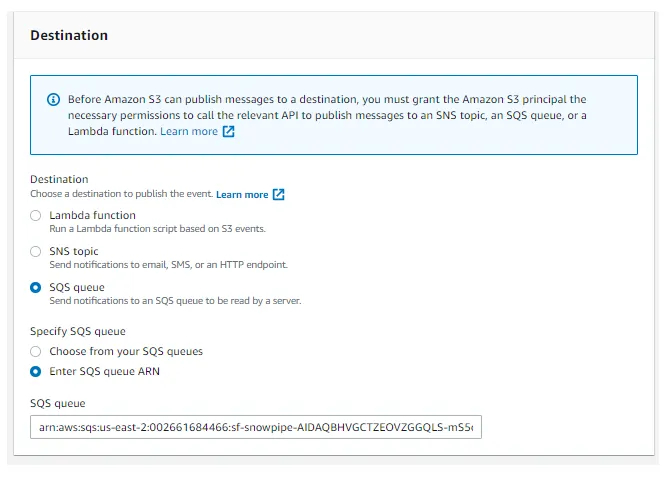
This links S3 → event → Snowflake.
4. Test the Setup
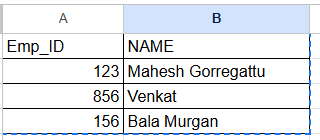
Create a sample CSV file with some test data, employee_test.csv
Upload it to the S3 bucket.
Run the command below to verify that you can list the contents of the AWS bucket.


Below are some useful commands.

This lets you verify that the file was detected, loaded, and check for any errors.
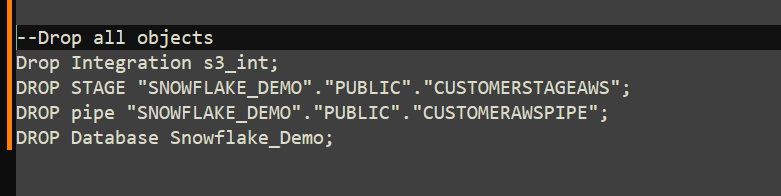
5. Clean Up (Optional)
If you want to remove all test setup afterward, drop the objects:
Conclusion
By following these steps, you can set up a fully automated pipeline for ingesting data from AWS S3 into Snowflake using Snowpipe.
This pattern scales well for streaming or continuous data loads, reduces operational overhead, and ensures near-real-time ingestion.
For more information, please visit our AWS Cloud Services or Snowflake Services pages.
Contact us for any questions.