Tasked to think of an easy way for users to create a mega menu, I came up with a 2 portlet display/config portlet combo. At the same time, I also wanted to try JSF after hearing so many good things about it. Here we go!
Menu Config Portet
Let’s first see how the UI looks like.

The configuration is a 3 step process.
1. Select the top tabs you would like to add.
2. Select which tab you would want to edit and how many columns would it have.
3. Choose which column you would want to edit and add the menu and sub menu on that column.
Easy, right? Let’s now dig into the code. We create 2 custom objects that would store our selection to our portlet’s preference.
public class MenuItem implements Serializable{
private static final long serialVersionUID = 1178799559133557017L;
private String id;
private List<Column> columns;
private List<String> childMenuIds;
private String max;
private boolean showAll;
public class Column implements Serializable{
private static final long serialVersionUID = 7748647923003628799L;
private String columnNo;
private List<MenuItem> menus;
As mentioned earlier, we used JSF to build our front end faster. This is how our backing bean looks like.
@ViewScoped
@ManagedBean(name = "menuConfig")
public class MenuConfigBean implements Serializable {
All the other logic in the menu config backing bean other than the save is just to manage the user selection and our bean and make sure they are always in sync. One good thing about JSF is that AJAX support can easily be integrated with almost any component.
The code to save our changes is simple too. It leverages google’s GSON to convert our object to JSON and back.
public void save() throws ReadOnlyException, ValidatorException, IOException, PortalException, SystemException{
FacesContext facesContext = FacesContext.getCurrentInstance();
ExternalContext externalContext = facesContext.getExternalContext();
PortletRequest portletRequest = (PortletRequest)externalContext.getRequest();
PortletPreferences prefs = portletRequest.getPreferences();
Gson gson = new Gson();
String str = gson.toJson(tabs);
prefs.setValue("tabs", str);
prefs.store();
}
Menu Display Portlet
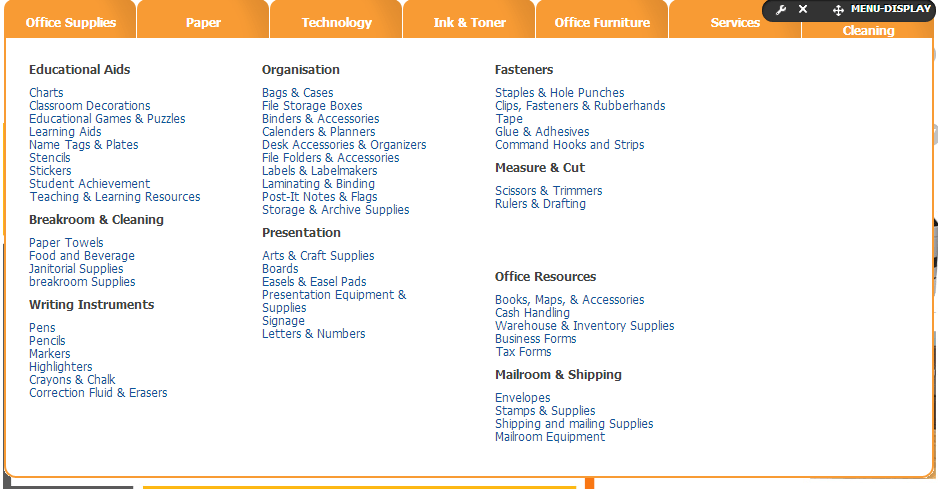
The UI looks like below and the look and feel can modified through CSS. The show and hide of the menu is done by qtip2 jquery plugin.
The interesting part of this is now to fetch portletpreferences from the menu config portlet. Here is a snippet of how we do it.
public MenuDisplayBean() throws ReadOnlyException, ValidatorException, IOException, PortalException, SystemException {
FacesContext facesContext = FacesContext.getCurrentInstance();
ExternalContext externalContext = facesContext.getExternalContext();
PortletRequest portletRequest = (PortletRequest)externalContext.getRequest();
ThemeDisplay themeDisplay = (ThemeDisplay)portletRequest.getAttribute(WebKeys.THEME_DISPLAY);
//get control panel plid
long gid = themeDisplay.getCompanyId();
Group cPanelGroup = GroupLocalServiceUtil.getGroup(gid, "Control Panel");
long cpanelPlid = LayoutLocalServiceUtil.getDefaultPlid(cPanelGroup.getGroupId(), true);
PortletPreferences prefs = PortletPreferencesLocalServiceUtil.getPreferences(gid, 0, 3, cpanelPlid, "menuconfig_WAR_menuconfig10SNAPSHOT");
String tabsStr = prefs.getValue("tabs", null);
if(tabsStr != null){
tabs = MenuSettingUtil.getTabs(tabsStr);
}
}
Finally, we can embed it in our theme as such
<nav class="$nav_css_class" id="navigation">
#* Embed the portlet *#
#set ($menu_display = "menudisplay_WAR_menuconfig10SNAPSHOT")
#set ($VOID = $velocityPortletPreferences.setValue('display-style', '1'))
#set ($VOID = $velocityPortletPreferences.setValue('portlet-setup-show-borders', 'false'))
#set ($queryString = "")
$theme.runtime($menu_display, $queryString, $velocityPortletPreferences.toString())
</nav>
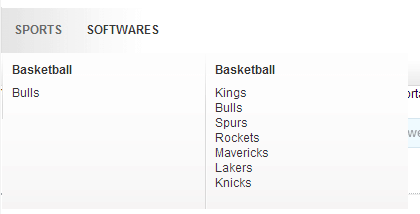
Here are some POC we already did:
Oracle like nenu

OfficeMax like menu