SUMMARY:
This guide demonstrates how to use Terraform, an Infrastructure as Code (IaC) tool from HashiCorp, to define, provision, and manage resources like virtual machines on the Microsoft Azure cloud.
- Terraform functions by processing human-readable configuration files and executing a sequence of commands to interact with cloud provider APIs.
- The installation process involves downloading Terraform directly from the HashiCorp website, with specific instructions available for different operating systems.
- Automating infrastructure deployment with Terraform helps create consistent environments, minimizes human error, improves cost tracking, and provides full auditability through version control.
By following the steps to write configuration files and apply them, you can automate the creation of a complete virtual machine environment in Azure
Table of contents
- SUMMARY:
- 1) What is Terraform
- 2) How Terraform helps to define, provision, and manage infrastructure resources using a declarative configuration language
- 3) How Terraform works
- 4) Installation of Terraform
- 5) We always need Terraform provider to connect with the cloud providers to define, provision, and manage infrastructure resources.
- 6) File structure of Terraform. Below are the core configuration files for Terraform.
- 7) Now we will create the Azure resources using Terraform. Below is an example of a main.tf file which contains all the required configurations to create a virtual machine on Azure cloud.
- 8) After applying the configuration below is the screenshot of the resources which were created in the Azure Portal.
1) What is Terraform
At its core, Terraform is an Infrastructure as Code (IaC) tool created by HashiCorp. It allows you to define both your cloud and on-premises resources in human-readable configuration files that you can version, reuse, and share.
2) How Terraform helps to define, provision, and manage infrastructure resources using a declarative configuration language

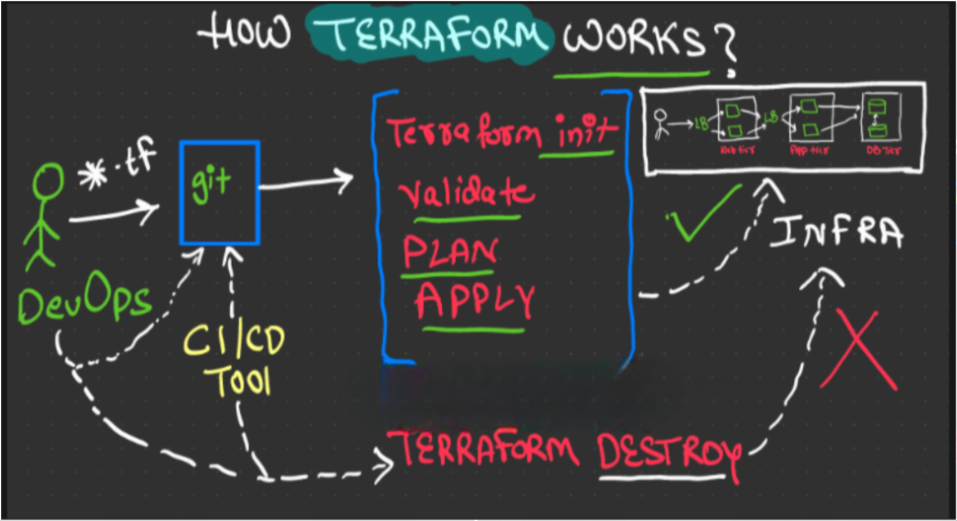
3) How Terraform works
Write your Terraform files –> Run Terraform commands –> Call the target cloud provider API to provision the infra using Terraform Provider
Phases: init –> validate –> plan –> apply –> destroy
4) Installation of Terraform
Go to the hashicorp site to install terraform.
https://developer.hashicorp.com/terraform/install
Here I am using the Linux example.
sudo yum install -y yum-utils
sudo yum-config-manager --add-repo https://rpm.releases.hashicorp.com/RHEL/hashicorp.repo
sudo yum -y install terraform
Run these commands in the linux shell and we will be able to install the terraform.
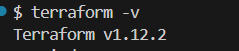
Verify that Terraform has been installed.
terraform –version
We will get the version of Terraform like below
5) We always need Terraform provider to connect with the cloud providers to define, provision, and manage infrastructure resources.
What is Terraform provider?
Providers are plugins using which we call cloud APIs or any third-party APIs for infra provisioning and management.
Below is an example of how a Terraform provider will be for Azure Cloud.
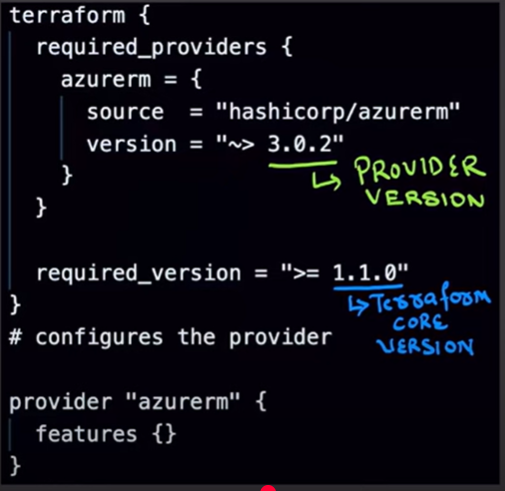
Here 3.0.2 is the provider version and 1.1.0 is the terraform version.
6) File structure of Terraform. Below are the core configuration files for Terraform.
main.tf: Contains the primary resource definitions, provider configurations, and module calls that define your infrastructure.variables.tf: Declares input variables for the Terraform configuration, allowing for parameterization and reusability. It’s recommended to include descriptions for each variable.outputs.tf: Defines output values that can be referenced by other Terraform configurations or external tools after a successful terraform apply.provider.tf(optional, or included in main.tf): Dedicated file for provider configurations and backend definitions.terraform.tfvars(and environment-specific .tfvars files): Contains default or environment-specific values for the variables declared in variables.tf.
7) Now we will create the Azure resources using Terraform. Below is an example of a main.tf file which contains all the required configurations to create a virtual machine on Azure cloud.
Below are the commands which we need to fire inside the Terraform first.
Terraform init –> To initialize the Terraform
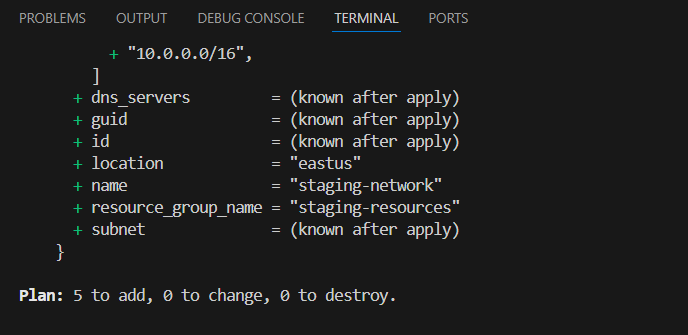
Terraform plan –> To see what changes will be implemented inside. It will show you how many resources will be added, how many resources will be changed, and how many resources will be destroyed, like below.
Terraform apply –> To apply the configuration.
Below is the main.tf file configuration, which I used to create the Virtual machine.
resource "azurerm_resource_group" "aamir" {
  name     = "aamir-resources"
  location = "West Europe"
}


resource "azurerm_virtual_network" "aamir" {
  name                = "aamir-network"
  address_space       = ["10.0.0.0/16"]
  location            = azurerm_resource_group.aamir.location
  resource_group_name = azurerm_resource_group.aamir.name
}


resource "azurerm_subnet" "aamir" {
  name                 = "internal"
  resource_group_name  = azurerm_resource_group.aamir.name
  virtual_network_name = azurerm_virtual_network.aamir.name
  address_prefixes     = ["10.0.2.0/24"]
}


resource "azurerm_network_interface" "aamir" {
  name                = "aamir-nic"
  location            = azurerm_resource_group.aamir.location
  resource_group_name = azurerm_resource_group.aamir.name


  ip_configuration {
    name                          = "internal"
    subnet_id                     = azurerm_subnet.aamir.id
    private_ip_address_allocation = "Dynamic"
  }
}


resource "azurerm_linux_virtual_machine" "aamir" {
  name                = "aamir-machine"
  resource_group_name = azurerm_resource_group.aamir.name
  location            = azurerm_resource_group.aamir.location
  size                = "Standard_F2"
  admin_username      = "adminuser"
  network_interface_ids = [
    azurerm_network_interface.aamir.id,
  ]


  admin_ssh_key {
    username   = "adminuser"
    public_key = file("~/.ssh/id_rsa.pub")
  }


  os_disk {
    caching              = "ReadWrite"
    storage_account_type = "Standard_LRS"
  }


  source_image_reference {
    publisher = "Canonical"
    offer     = "0001-com-ubuntu-server-jammy"
    sku       = "22_04-lts"
    version   = "latest"
  }
}
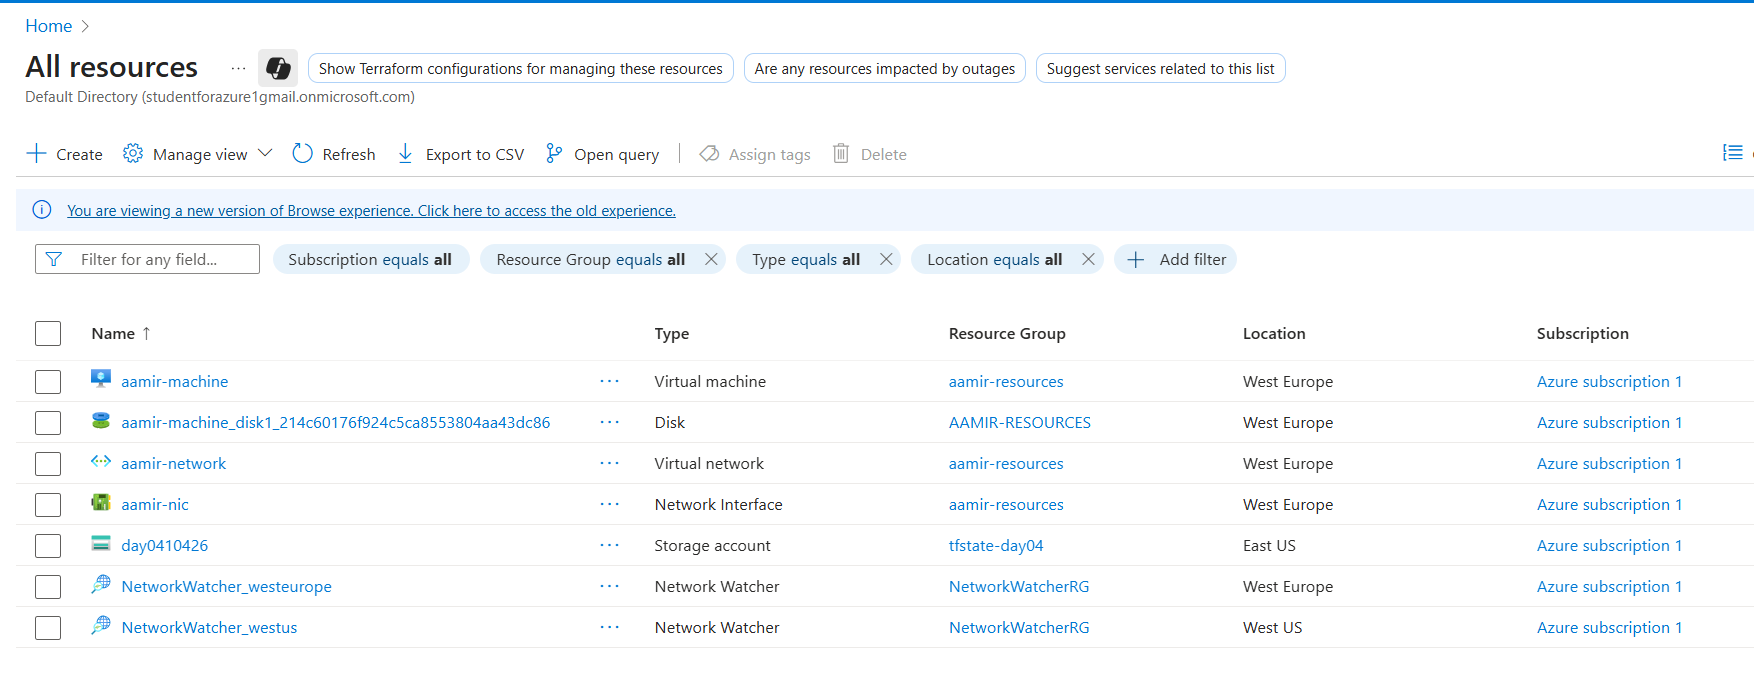
8) After applying the configuration below is the screenshot of the resources which were created in the Azure Portal.
Summary
Terraform helps to create a consistent environment that is easy to set up and destroy, which is crucial for solving production issues by quickly replicating a live scenario. This ‘write once, deploy many’ approach with a single code base not only saves significant time and reduces human error, but also makes it easy to track costs and achieve substantial cost savings through automated cleanup and scheduled destruction of non-production resources. Furthermore, because all changes are tracked in version control like Git, we have full auditability, allowing developers to focus more on application development and less on underlying infrastructure concerns.