Occasionally we find ourselves in situations which do not meet the standard e.g. users placed in a directory tree a few levels deep or the distinguished name uses the common name which has spaces. Below are some tips on handling these situations.
A useful tool to analyze the structure of the LDAP directory is JXplorer (http://jxplorer.org/). Download and install the tool.
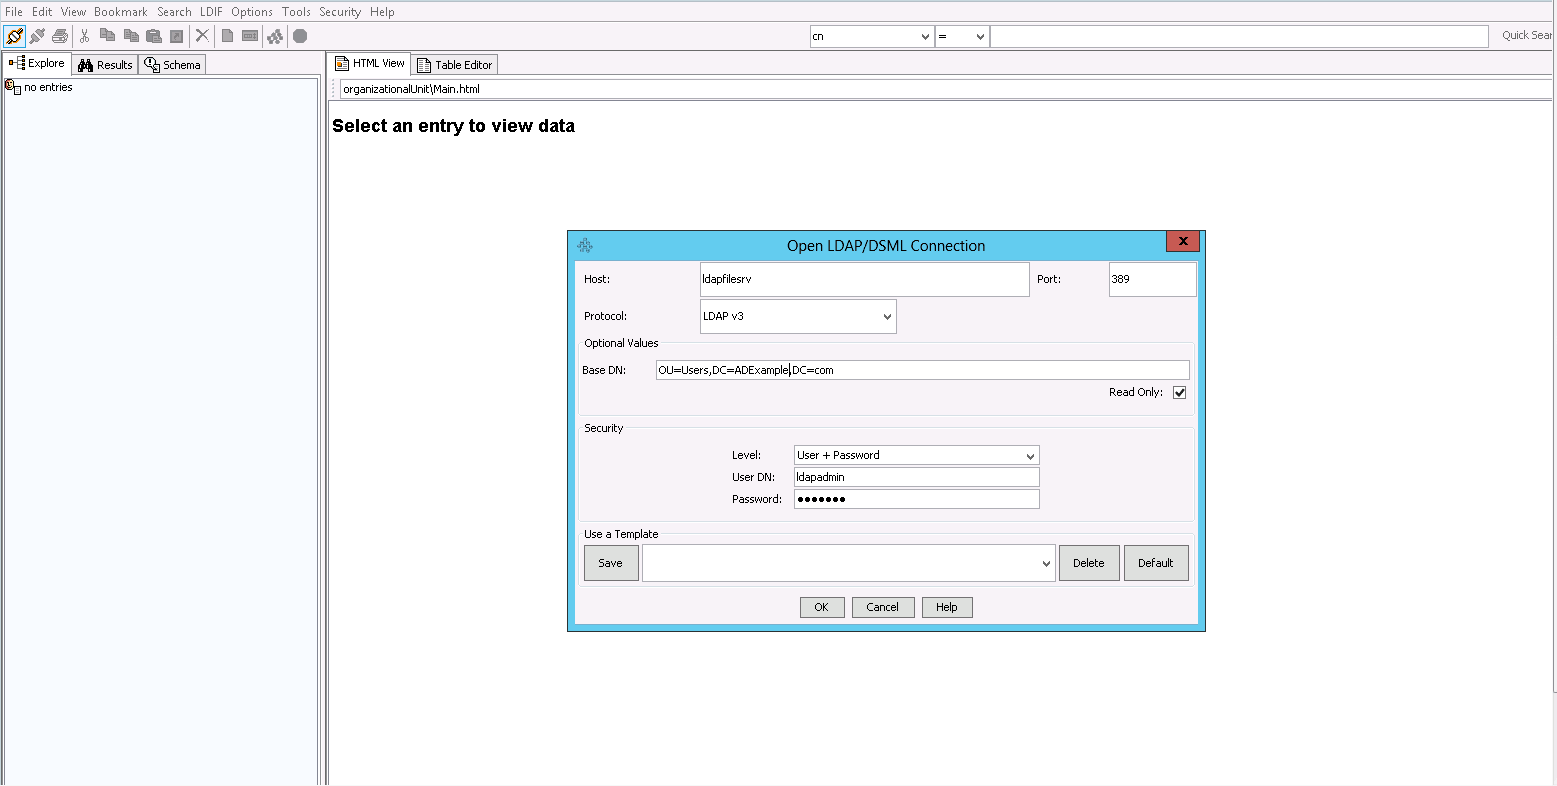
To connect to your LDAP server, click on the button located just below ‘File’ on the menu bar, in the window that comes up enter the Host, Base DN, User ID & Password.
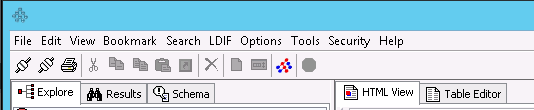
Once you have successfully connected, click on the Refresh button (pink & blue button) located below Options & Tools on the menu bar, to see all users and directories below the parent directory.
Select the user whose attributes you want to research and click on the ‘Table Editor’ in the window on the right.
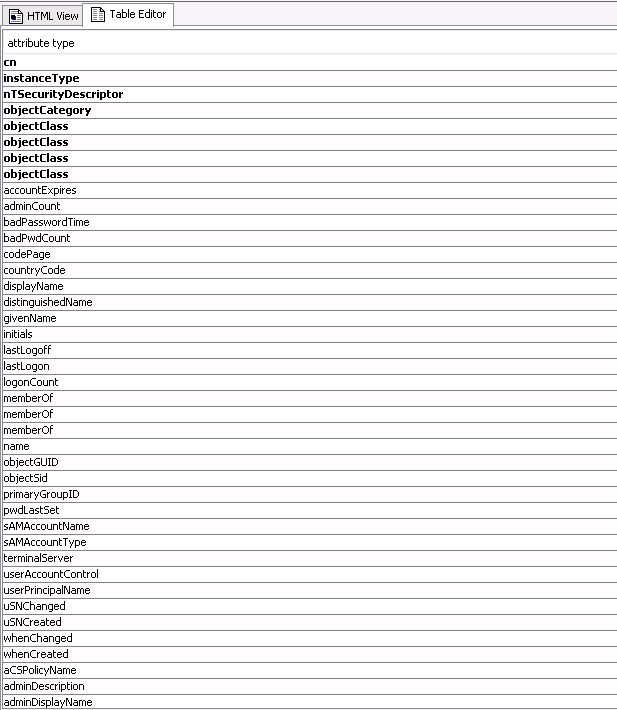
Analyze the distinguished name field, this will tell you where the user is located in the LDAP directory structure.
To set up external authentication, use the sample-applicationContext-externalAuth-LDAP-mt.xml file provided as a template. This file can be found in the <js-install>/samples/externalAuth-sample-config/ directory. The community edition file will not have the ‘-mt’ extension at the end. Rename the file removing the ‘sample-‘ prefix.
Make the following changes to the file:
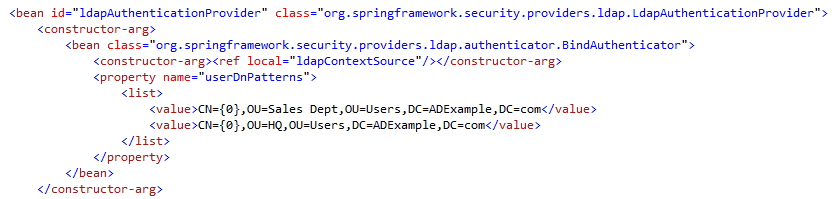
To authenticate the user using bind authentication and a distinguished name search, update the ldapAuthenticationProvider bean in the file, specifying the search location to match the distinguished name found in JXplorer.
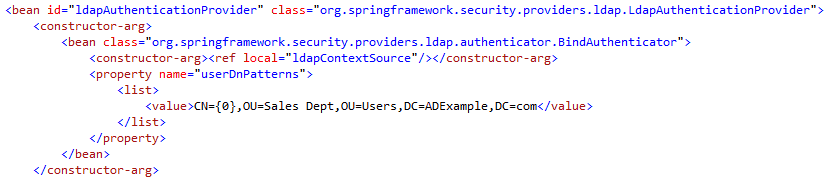
Occasionally users may be located in different directories, add the different locations below the first search location.
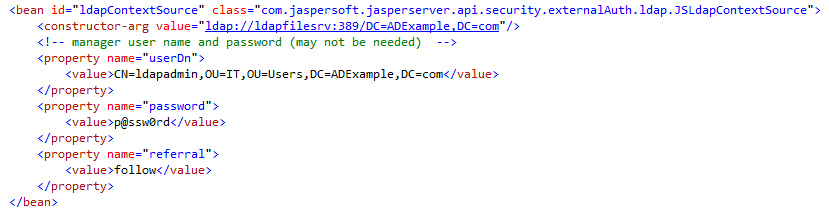
The ldapContextSource bean specifies the connection parameters for the ldap administrator.
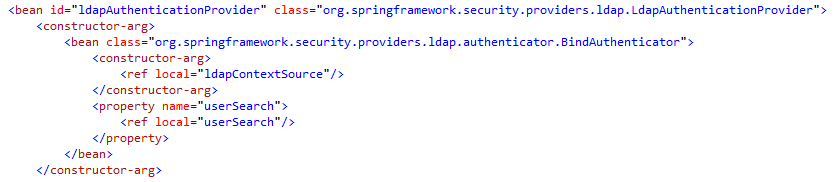
Occasionally the distinguished name contains the common name (e.g. CN=John Smith). This is not ideal, in this situation we should authenticate the user using his sAMAccountName. Make the following changes to the file:
Use user search instead of distinguished name search in the Bind Authenticator.
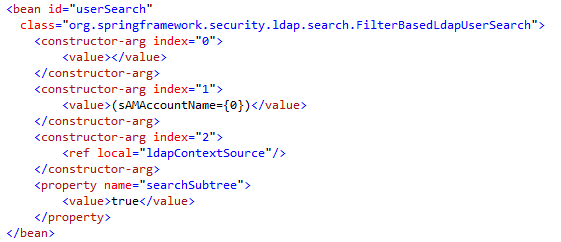
Modify the userSearch bean in the following manner:
Place the modified file in the <js-webapp>/WEB-INF directory.