
This article is a step-by-step guide to utilizing the Asset Publisher to publish typed content.
Introduction
When adding one-off web content to a page in Liferay, it probably makes sense to simply employ a Web Content Display portlet. However, when publishing repeatable code blocks like a list of FAQs or Staff Members, that have identical data models and should be displayed using the same markup and styles, you can choose between either a Web Content Structure with repeatable elements (and associated Web Content Template) or using an Asset Publisher. The single Web Content Article with repeatable elements method will work for you if:
- You do not want to apply audience targeting or access control to the repeatable content items (an individual FAQ or Staff Member).
- You do not need the flexibility to reorder the content items.
- You don’t wish to categorize individual content items – for example, categorize FAQs based on topic (New account registration, Account Security, Price Match Policy, Shipping Policy and so on for an e-commerce site) or categorize staff members based on their skills and/or location.
- You don’t wish to reuse individual content items in other contexts (for example, on the “Price Match Policy” page that displays the “Price Match” terms and conditions, you will not be able to reuse the FAQs categorized with “Price Match Policy”).
- You do not care about search results including only the relevant content item based on the search terms, and you are ok with the entire “list of FAQs” or “list of staff members” showing up in the search results.
If you are ok with these limitations, then using a single web content article will simplify content maintenance and enhance performance. If not, it usually makes sense to use the Asset Publisher.
Consuming and publishing structured data via an Application Display Template (ADT) provides a more robust framework for delivering content types, keeping the markup DRY and providing a development experience more familiar and comfortable for many front-end developers.
Let’s walk through the process of creating Structures and Templates that will allow a content publisher to easily add, update and delete a list of Staff Members to be displayed in our Liferay DXP website.
Note: This article assumes you already have a Liferay DXP environment set up and running and a site instance in which you are ready to add content.
Creating the Structure
A Structure in Liferay DXP is where we define the data model for the type of content we want to publish to our site.
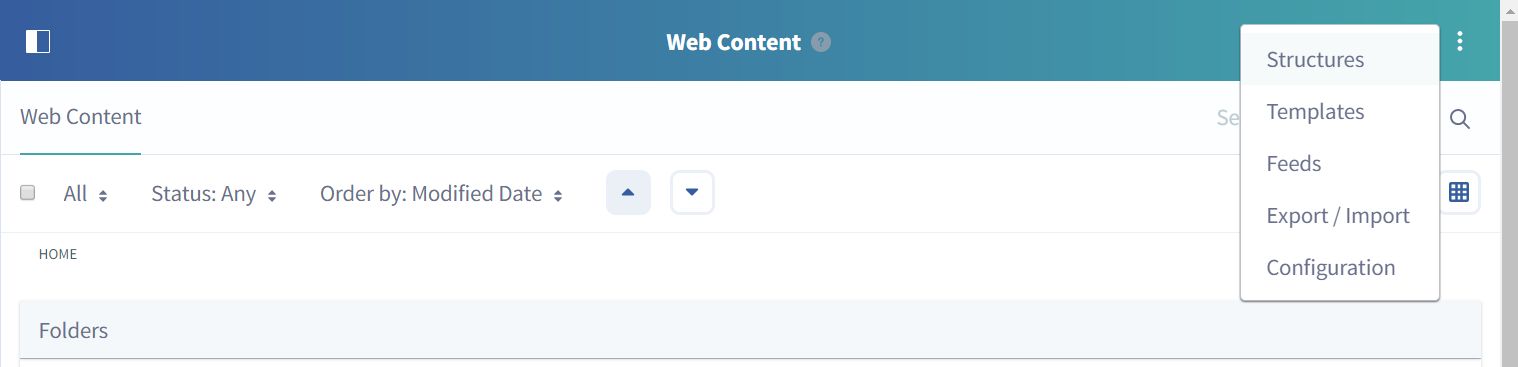
- Open your site administration navigation and navigate to Content > Web Content. Then open the page context menu in the top right corner of your page (indicated by the vertical ellipsis) and open Structures.
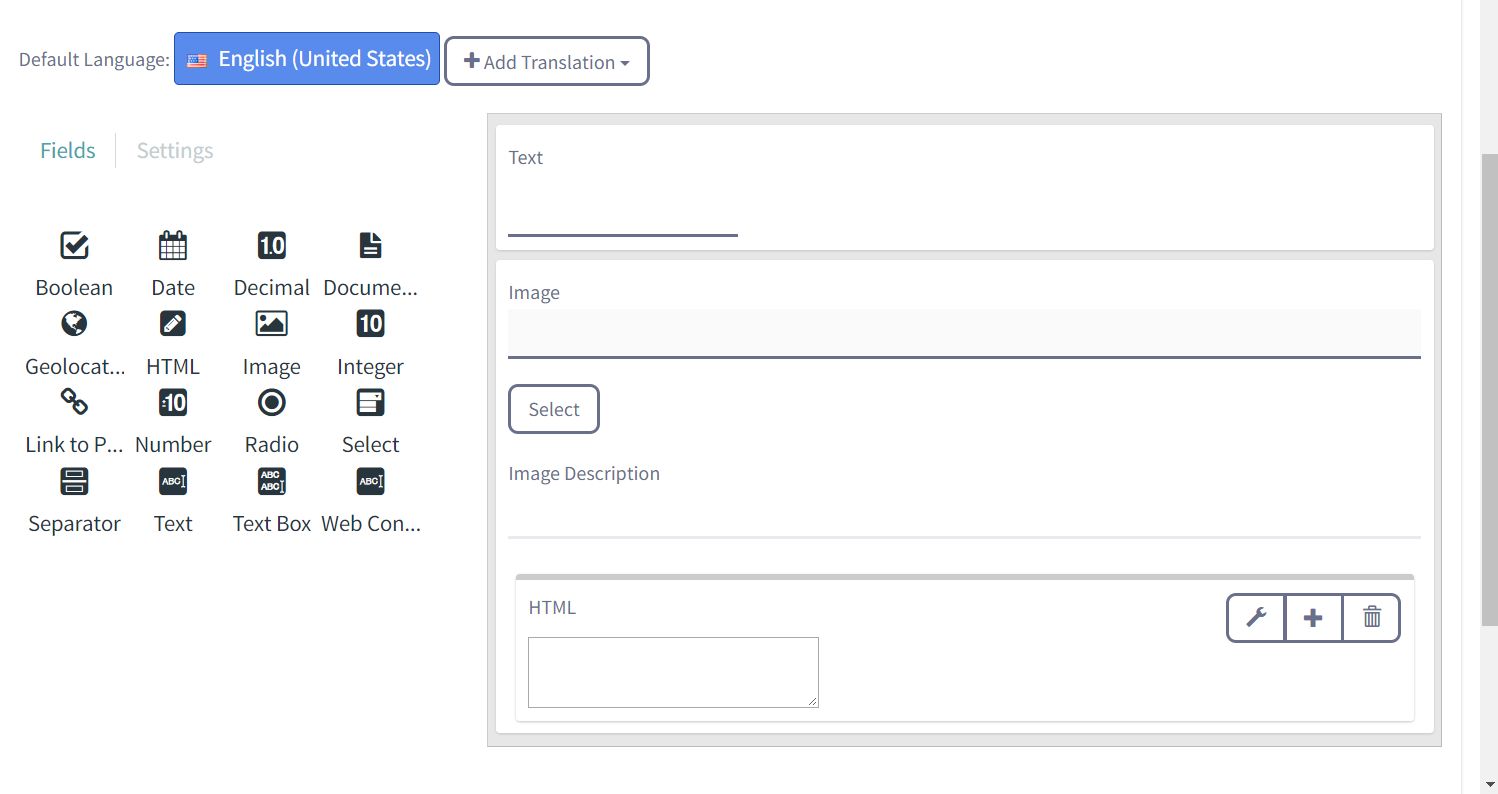
- Then create the desired fields for your content type (click the Add button in the lower right-hand corner of the Structures list page).Note: It is recommended that you name your Structure using a singular (Staff Member in this case), as the Structure represents one instance of the content type.In our Staff Member’s example, we will need fields for Name (Text), Photo (Image) and Bio (HTML). We are using the HTML type for the Bio field to allow content publishers to include common text related markup like em and strong tags, as well as ordered (ol) and unordered (ul) lists when desired. We can add each of these fields by dragging the desired data type from the Fields list onto our Structure canvas.
- Configure the fields by setting the Field Label (seen by content publisher), the Name (referred to inside our template) and the Required property (false by default).Note: The Tip field is useful to provide any necessary context or instructions to the content publisher regarding the particular field and will be rendered as the content of a tooltip that is displayed when hovering over the included Help (?) icon.
- Click Save to save your new Structure.
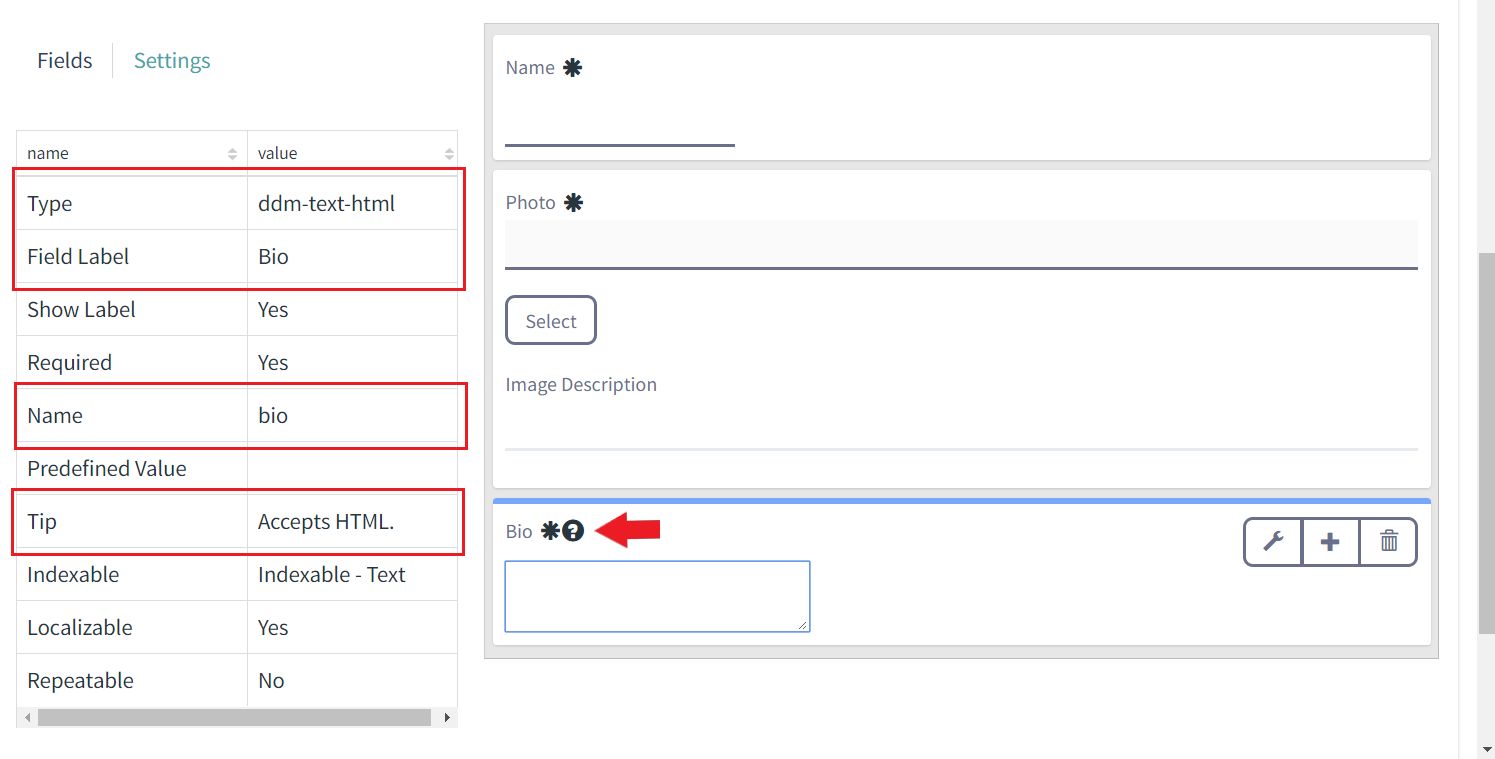
Note: The Type field value is set automatically when you choose the data type from the Fields list and is not editable.
Creating a Template for the Structure
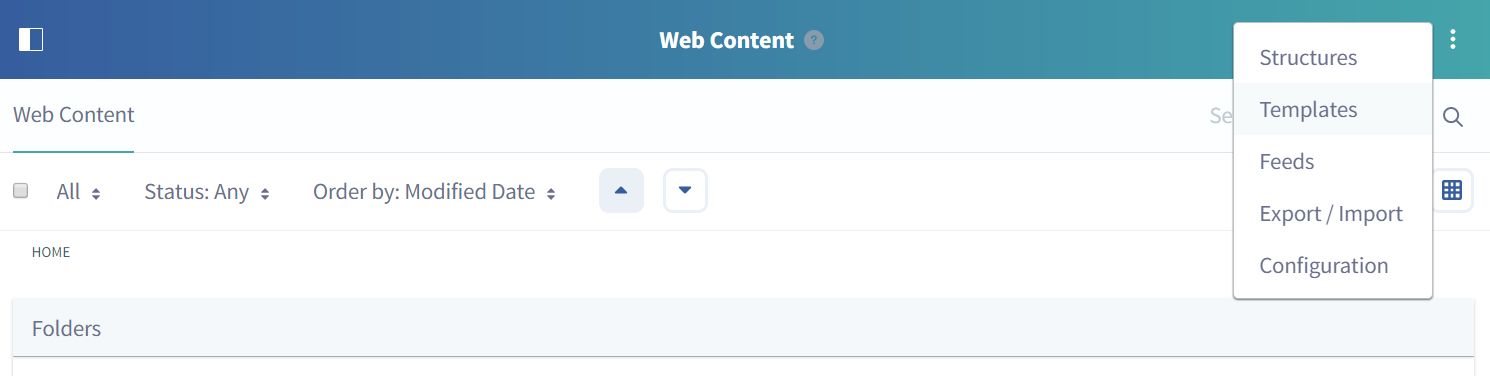
- Navigate back to Content > Web Content and select Templates from the page context menu in the upper right-hand corner.
- After clicking the Add button in the lower right-hand corner, enter Staff Member as your template name, select Staff Member as the Structure
- Add the desired markup for one Staff Member and add the references to the web content data (Name, Photo, Bio) by clicking the field names in the left-hand menu and move them into the desired location in the markup.
- Click Save.
<div class="col-md-3 col-sm-6">
    <div class="thumbnail">
        <#if photo.getData()?? && photo.getData() != "">
            <img src="${photo.getData()}" alt="${name.getData()}">
        </#if>
        <div class="caption">
            <h5>
                <a href="#">${name.getData()}</a>
            </h5>
            <p>${bio.getData()}</p>
        </div>
    </div>
</div>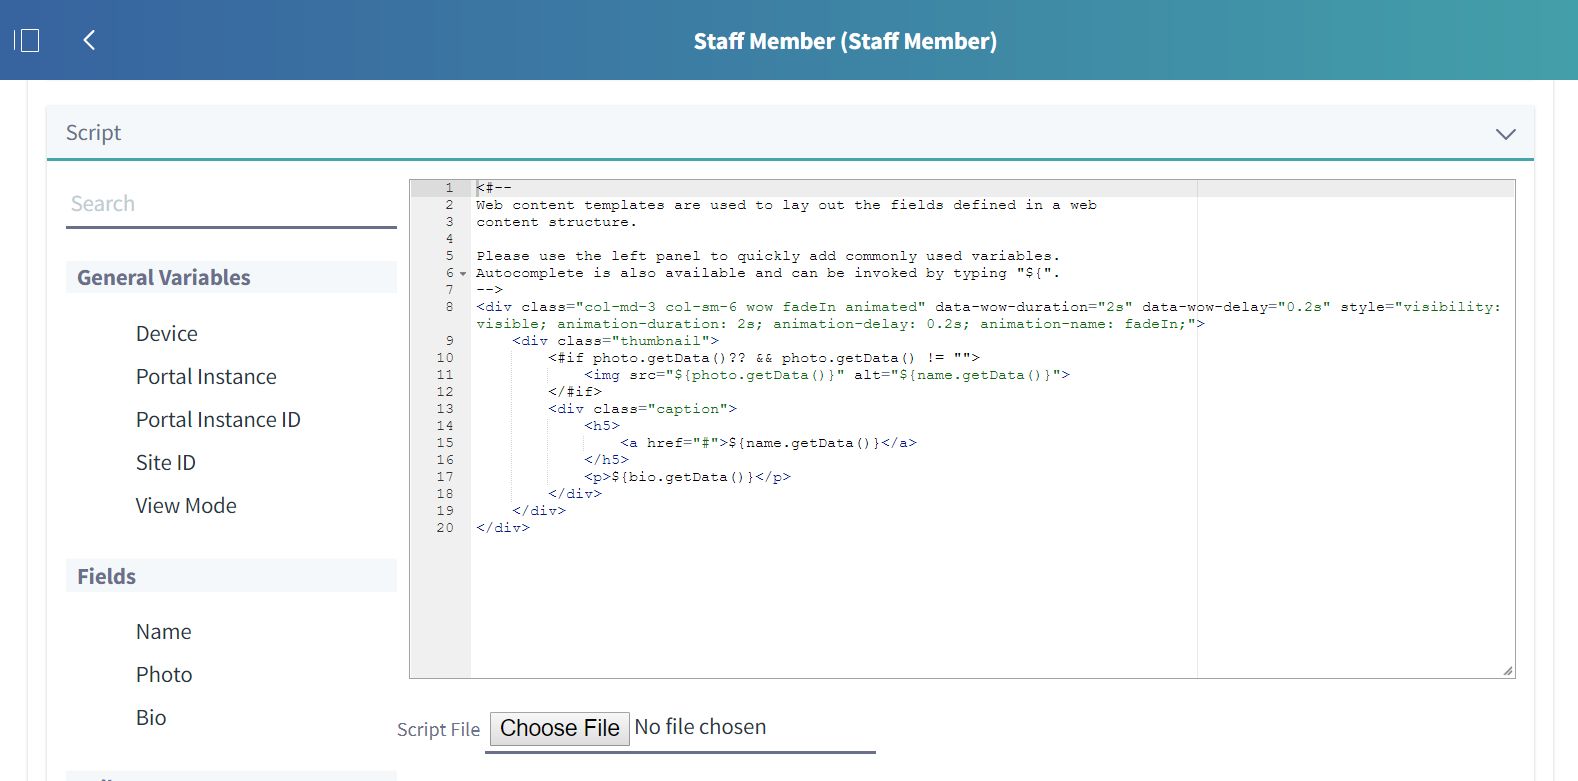
Creating the Application Display Template
- In your site administration menu, navigate to Configuration > Application Display Template. Click the Add button and select Asset Publisher Template from the menu.
- Add a Name (Staff Members in this case; note the plural because this template is intended to display multiple Staff Members).
- In the script field, add the following FreeMarker template code:
<#if entries?has_content>
    <div class="staff-members">
        <div class="container">
            <h3>Our staff</h3>
            <div class="row">
                <#list entries as curEntry>
                    <@liferay_ui["asset-display"]
                        assetEntry=curEntry
                        assetRenderer=curEntry.getAssetRenderer()
                        showExtraInfo=false />
                </#list>
            </div>
        </div>
    </div>
</#if>
On the first line we verify if there are any entries (instances of our content structure) being passed to the template. We then include some markup intended to wrap our list (
.staff-members,.container,.rowetc.). We then loop over the data passed to our template:<#list entries as curEntry>.For each item (
curEntry), we pass the current web content item (curEntry) and a reference to theassetRendererto theliferay_uitag, which will render the web content data into the template associated with the web content entry we are displaying. - Click Save.
Adding the Staff Members to Web Content
- Navigate to Content > Web Content, add a Staff Members folder (Add > Folder > enter Staff Members and click Save).
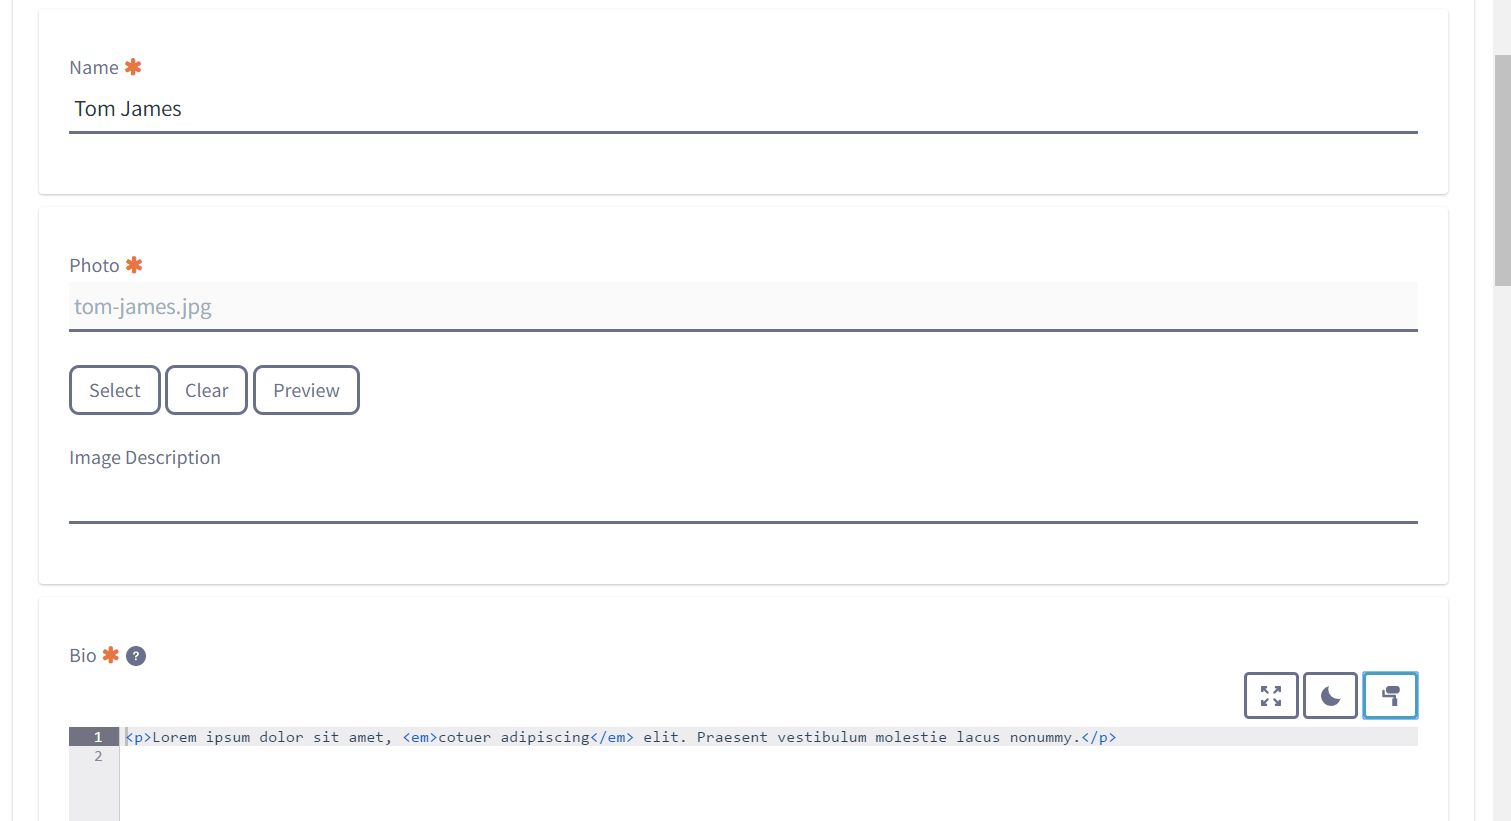
- Navigate into your new Staff Members folder and click Add > Staff Member (defined by the Structure we created above).
- Enter Title for the entry, our staff member’s Name, select a Photo and add the desired markup for the member’s Bio.
- Lather, rinse and repeat for all of the staff members you wish to publish on your site.
Publishing the List of Staff Members
- Navigate to the desired display page in your Liferay site and click the Add button in the upper right-hand corner, click Application > Content Management and drag an Asset Publisher portlet into the desired location on your page.
- Configure the Asset Publisher to display the Staff Members:Note: An in-depth look into configuring content within Liferay DXP is beyond the scope of this article, but we will highlight a couple of features to apply to our example.
- Open the Asset Publisher Options menu in the upper right-hand of the Asset Publisher (indicated by vertical ellipsis) and click Configuration. This will open the Asset Publisher Configuration modal window. The Asset Selection tab will be displayed by default.
- For Asset Type select Web Content Article. This will display a secondary drop-down menu for Web Content Article Structure; select Staff Member from this menu. (In the Structures option group.)
- Click the Display Settings tab to set the Display Template and Number of Items to Display.In the Display Template drop-down menu, select Staff Members (to specify our Staff Members Application Display Template). In this example we only want to display three staff members in this particular location, so we’ll set Number of Items to Display to 3.
- Make any other desired configurations and click Save.You should now have the markup and data for three of your Staff Members on your Liferay page.
If you tagged any of your entries, perhaps to identify specific staff members you wish to highlight on particular pages, you can configure your Asset Publisher in the Filter section to display only those items. You can also optionally configure the Ordering and Grouping in the last section of the Asset Selection view.

If you have questions on how you can best leverage audience targeting and/or need help with your Liferay DXP implementation, please engage with us via comments on this blog post, or reach out to us at https://www.xtivia.com/contact/ or [email protected].
Additional Reading
You can also continue to explore Liferay DXP Asset Publishing by checking out Designing Uniform Content, Application Display Templates, Asset Publisher or Organizing Content with Tags and Categories in the Liferay 7 Knowledge Base and referencing the Apache FreeMarker Manual.